
When I received my brand new mini catalog and took a first glance, I got so excited about the Hooray for Surprises Bundle. It’s the first time I’ve seen this type of stamp and die set that creates such a fun surprise. This stamp set has coordinating dies that create a hidden message on your creations that are revealed by the pull of a tab. LOVE!!!


How fun are these. And, these sayings are perfect to use in tandem with other stamp sets. I love that!! As you can see in the image above, the dies create a cut image, but also a perforated version with a pull tab. The stamp set includes several clue stamps…such as “Pull”, “Open here” and “For you” that prompts your recipient to look for the surprise. Now let’s play!


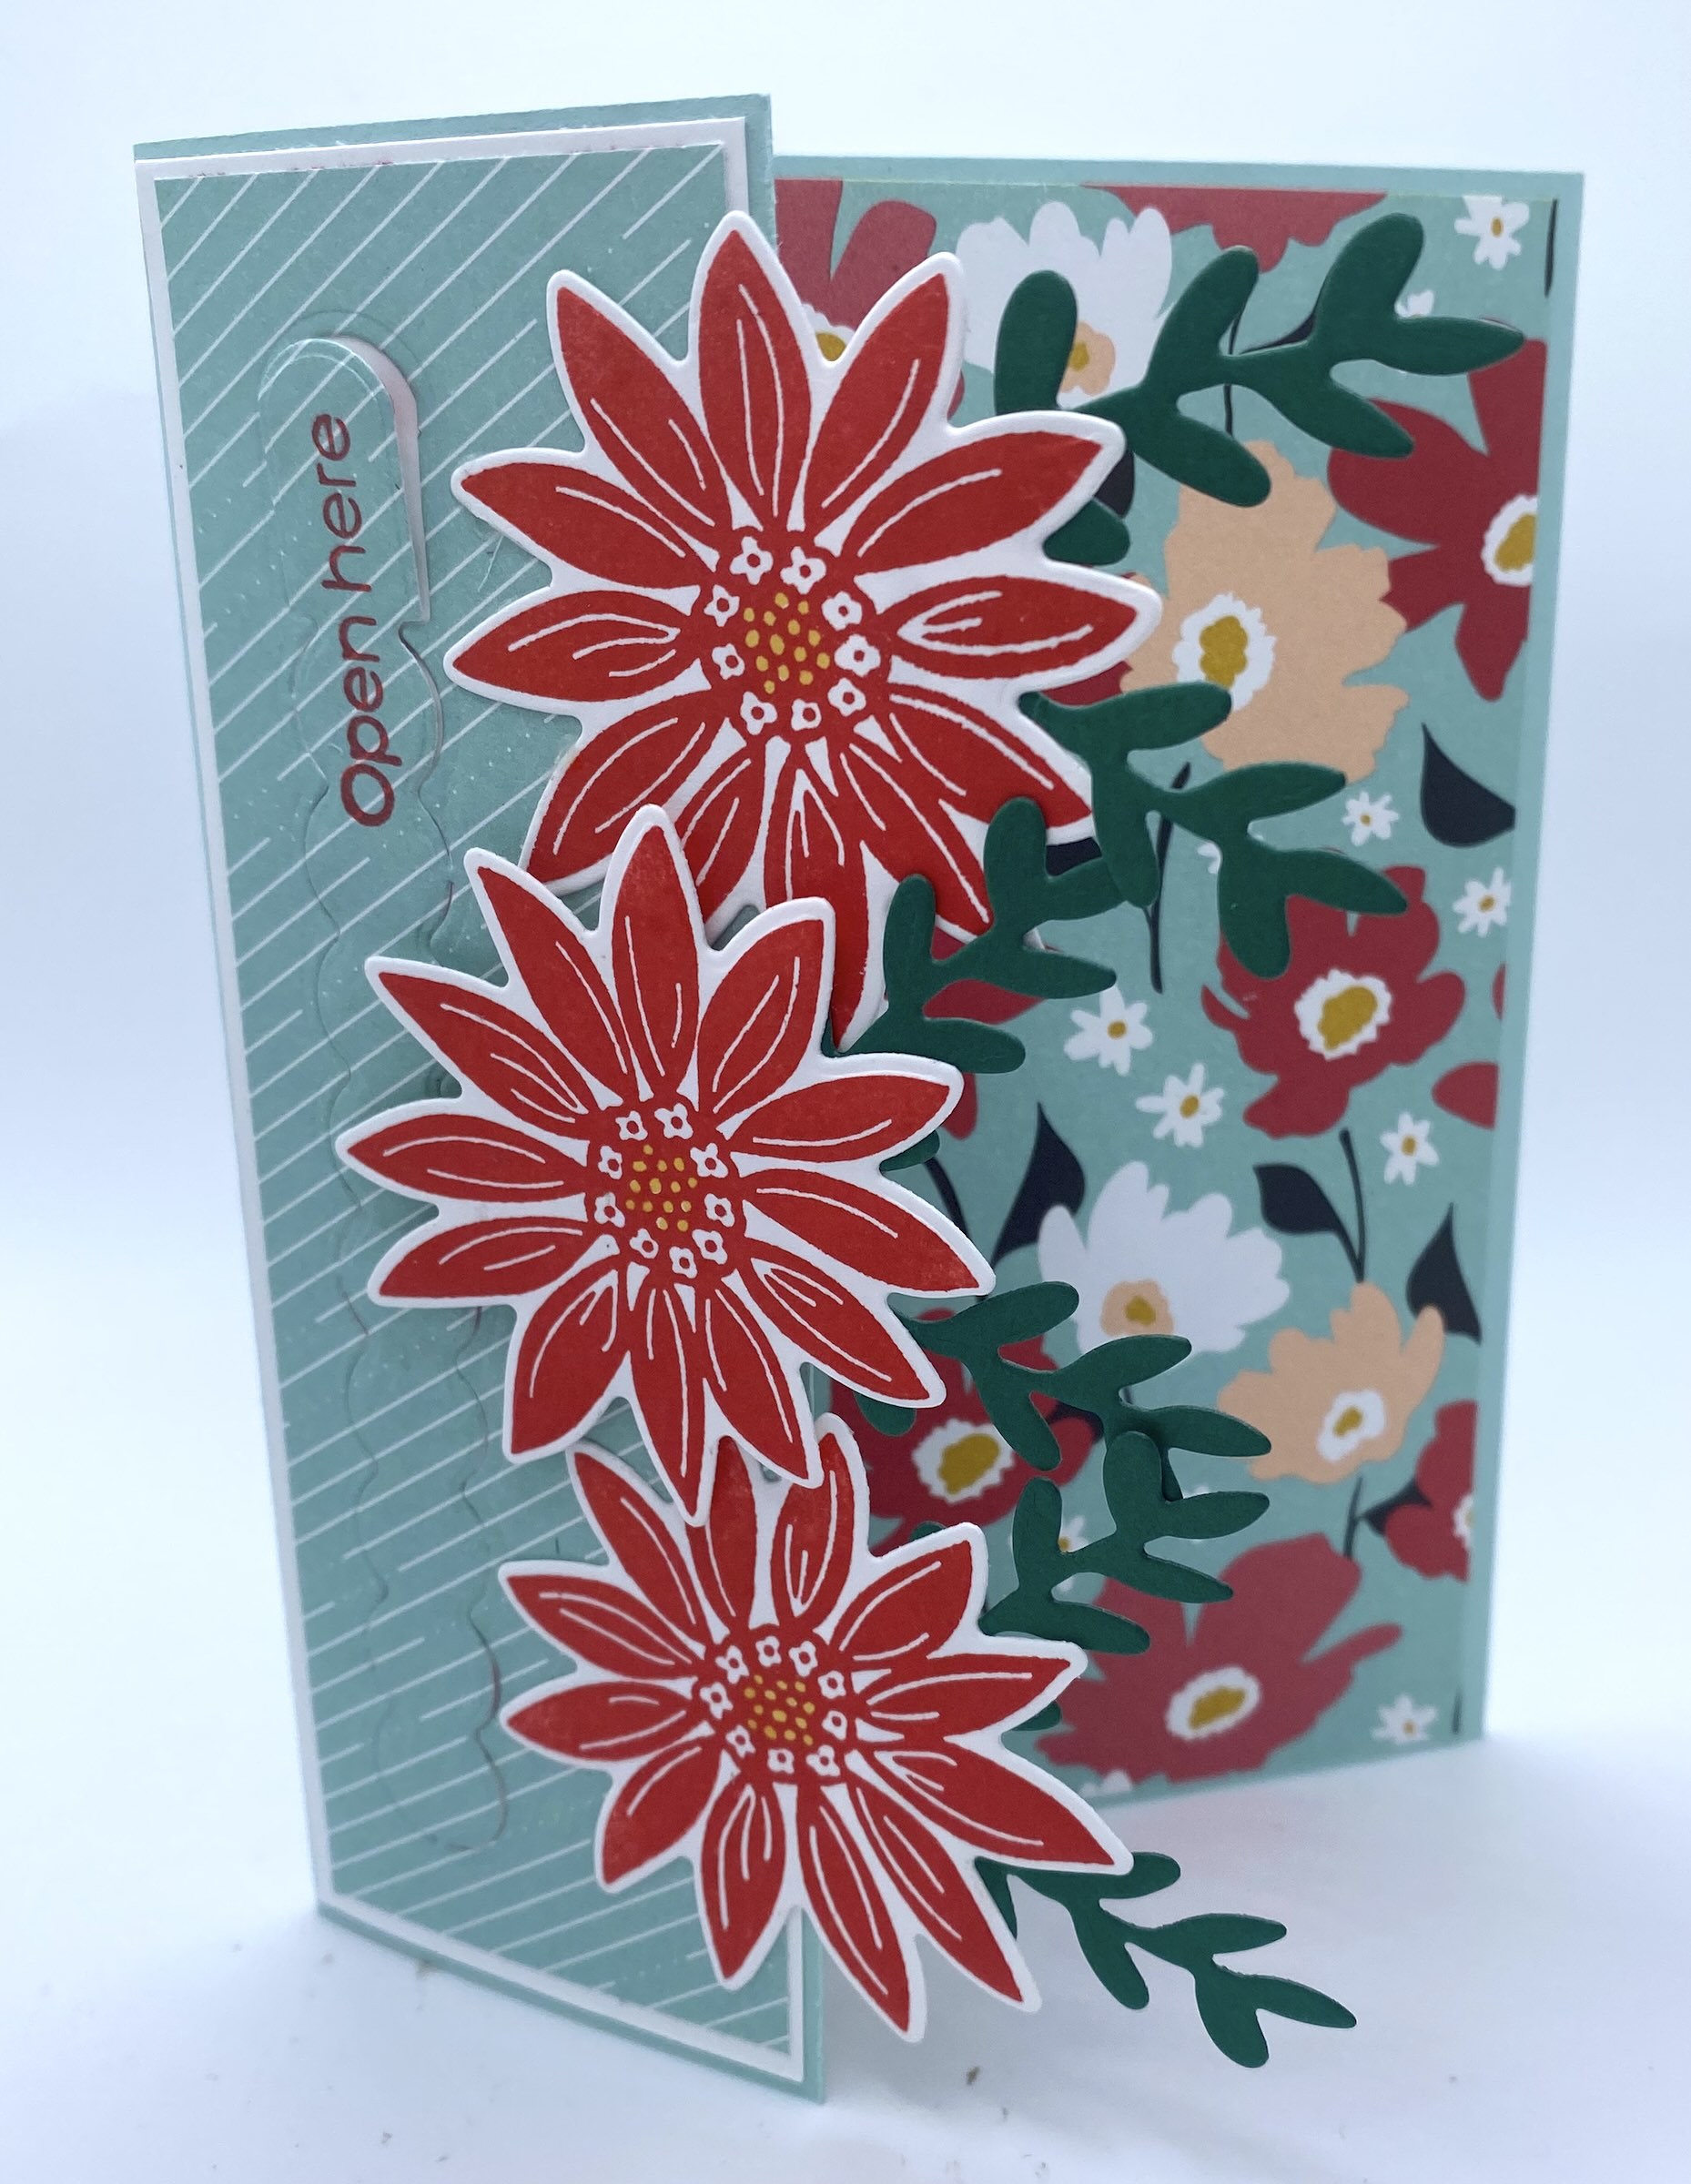
I love Poppy Parade and Pool Party paired together…they go so well together. I also used the Sunny Days DSP that was a free product during Sale-A-Bration. The flowers went together well. Now, here’s how I created this card.
CUTTING/SCORING:
BASE (Pool Party): 5 1/2″x 10 1/2″, scored at 2″ and 6 1/4″
FLAP: Basic White 1 7/8″x 5 3/8″; DSP 1 3/4″x 5 1/4″ (and a second one on copy paper)
INSIDE LEFT: Poppy Parade 4 1/8″x 5 3/8″, Basic White 4″x 5 1/4″
INSIDE RIGHT: DSP 4 1/8″x 5 3/8″
CARD POCKET: Poppy Parade 3″x 4 1/8″, on the long side mark 1″ from the right and cut from that mark down to the opposite corner
EXTRAS: Die cuts & embellishments
ASSEMBLY: Fold your base towards the center of the card on both score lines and crease with the bone folder. Grab the pieces you cut for the flap…Basic White, DSP and copy paper. Stack your DSP and copy paper together and die cut using the long pull tab die. I offset mine to the left to make room for the flowers to be added later and not obstruct the pull tab area. Once you have both layers die cut together, you can gently separate the copy paper from the DSP. Then, remove the pull tab on the copy paper…this creates a template for your sentiment. The next thing you want to do is grab your Basic White piece, line up that template and use it to know exactly where to stamp that secret sentiment. You can either lightly trace around it and then stamp, or just secure it with a piece of frog tape and stamp and then remove the template. Now you can stamp “pull” on your DSP tab and attach your layers to the front flap of the card.
For the inside, do your stamping on the Basic White and then adhere all your layers. Add the pocket last. **You can play with the pocket making it bigger or smaller depending on what you want to use it for. This pocket works for a gift card, $$, and even a photo or folded note.
To finish up this card, stamp and die cut some flowers and greenery and add them to the front with some dimensionals. Now check out your super cute card…how fun! And the extra surprise message will really impress them!
Here are a few other cards I created with this super unique bundle!


This cute birthday card was created using Fresh Freesia and Berry Burst cardstock and the Bright & Beautiful 6×6 DSP. The circles were cut using the Deckled Circles Dies. Stamping was done with Fresh Freesia, Berry Burst, Pool Party and Daffodil Delight.


This final card was created with Real Red and Gold Metallic cardstock and paired with the Most Adored DSP that was free during Sale-A-Bration. I really love that paper with the gold metallic weaved into the design. I added some retired heart embellishments had-they were perfect!
I hope you get a chance to grab up this unique bundle before it disappears at the end of April. It’s so unique and really makes special cards. Who doesn’t love a surprise…and Hooray for Surprises!
Happy Crafting!