
I’ve never made a Pinwheel Tower Card…at first glance they seemed complex and time consuming. I don’t know why I thought that because I make some complicated cards sometimes. Nevertheless, I finally decided to try it out….and I am pleased and excited to say that it’s actually quite simple. Now you know! 


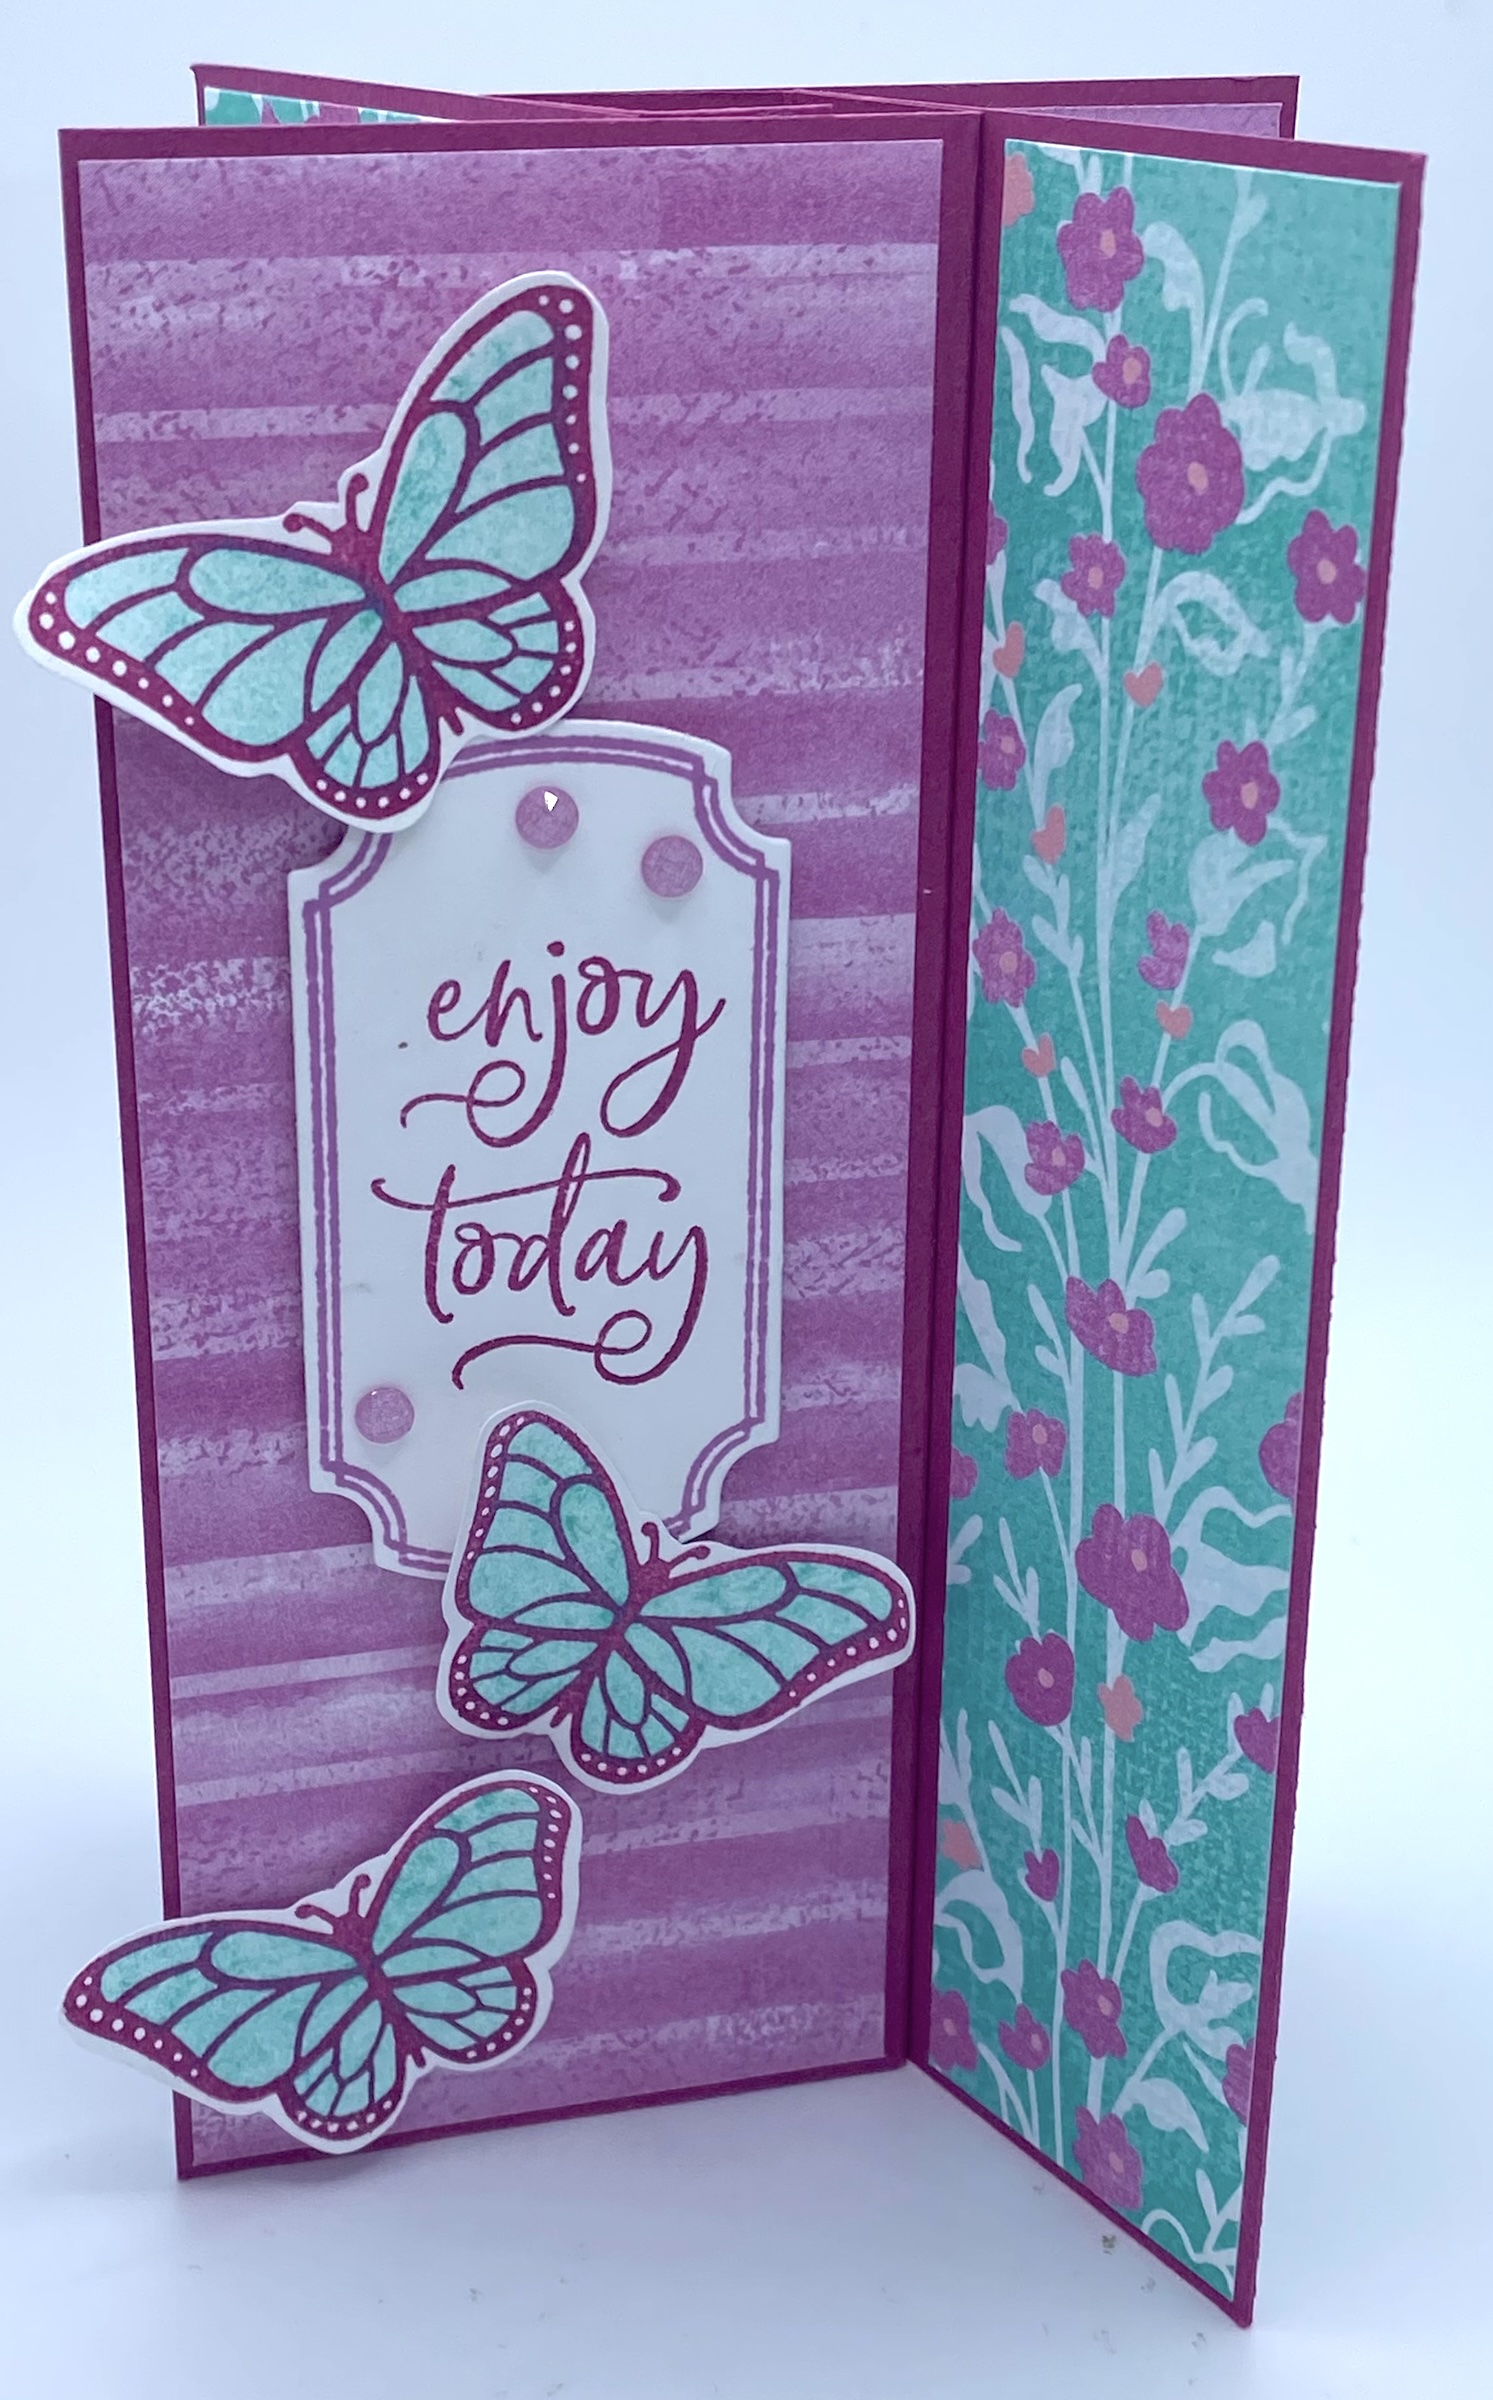
My inspiration for making this card came from a mix of wanting to use the Labeled with Love stamp set and the gorgeous Unbounded Beauty 12×12 Designer Series Paper. I just knew they would work well together. I used Berry Burst cardstock for the base along with Basic White of course, and the rest is simply that gorgeous paper! I stamped in Berry Burst, Petunia Pop and Summer Splash.
Here’s how you create this card.
CUTTING/SCORING:
BASE (Berry Burst): 5 1/2″ x 4 7/8″, with the 4 7/8″ edge at the top, score at 1/2″, 1 1/4″, 2″, and 2 3/4″; also, cut 3 pieces of Berry Burst at 5 1/2″ x 2 1/8″
DSP (Unbounded Beauty): Print #1 – 5 3/8″ x 2″ (x2); 1 1/4″ x 5 3/8″ (x2); Print #2 – 5 3/8″ x 2″, 5 3/8″ x 1 1/4″ (x2), and 5/8″ x 2″ (x2)
BACK PANEL (Basic White): 5 3/8″ x 2″
ASSEMBLY: Fold all the score lines on your base piece in the same direction so it looks like a swirl when it’s done. Add adhesive to the first section. Now fold your cardstock at the 2nd score line and fold the paper over the adhesive so it’s flat. When you open it up you will have you square which is the middle of the pinwheel. Now you can add adhesive to the next section. Then grab the first of your three 5 3/8″x2″ Berry Burst pieces and butt it up against the panel you just added adhesive to. Fold the panel over onto it and your first pinwheel is done. For the next section, add the adhesive just as before, grab your second panel piece, line it all up and then on this one you’ll hold it against your last panel and then fold it onto the adhesive. This forms your second pinwheel. Repeat for the last panel and you’ll have all your pinwheels complete. **Refer to the video if you find this part confusing. It will make sense once you do it.
Now all you have left is the decorating. Lay out how you want your panels to look and start layering them onto your base. I like to figure out where the front of my card will be first so then I know which panel will be the back-where I put my Basic White for the message. On my card, I added a tag and butterflies to the front. And then on the back, I just added the 2 small DSP strips and Happy Birthday. Simple yet elegant!
Here are my other samples.


For this card, I used Peach Pie for the base and paired it with Unbounded Love Suite – the DSP, stamps and dies. I die cut the stems and leaves with coordinating cardstock and created the fun tag for the greeting. I stamped in Petunia Pop. I kept it simple since the paper does so much of the work!


This last card was very free spirited. I didn’t really plan it out but just created as I went…and I’m very pleased with the results! I used the Summer Splash cardstock and again paired it with the Unbounded Beauty DSP. I added something to every panel on this card. This time I used the Pocket Thoughts bundle for the images and greetings and even made a little pocket with a surprise message! I love the pocket dies! I die cut the circles from the Stylish Shapes dies and used some Petunia Pop Ribbon on one panel. Here’s a tip for you – when I stamped the cupcake frosting in Petunia Pop, I used a Pretty in Pink Stampin’ Blend Marker to color in the white areas. This gave the cupcake a shaded look that is really pretty. I also added some wink of Stella for some extra shimmer.
There you go…3 fun cards shaped like a really cool pinwheel tower that anyone would love to sit on their shelf long after the occasion they received it! I hope you enjoy this fold.
Happy Crafting!