Fun Fact…although we travel full time, I’m a Florida Girl. As a matter of fact, both my husband and I grew up in the Tampa area. With that said, I love the water. I love the ocean and learning about the things living in it. I also love to fish…my grandpa taught me well. My husband and I went fishing on our first date (he skipped school to go…shhhh!). I think that is one of the reasons I enjoy the Submarine Life Stamps. They are all about the ocean. When I saw the Easel Block Fun Fold, I just knew Submarine Life would be the perfect pairing!


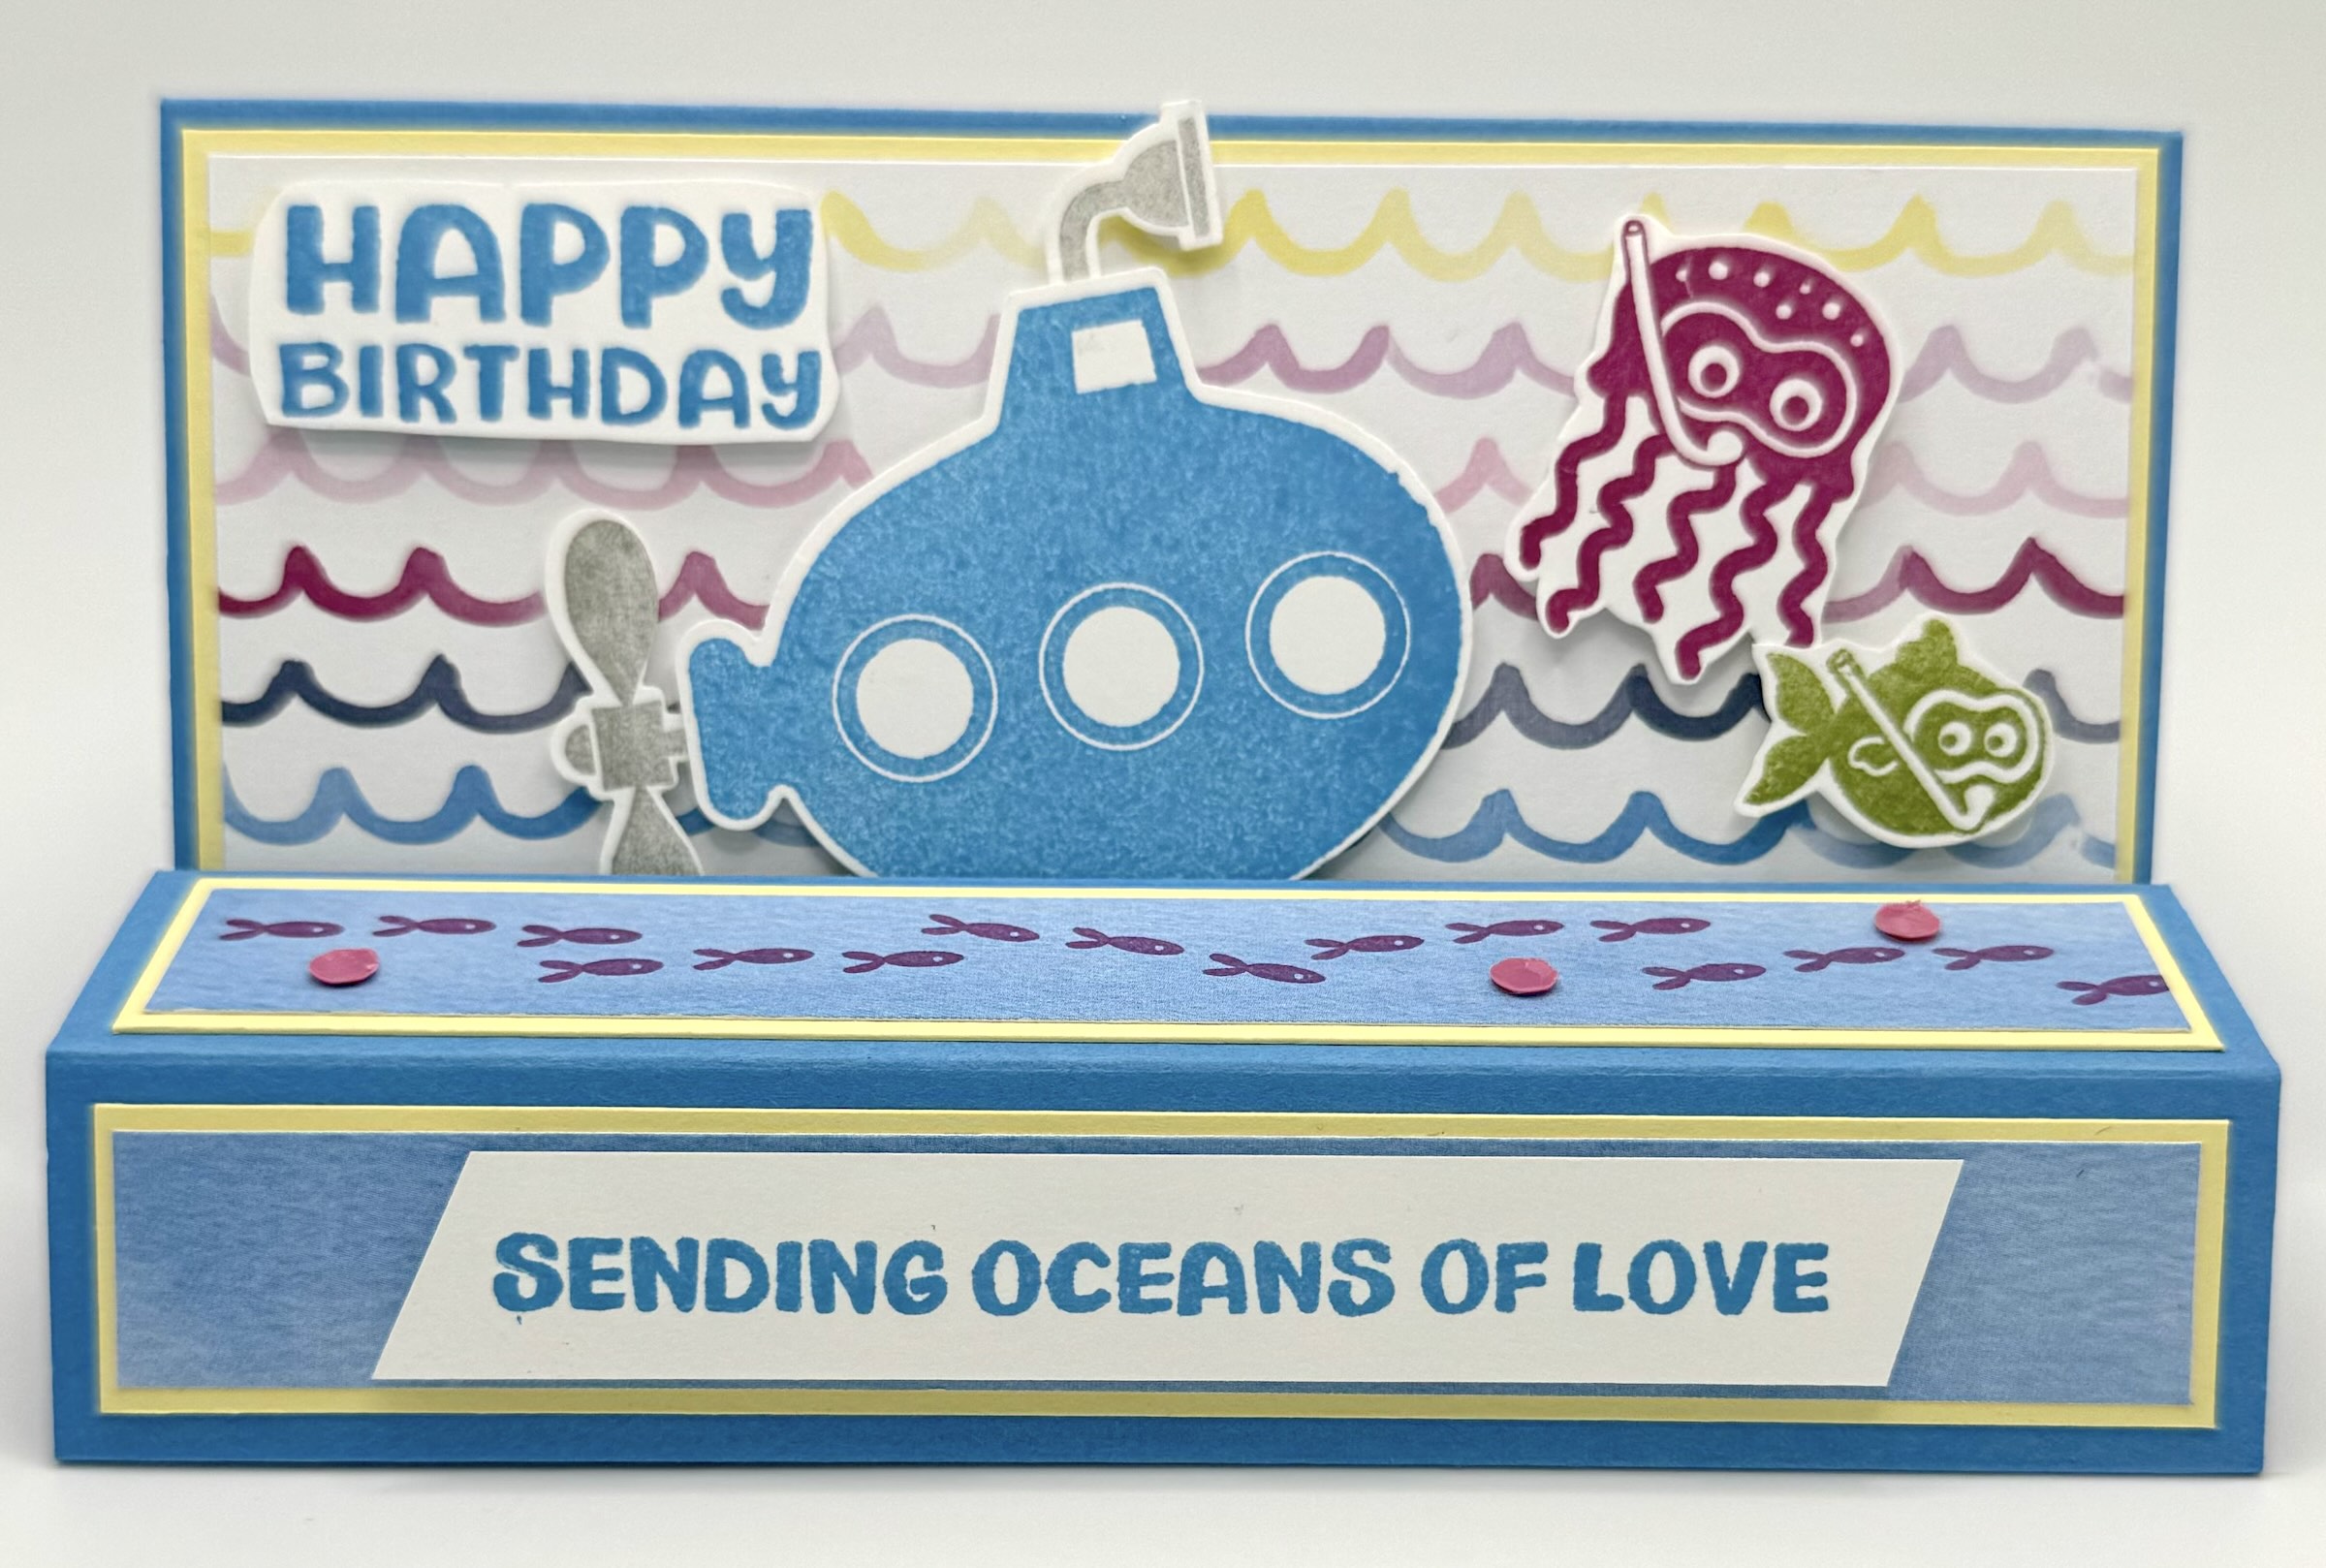
When you purchase this stamp set, you really should get the bundle that comes with the coordinating punch. The little submarine (that also flips upside down to make a cute little blimp) really makes this stamp set next level fun! I love how this fun fold gives you so much room to create the cutest scenes and the broad panels really show off the DSP and your artwork! I used Azure Afternoon for my card base and paired it with Lemon Lolly under the panels and used the Bright & Beautiful 6×6 DSP throughout the card. Here’s how to create this fun fold.
CUTTING/SCORING:
BASE (Azure Afternoon): 5 1/2″ x 8 1/2″, scored at 1″, 2″, 3″, 4″ and 8″; also 5 1/2″ x 6″, scored with the 6″ side at the top at 3″ so you score it in half.
LAYERS (Lemon Lolly): 5 3/8″ x 2 7/8″ (x4); (DSP pattern #1): 5 1/4″ x 2 3/4″ (x2); (DSP pattern #2): 5 1/4″ x 2 3/4″ (x1); (Basic White): 5 1/4″ x 2 3/4″ (x1)
BLOCK LAYERS (Lemon Lolly): 3/4″ x 5 1/4″ (x3); (DSP) 5/8″ x 5 1/8″
ASSEMBLY: Cut and score your 2 base pieces. Fold all the score lines in the same direction and burnish with the bone folder to create crisp folds. On the main base, add adhesive to the first 1″ section. Then, fold the paper over at the 2nd score line (half) and fold it onto the rest of the base to create your block. Next, take the piece scored in half (which is your card front) and adhere it to the last 1/2″ section that was scored. Now your card base is done.
Next, do any stamping on your panel pieces (I added fish and bubbles to my blue DSP.) Glue the panel layers together and then add them to the card base in the arrangement you like best. Once that is all in place, you can create your scene on the front. I used the punch to create my submarine (stamped in Azure Afternoon). I punched the periscope and propeller out in Silver Metallic DSP; then stamped the little sea creatures in Berry Burst and Granny Apple Green and fussy cut them. I popped them on with dimensionals. I also stamped Happy Birthday and Sending Oceans of Love in Azure Afternoon. Don’t forget to add some sparkly embellishments!
Here are my other samples!


This is a fun card! I used Basic Black cardstock as my base. And then I paired it with the Full of Life 6×6 DSP. I used the Racing By stamps to create all the images. The stamps are two step so you stamp the car and then stamp the details. You even have options on the tires so you can make them different! All of the stamps in this set are easy to fussy cut so there is no need for dies. This makes creating very easy!


This last sample ended up being a favorite! It was so super simple but really stunning. I created a Mossy Meadow card base and used Petunia Pop as the layer color. The gorgeous Thoughtful Journey DSP did all the work on this card. When I cut the panels, I made sure to cut them consecutively so all the papers puzzled together when assembled. I stamped Happy Birthday (Unbounded Beauty Stamps) right onto the DSP in Mossy Meadow. Then, to finish it off, I wrapped a piece of Petunia Pop ribbon around the front of the block and tied a know. I even looks gorgeous when the card is closed.
This fold is so simple and fun. I’ll be making up lots of them while I get ready for my winter card fair I’m selling cards at. I know this one will be a hit. Try it out soon because it’s definitely a winner.
Thanks for checking out my video and cards! Happy Crafting.

