
I love when Stampin’ Up gives us unique bundles! The Round We Go bundle is so much fun and unique. There are lots of ways to create all the pinwheels and you can use any type of DSP to create an endless variety of 3D pinwheels and of course tons of different colors by utilizing all your ink pads!


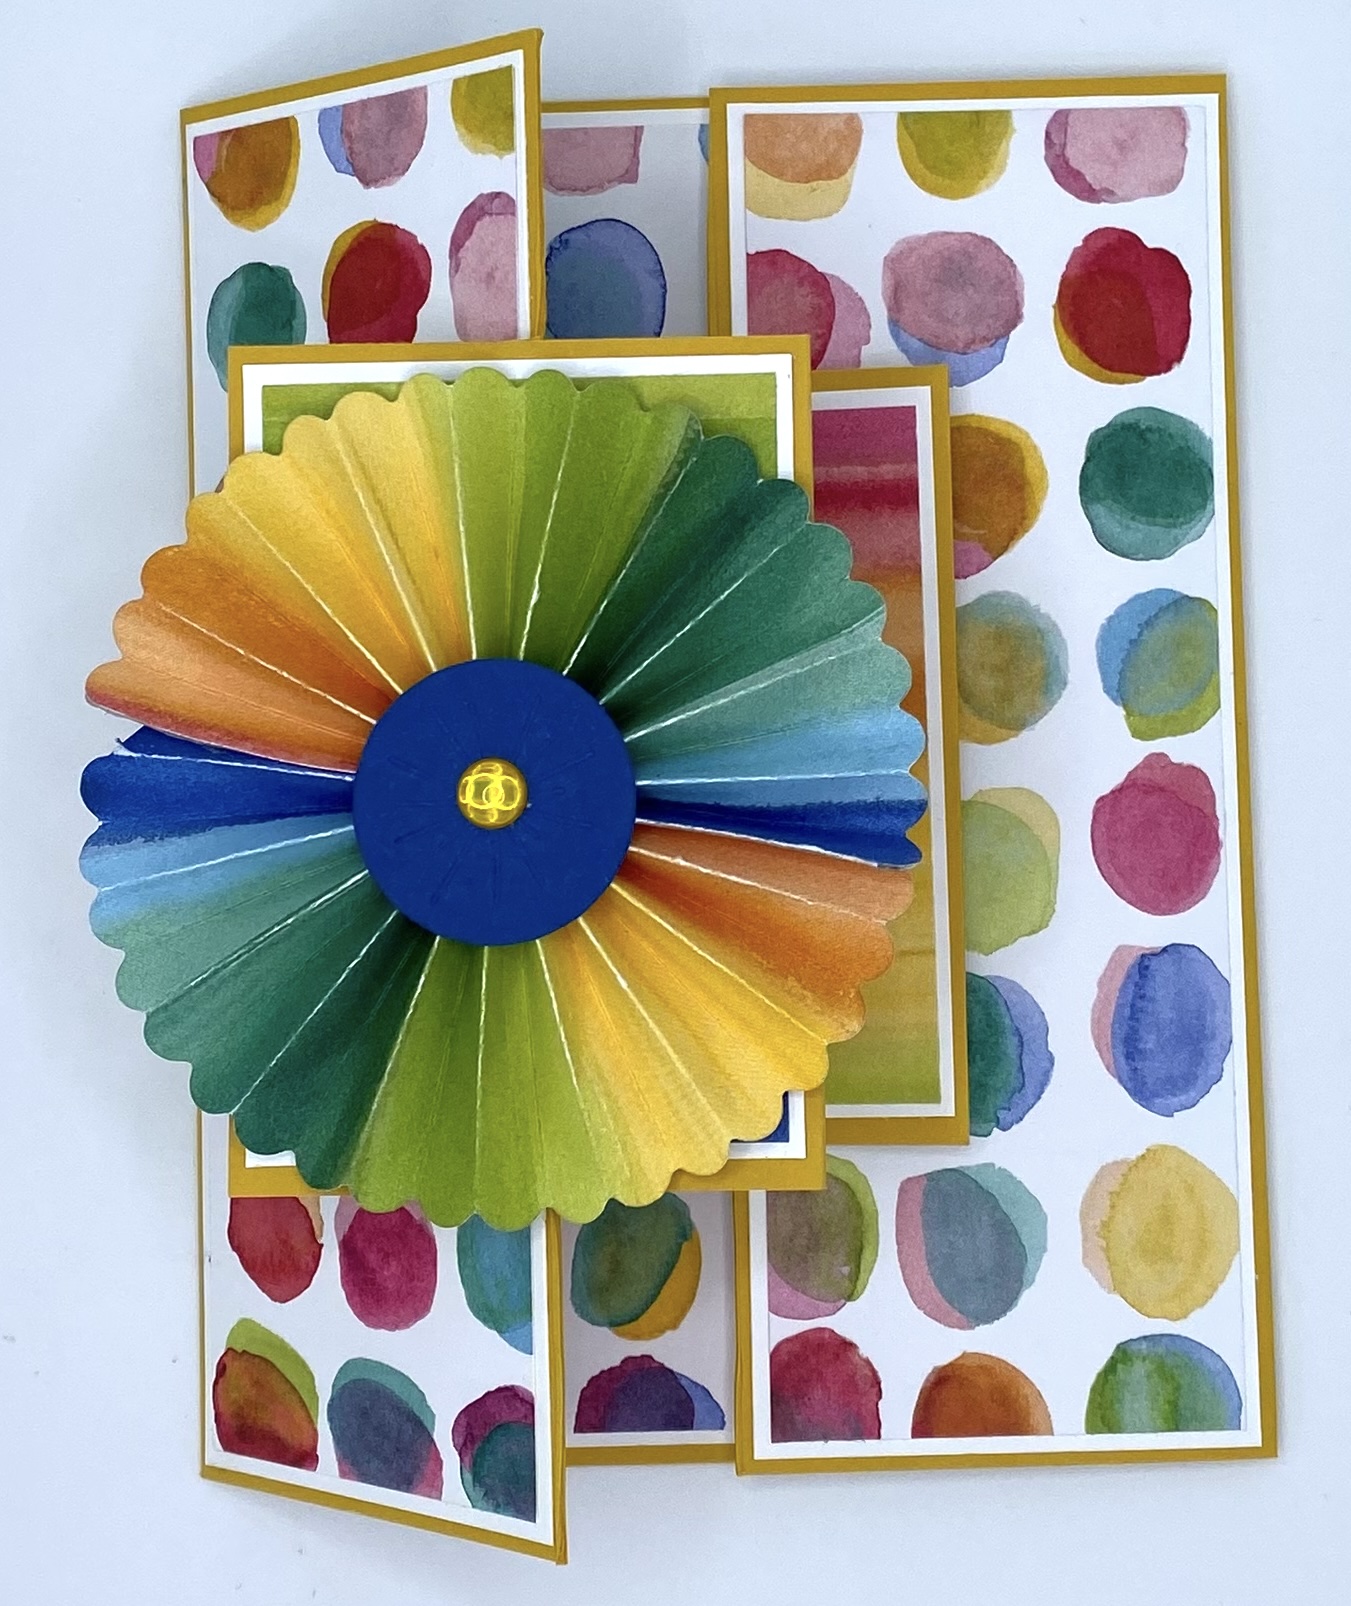
How much fun is this card! The combination of the Full of Life DSP and the Round We Go Bundle makes for a very colorful card! Since the Full of Life DSP has so many colors in it, you have endless possibilities. And this fun fold is the perfect way to show it off. Additionally, once you know how to make this fun fold, you can create all kinds of cards with all kinds of stamps and papers. It’s a go to masterpiece!! Here’s how to create this fun fold card.
CUTTING/SCORING
MAIN BASE (Crushed Curry): 5 1/2″ x 9 1/2″, scored at 1/2″ and 2 5/8″ on each end
PANEL LAYERS (Basic White): 2″ x 5 3/8″ (x4)
CENTER PANEL (Basic White): 4 1/8″ x 5 3/8″
DSP LAYERS (Full of Life): 1 7/8″ x 5 1/4″ (2 each of 2 DSP Designs)
DSP CENTER LAYER (Full of Life): 4″ x 5 1/4″
INSIDE ACCORDION CARD
BASE (Crushed Curry): 3″ x 10 5/8″, score at 2 1/8″ and 4 1/4″ on each end
PANEL LAYERS (Full of Life): 2″ x 2 7/8″ (x2)
PANEL LAYERS (Basic White): 2″ x 2 7/8″ (x3)
ASSEMBLY
After cutting and scoring all your pieces, fold your main base and burnish it well with your bone folder. Add your layers to the main base. Next, fold and burnish your center accordion card. Add your two outside layers. Stamp your inside pieces and adhere to the center three sections. Next, center your center accordion panel across the main base and mark the ends where the card sits on the 1/2″ folds. Trim away the excess. Adhere the center of the panel to the center of the main base. Then, add some Tear & Tape to each remaining tab and adhere the rest of the center panel to those tabs. **Refer to the video if you need a visual! Now you can close the card and create your front decoration. I simply die cut two pieces of the pinwheel die, folded the pieces and attached them together to form a circle. I also die cut two small circle pieces from the dies. I applied Tear & Tape and attached the pinwheel to the bottom circle. Then, I added a bit of liquid glue around the middle hole of the pinwheel to give it some extra sticking power. Finally, I added another circle to the top. This creates a nice sturdy pinwheel. Glue that to the front of your card and add some additional embellishments if you wish.


This sample was my inspiration. I participated on an Online Stamp Retreat and learned this fold there….I created this very card. This one is layered on Misty Moonlight and uses the gorgeous Country Woods Suite of Products. I will definitely be making more of these!


This final sample was created with the pretty Thoughtful Journey Design Series Paper and the Trucking Along Bundle. I had so much fun creating this one. The punch did all the work creating the cute little truck so I didn’t need to do much else. I created a wagon by die cutting two trucks and using just the bed of the second truck. When the card is displayed, you can see the little wagon perfectly.
Thanks for stopping by. I hope you enjoy this card fold and have lots of time to create your own cards very soon! Happy Crafting!