
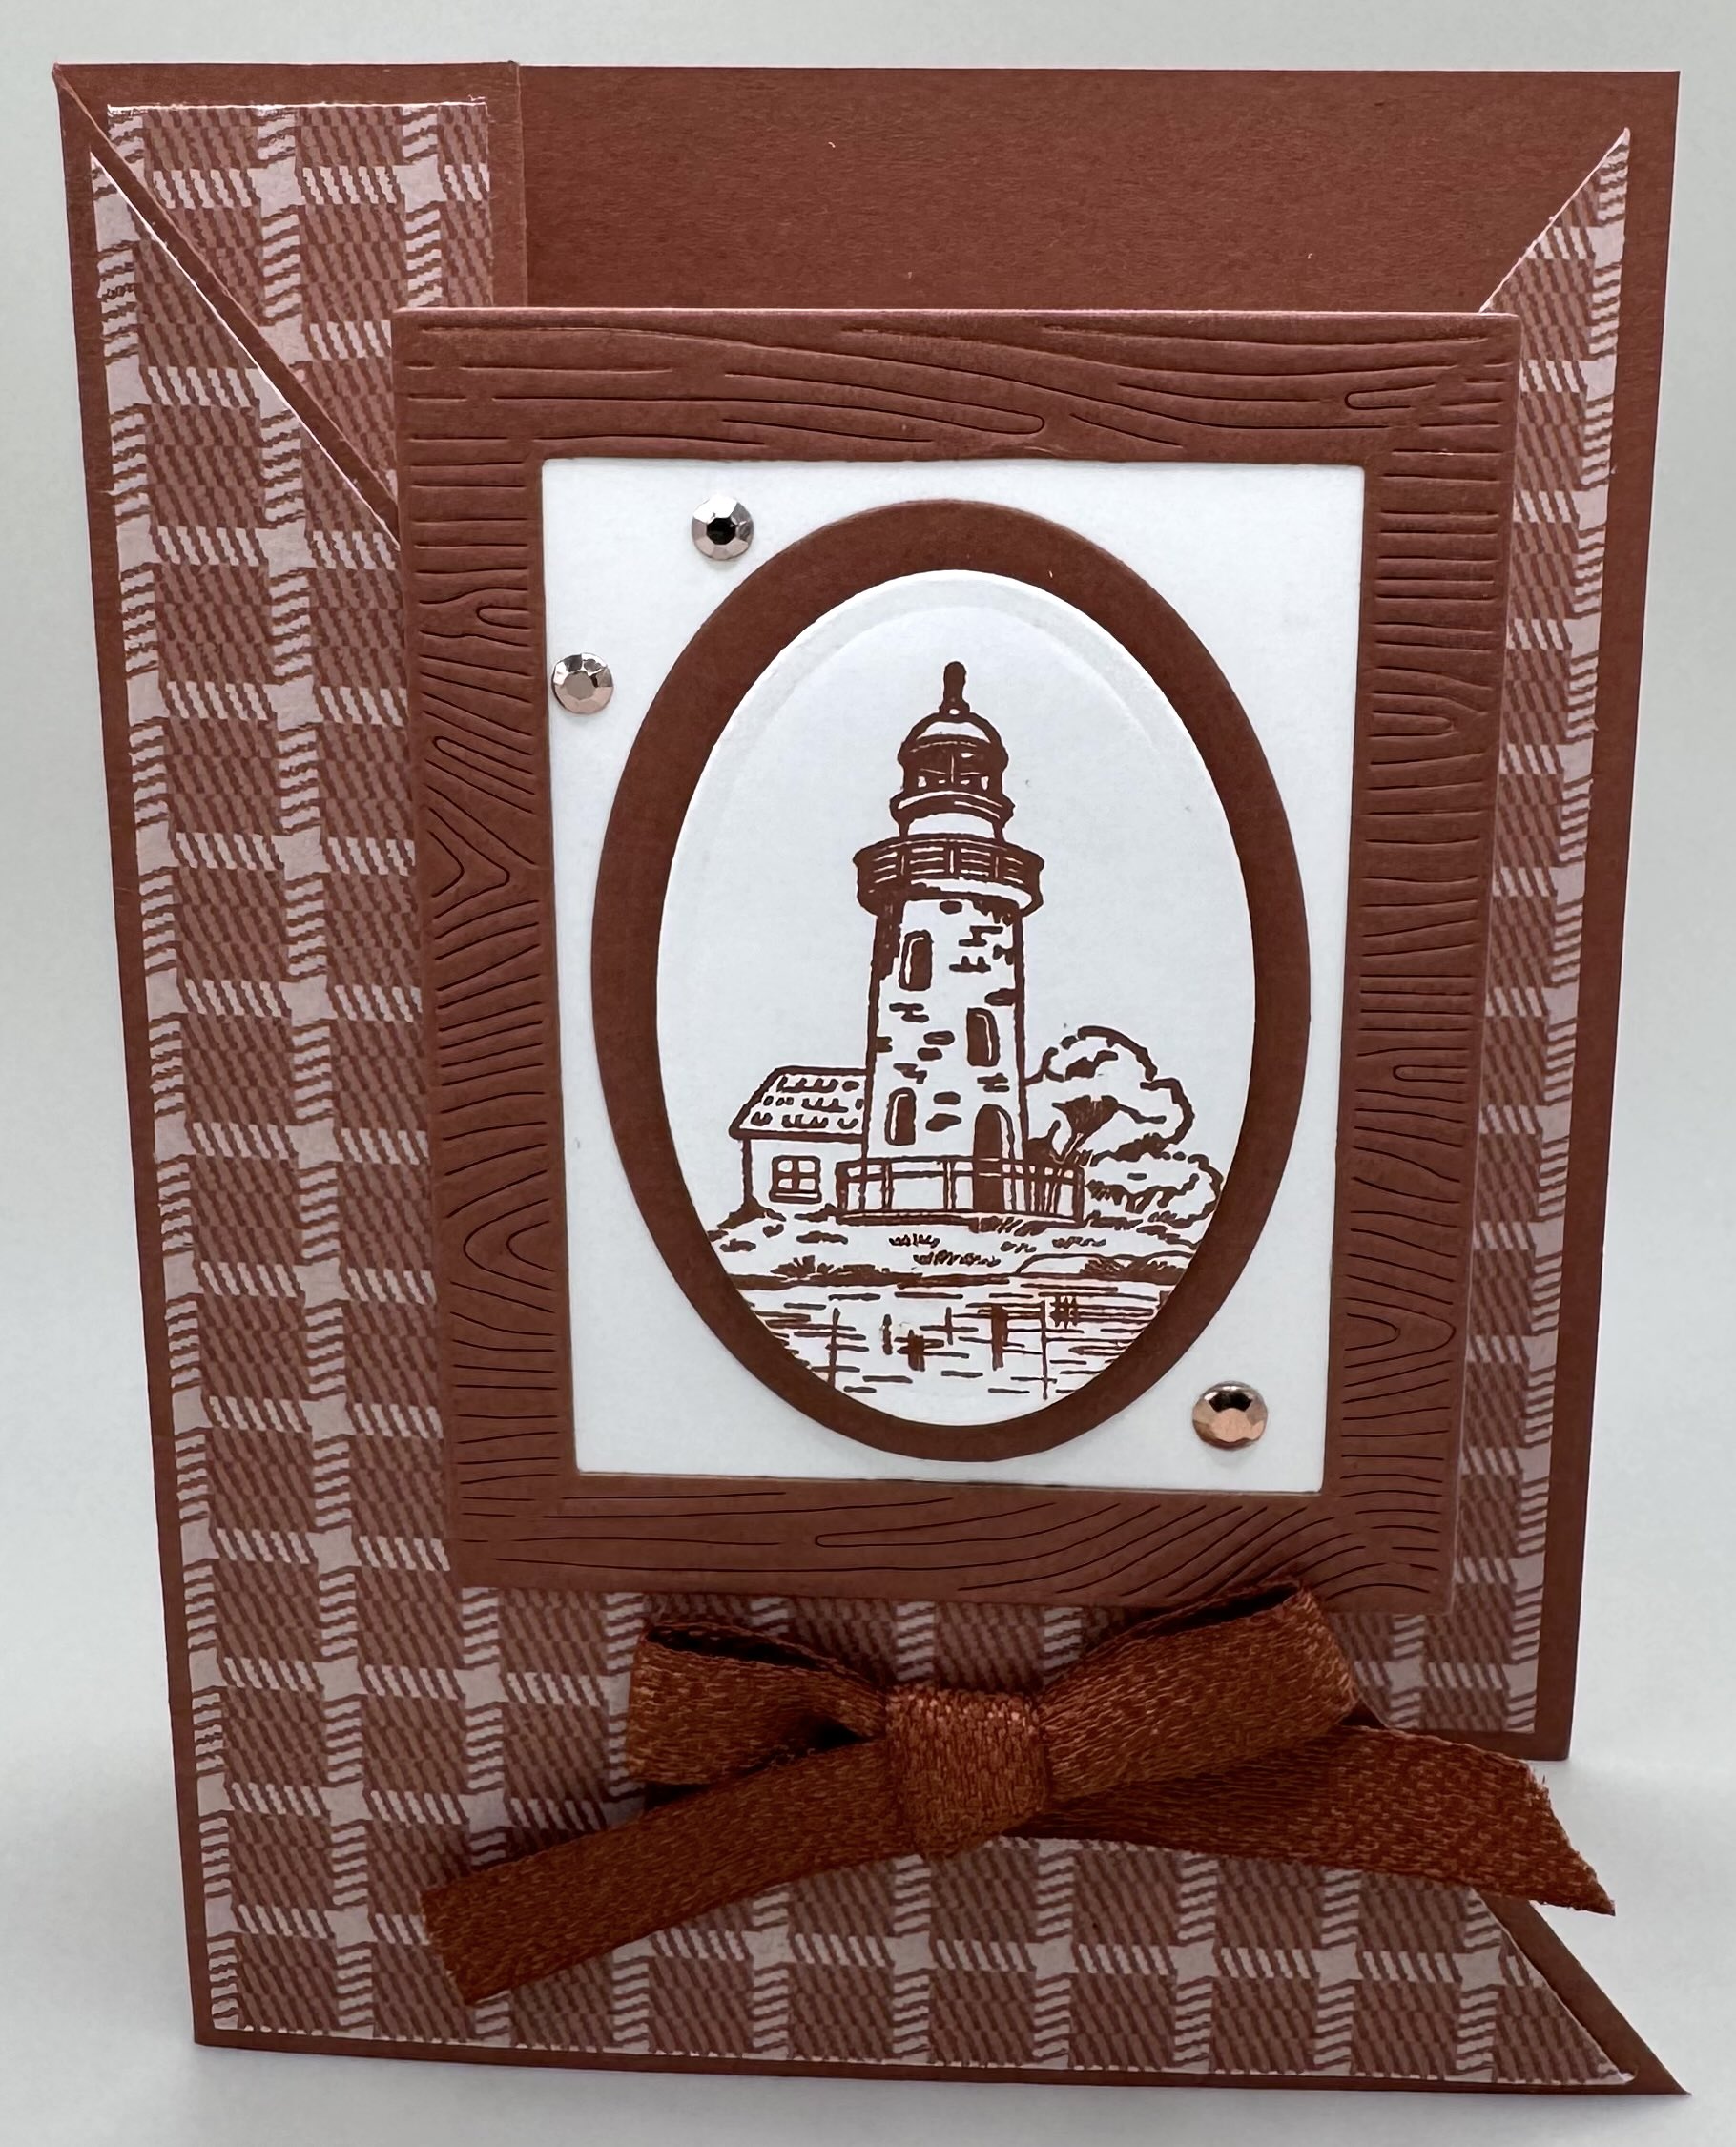
I learned how to make this fun fold recently and I knew I needed to share it with you right away! It’s unique, but simple. And it’s oh so versatile. I made this card as a Copper Clay tone on tone card; however as you can see from my other samples you can use anything and any look! Change up the front piece by adding different shapes or even just die cut images. Use DSP or even embossed card stock. Let your imagination run wild! I hope you enjoy this one.


Have you seen the new Online Exclusive Framed Scenes Bundle? They’re super neat and I happen to know there are also some more great frame dies in the upcoming 2025-2026 Annual Catalog so I know I’ll be using this bundle a lot. I really enjoy a tone on tone card, especially for cards that aren’t gender specific. I used Copper Clay for my base and then paired it with the Take to the Sky DSP in the same shade. The plaid really works great here. The dies in this bundle consisted of a couple frames and a wood texture element which is so perfect. (This set also works great with the Country Woods DSP – also being carried into the new annual catalog – YAY!)
Here are all the details you need to make this card!
BASE: (Copper Clay) 5 1/2″x11″, scored at 4 1/4″, 5 1/2″, and 6 3/4″. Then, cut from the top of the 4 1/4″ score line to the bottom outside edge to create that triangle on the front. *Refer to video!
DSP: 4″x5 1/4″, cut to create triangles (you need 2 so depending on which directly your inside goes, you may need to cut an additional rectangle to get there) **you can use 2 different pattern DSPs here if you wish
DSP INSIDE BACK: 4″x5 1/4″ This is optional – or you can just use a triangle or even leave that space blank. In this card I left it out. On my other cards I used a triangle.
DSP STRIPS: 1″x5 1/4″ (x2) **you can use 2 different patterns of DSP here.
INSIDE CARD: DSP 3 1/4″x4 1/4″; Basic White 3″x4″


This was my inspiration card. I learned this card from a recent Online Retreat and fell in love with it. This card uses the Storybook Garden Bundle and matching Storybook Moments DSP. I used 2 different DSPs here so the coordinating Timeless Plaid 6×6 DSP is mixed it. I love using 2 different patterns. It really makes everything pop! The card base is Mossy Meadow. I used torn Crumbcake cardstock layers that I brushed with Pecan Pie ink to create the garden bed. The fun part of this is that you can literally pick the little vegetables since they are just tucked into the “soil”. How fun is that!! I think I’ll be adding a farmer bunny and making this one of my Easter cards!


I love this card so much! I used the Arched Wishes stamps and of course the coordinating Everyday Arches Dies. The cupcake is super easy to fussy cut. The card base is Berry Burst and I paired Beautiful Bokeh paper here. Since the DSP is double sided, I just used both sides on the card and everything matches so perfectly. Here’s a happy accident tip for you!! I wanted to Emboss the greeting on the front in White. However, when I embossed it I found that some of the words did not come out as vivid and clear as I’d like. I really didn’t want to die cut another piece so I tried stamping again in Versamark and Embossing a second time. Well, it worked perfectly and I had a vivid image. **I did use my Misti – a stamp positioning tool – so my stamped image was exactly in the same spot for each time. That’s probably important here to get the exactly same image.


Here’s one last sample. This one is so simple, yet elegant. Black and Basic White and that’s it! I didn’t use any DSP on this one. I simply Embossed the layers with the Birch Wood 3D Embossing Folder. This would make a great sympathy card as well.
Try this Angled Accordion Card!! There are so many ways you can create with it.
See you next week! Thanks for stopping by.
Happy Crafting!
~Jill
Leave a Reply