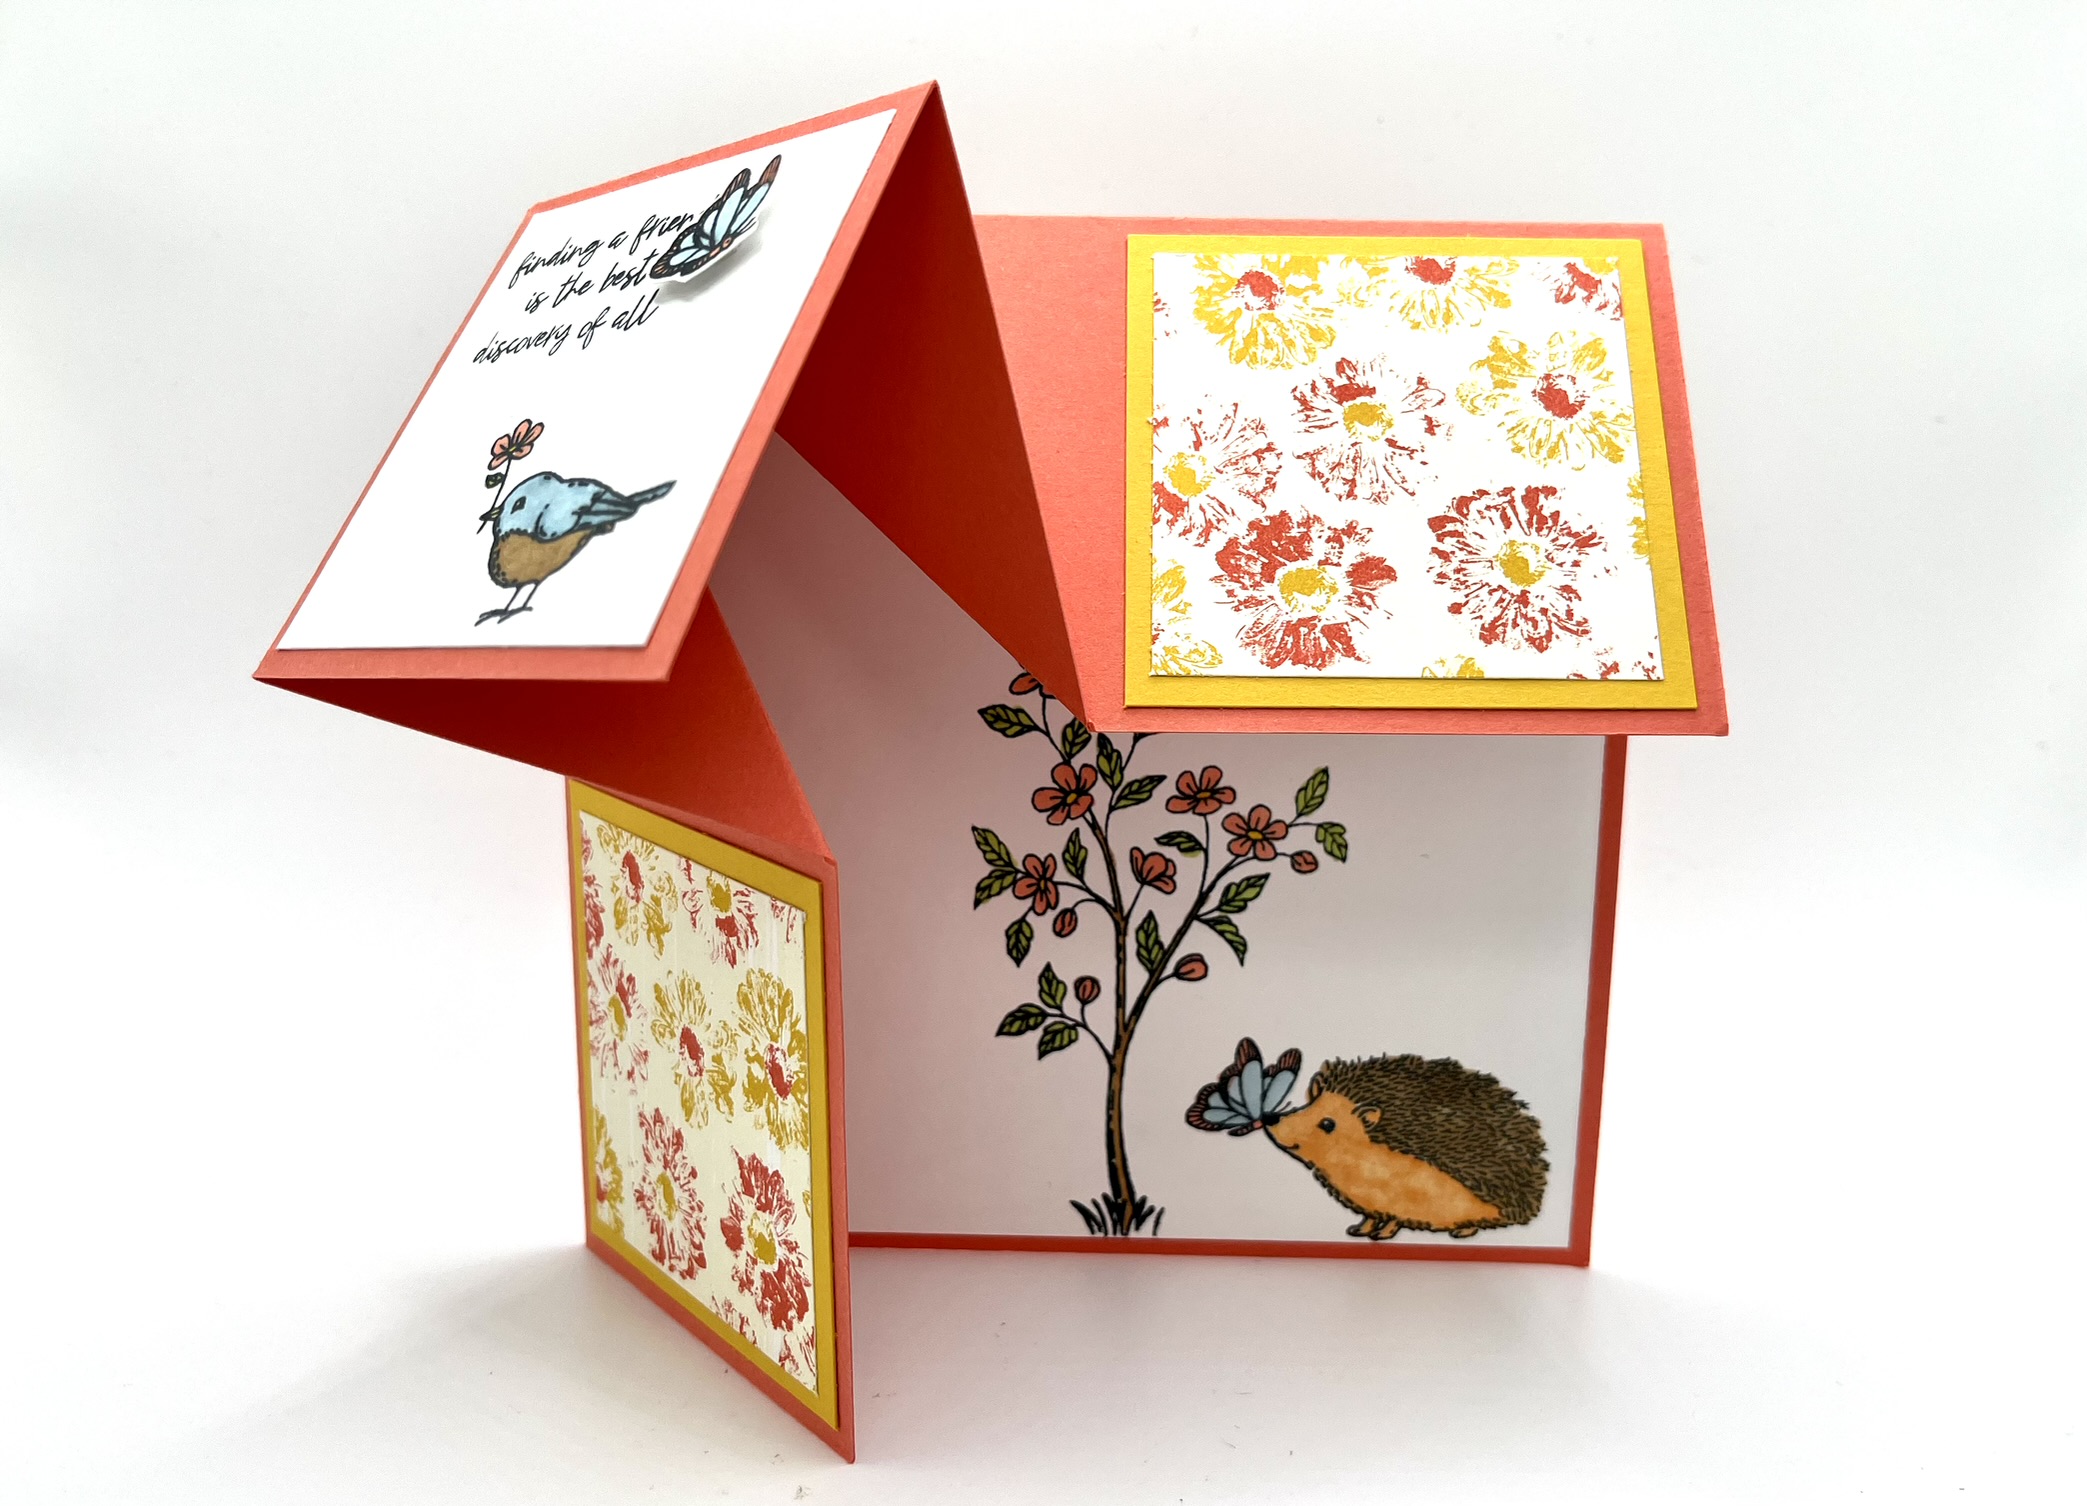

**Products used on the card above: Happy Hedgehogs Photopolymer Stamp Set, Calypso Coral and Crushed Curry Cardstock, Inked Botanical DSP, Stampin’ Blends Markers, Stampin’ Seal, Clear Wink of Stella
This card was created using the Happy Hedgehogs Photopolymer Stamp Set that is so much fun to create with. The images go together so well that it’s almost like creating an outdoor scene. I also love the versatility of the images and since they’re easy to fussy cut you can create layers using dimensionals.
This fold is easy to create. The finished image is 6×6 so you’ll need larger envelope. An envelope maker will come in handy and it’s simple to use. Check out my Tools for Success page for links to this and any other non-Stampin’ Up tools I use while crafting.


**Products used on the card above: Happy Hedgehogs Photopolymer Stamp Set, Night of Navy and Balmy Blue Cardstock, Regency Park DSP (retired) but you can sub Countryside Inn DSP, Stampin’ Blends Markers, Stampin’ Seal, Clear Wink of Stella
To make this card, first choose a cardstock color and coordinating Designer Series Paper. Also, grab some white cardstock. We’ll use Memento Ink and Alcohol Markers to stamp and color our images to pull all our colors together.


**Products used on the card above: Happy Hedgehogs Photopolymer Stamp Set, Berry Burst and Crushed Curry Cardstock, Bright & Beautiful DSP, Stampin’ Blends Markers, Stampin’ Seal, Clear Wink of Stella
Instructions:
Base: Colored Cardstock cut 8 1/4″ x 8 1/4″, scored at 2 3/4″ and rotate clockwise, score again at 2 3/4″, Take a look at your score lines and you’ll see a square in one corner. With that square in the top left corner, make a tick mark at 5 1/2″ to the right of that square on the top edge of the cardstock, and 5 1/2″ below the square on the left edge of the cardstock. Make a tick mark at the intersection of your two 2 3/4″ tick marks. Then, match all the tick marks up on your paper cutter and score that line so you have a triangle scored.
To fold the base, first make a valley fold on the two 2 3/4″ score lines and burnish them with your bone folder. Then, fold the triangular score line as a mountain fold (the opposite direction). Once all your score lines are folded you can create your top left fold so you’ll now have 4 quadrants to your card.
Card Insert: Using Basic White cardstock, cut a 5 1/4″ square piece and set aside.
Top Left: Using Basic White cardstock, cut a 2 1/2″ square
Top Right and Bottom Left: Using coordinating Designer Series Papers, cut two 2 1/2″ squares and two 2 1/4″ squares. *Or just cut one layer of 2 1/2″ pieces
Stamp and color your images on the Card Insert piece and on the Top Left piece.
Assembly: Adhere the Card Insert to the inside of the Card Base. Then adhere the Top Left. Layer your 2 1/2″ and 2 1/4″ pieces and adhere to the Top Right and Bottom Left. Add embellishments and make your 6×6 envelope if needed.
I hope you enjoy making this card as much as I did!

