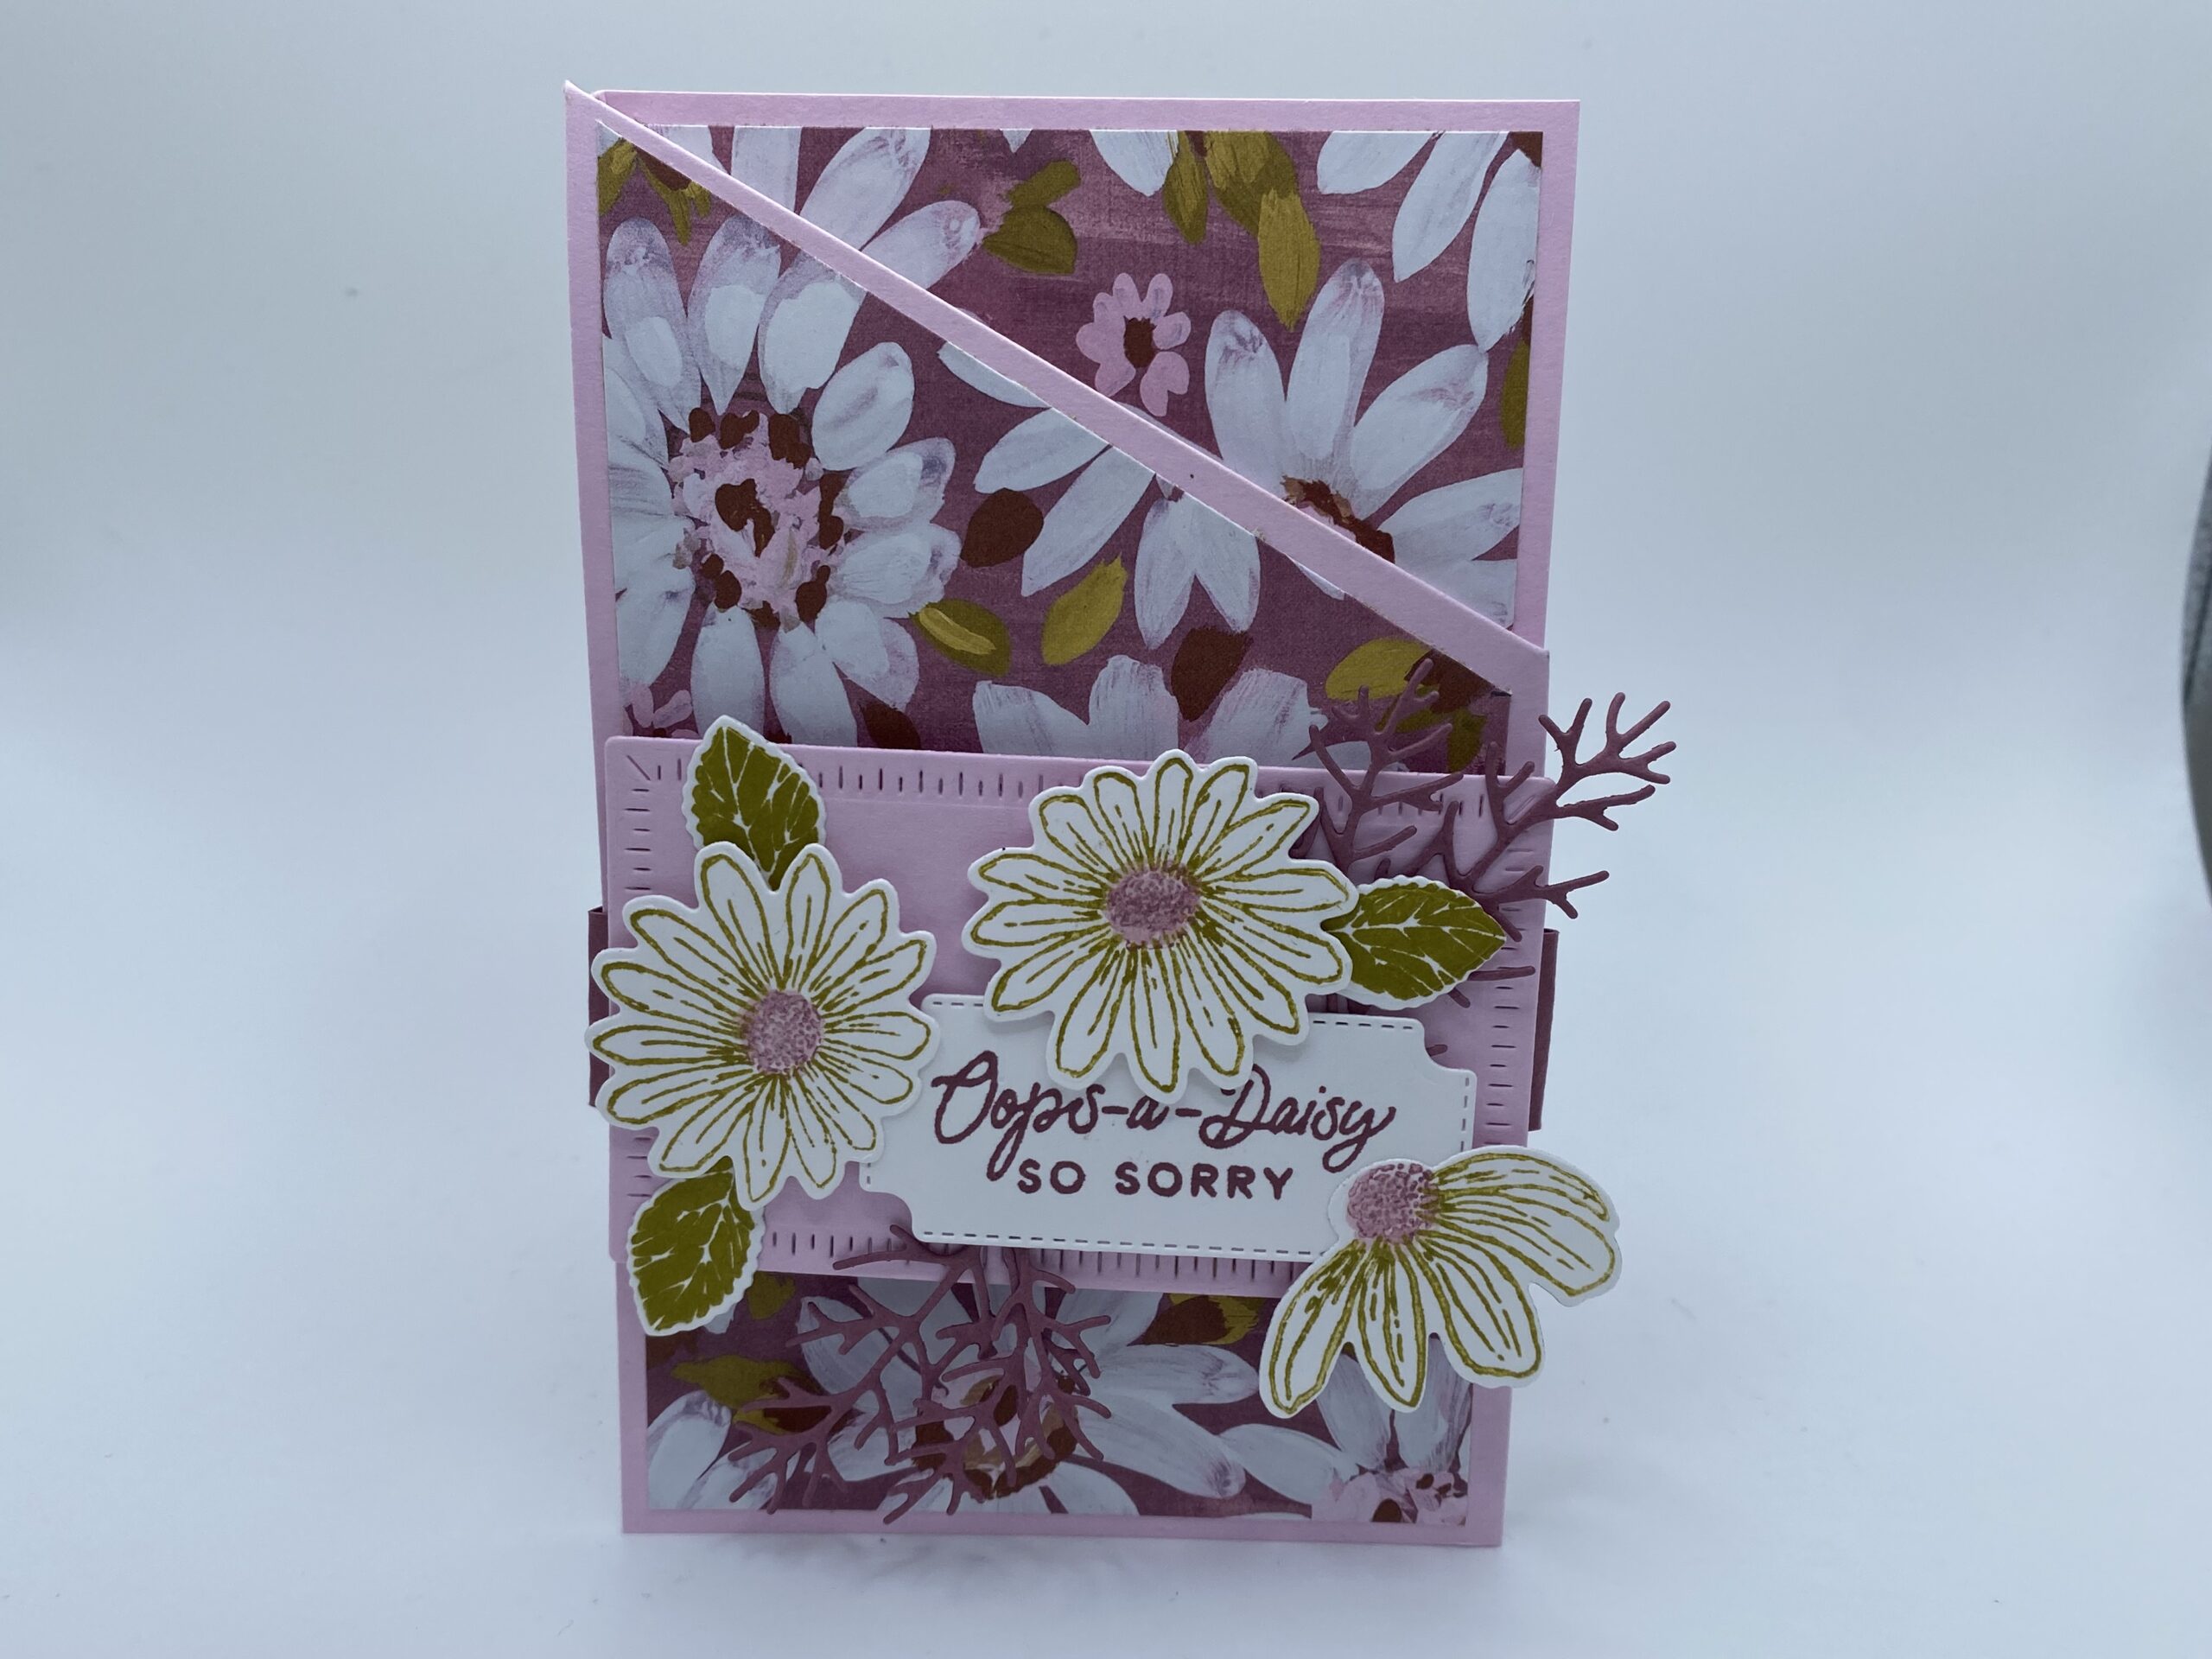
Check out this mirror fold card. This is a great fold to show off your Designer Series paper. It can be created with or without a belly band. The center of the card gives you the perfect spot to write a special message. It looks tricky, but once you make a couple it’s pretty simple. I’ve even added a template below so it all makes sense!
**On this fun fold, you’ll want to use non-directional Designer Series Paper so you don’t have to worry about which way the paper faces!


I just can’t get enough of the Cheerful Daisies DSP (designer series paper). It’s so pretty and the Cheerful Daisies stamps make such pretty flowers, especially with the coordinating dies. Those dies make it simple to build beautiful flowers and stems for your cards. The card base is Bubble Bath and I stamped the images and words in Bubble Bath, Moody Mauve and Wild Wheat to pull in all the gorgeous colors in the DSP. The belly band was created using Radiating Stitches and Cheerful Daisies dies.

INSTRUCTIONS:
**watching the video or working along with it the first time will definitely help this fold make sense!
Base: cut cardstock 5 1/2″ x 10 1/2″, score at 3 1/2″ and 7″; referring to the template above, make your score lines 2″ down from the 3 1/2″ score line and 2″ from the bottom of the 7″ score line. Fold the top left section so it folds away from you (valley fold) and the bottom right section so it folds towards you (mountain fold).
DSP (use non-directional patterns): cut two pieces at 3 1/4″x5 1/4″, mark a tic mark at 2″ down and cut at the diagonal. Then, cut two more pieces at 1 3/4″ x 3 1/4″ and cut those diagonally in opposite directions. (cut 1 from top right to bottom left and then other from top left to bottom right)
Center piece: cut Basic White or Very Vanilla 3 1/4″x5 1/4″; tic mark at 2″ down and cut diagonal; repeat on other end.
Assembly: lay out all pieces on your base so you know everything fits. Then adhere to the base. Create your decoration/sentiment for the front or create a belly band (see below)
Optional Belly Band: if you choose to have a belly band on the front, cut a strip of cardstock that will wrap around card (keep a little loose so it slides on a off easily); glue the ends of the band together; create your decorative piece for the front of the band as desired.


This card was created using Pretty Peacock Cardstock and Wild Wheat, Lemon Lolly and Pretty Peacock ink. I used the coordinating dies to create a cluster of daisies for the front of the card and attached a piece of Wild Wheat ribbon to pull it all together. I finished it off with a Brass Butterfly embellishment for the inside greeting.


On this final design, I used Lemon Lolly cardstock for the base and stamped in Shaded Spruce, Lemon Lolly and Wild Wheat ink. I created a matching belly band using the Radiating Stitches die and the coordinating Cheerful Daisies Dies.
Stampin’ Up makes it so easy to coordinate everything so you look like a paper crafting pro!
I hope you enjoy this Mirror Fun Fold. Please check out my online store for all your paper crafting supplies and don’t forget to Like and Subscribe to my YouTube channel so you never miss out on a video tutorial!

