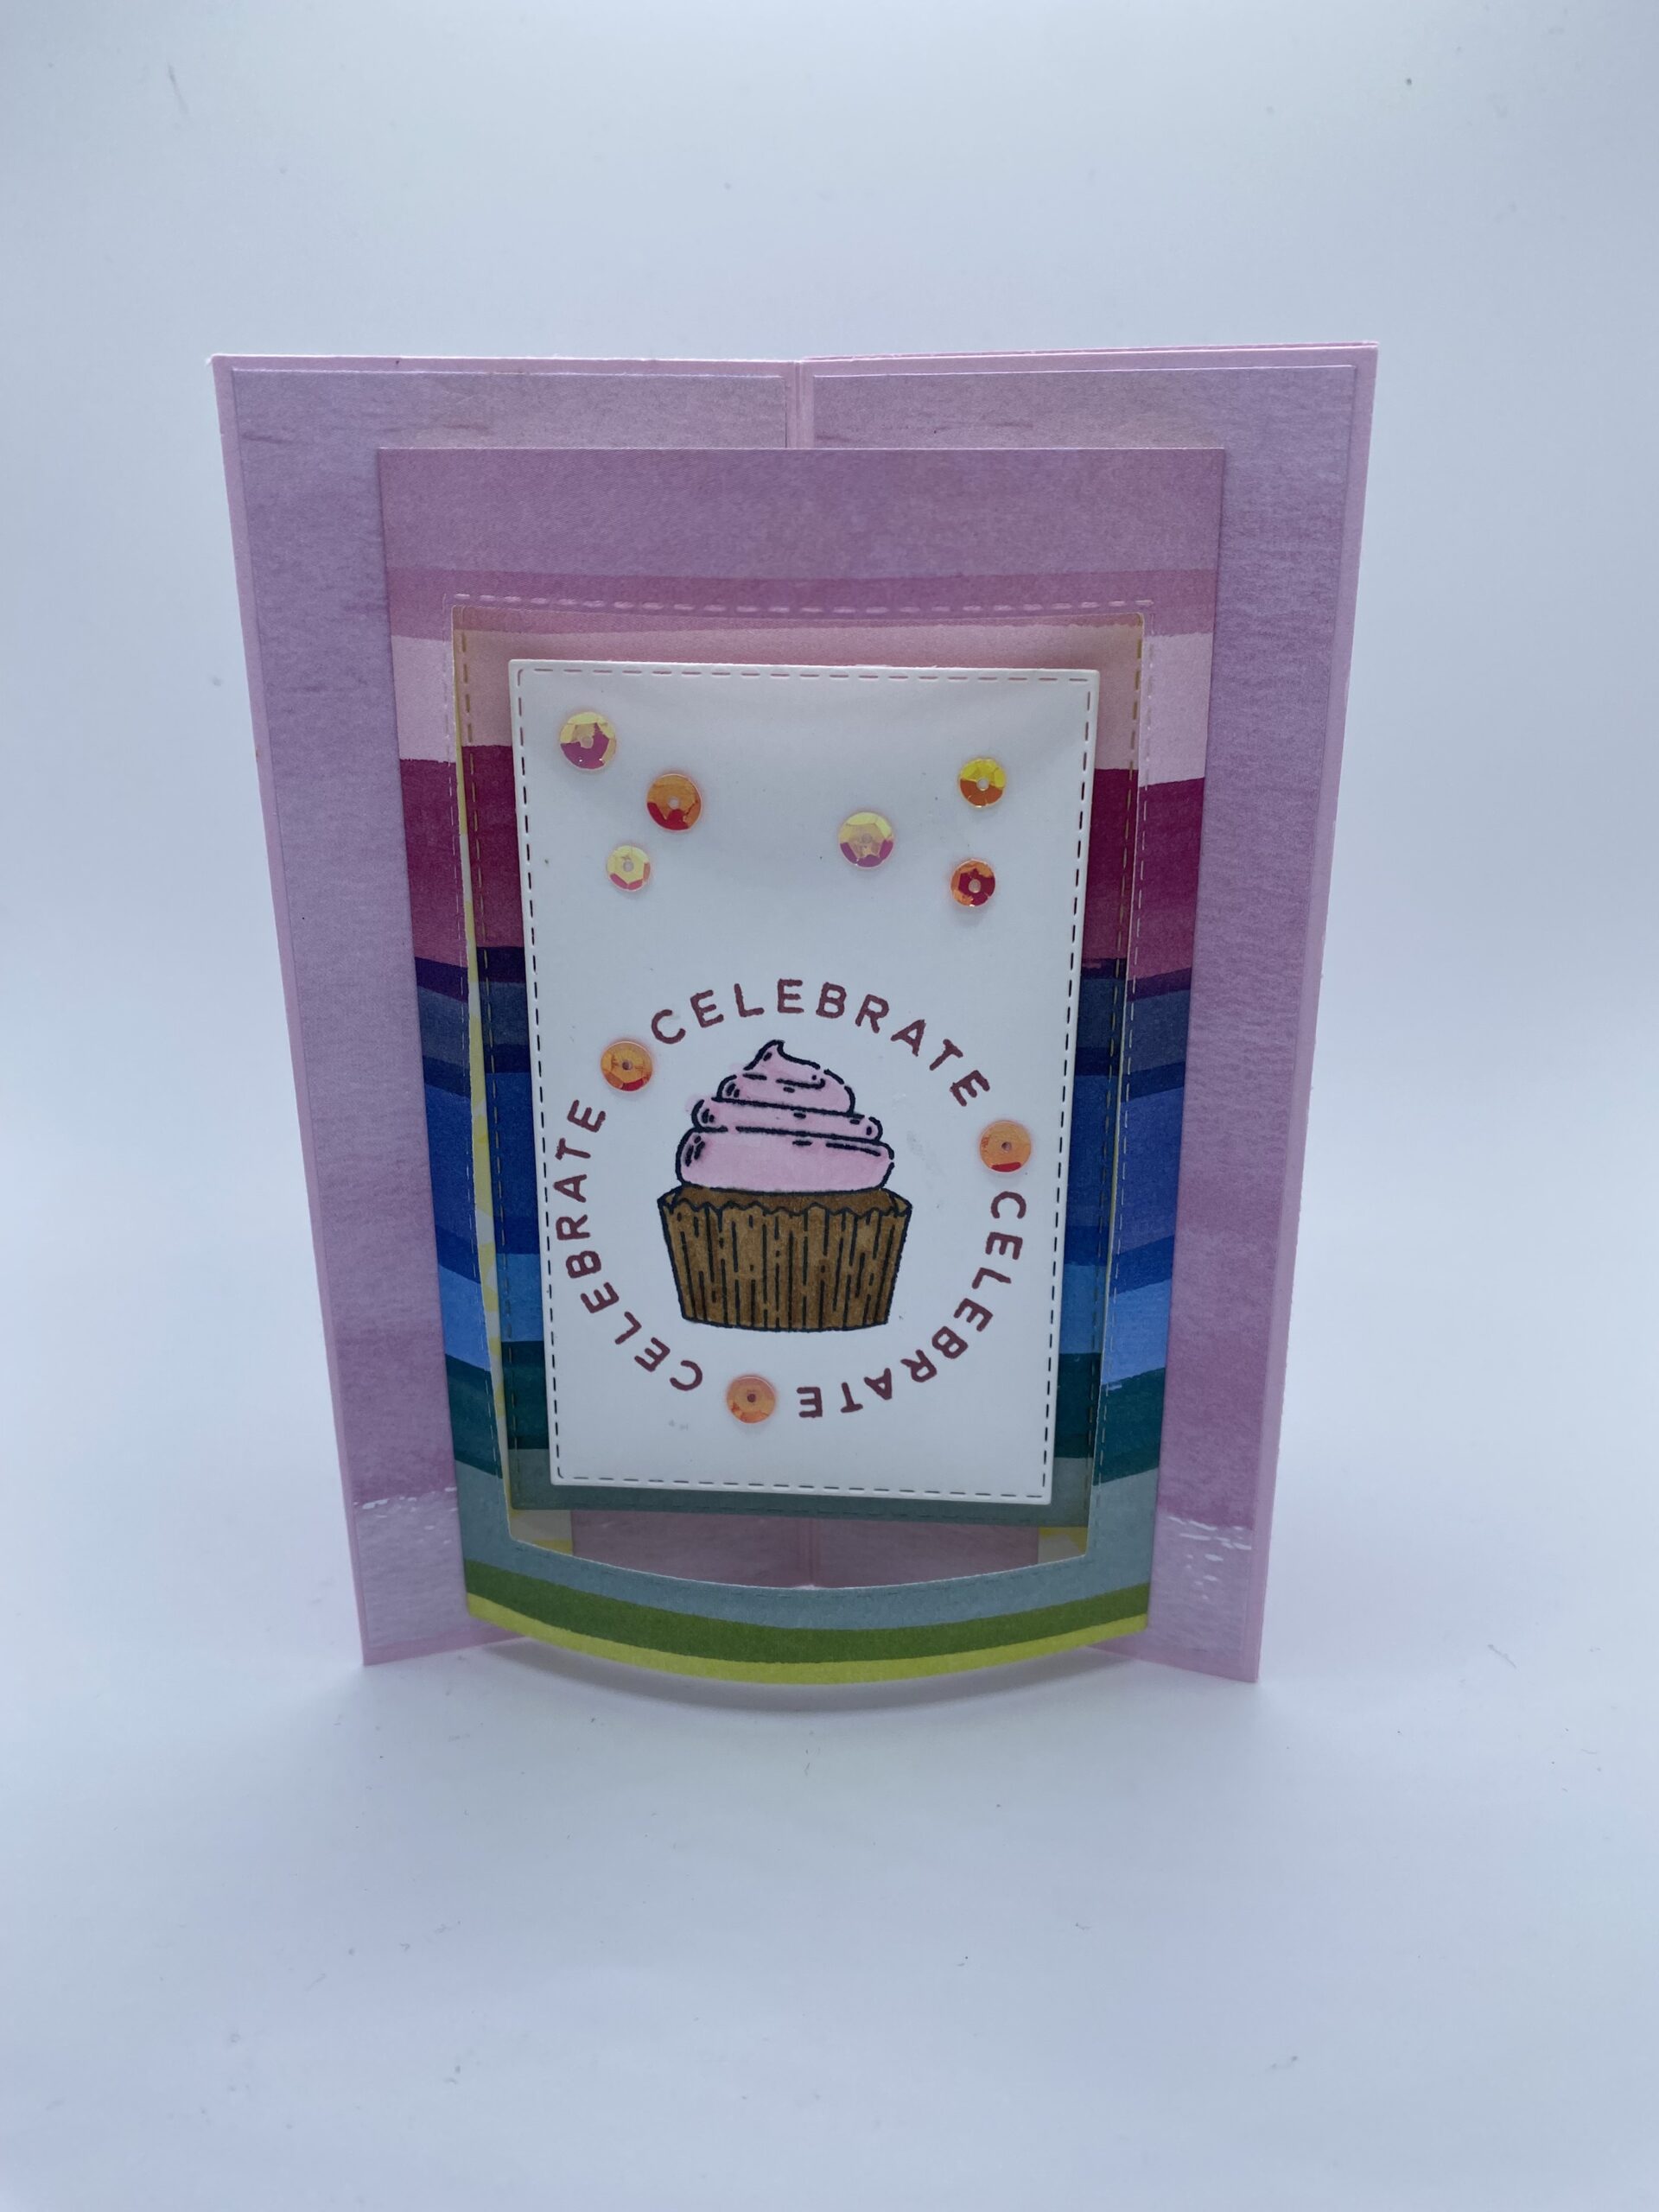
When I recently came across a card made with this fun fold, I knew I needed to make some. I love how this fold sits almost like a carousel and you could decorate all 8 panels if you wanted to! I like to leave a space on the back panels for a sweet message.


I created this card using the Circle Sayings Photopolymer stamps and the Bright & Beautiful 6×6 Designer Series Paper. I paired the DSP up with Bubble Bath paper to match. I stamped the images in Memento Ink and colored them in with my Alcohol markers in Bubble Bath and Pecan Pie. Stamping was done in Moody Mauve so everything is perfectly coordinated. I used Stitched Rectangles dies on this card, but you can use any dies you have to create the window of your choice. I had a stash of retired embellishments that were full of fun pink sparkle and added those for a little bit of pizzazz. What fun embellishments would you use?
INSTRUCTIONS:
Base: cut one sheet of cardstock into four equal pieces…so 4 1/4″x5 1/2″ (x4); score each piece in half at 2 1/8″
DSP: cut 8 pieces of Designer Series Paper/Cardstock at 2×5 3/8″ *you can mix & match if you want…whatever makes you smile!!
Bend: cut DSP at 4 1/2″x5, score 1/2″ on each long side
Pop Out Mechanism: cut cardstock at 1″x2 1/2″, score at 1/2″ on each short side
Center Focal Point (for message/stamping): use the piece you die cut or cut a piece of cardstock that will fit inside the window.
Assembly: Adhere DSP pieces to Base pieces; fold the base pieces in half. Use strong Stampin’ Seal+ to adhere each base piece together until you have all 8 sides glued. Fold flat so the designated back is in the back and the designated front is in front. Set aside.
Lay out the Bend piece. Use the score lines determine the center portion and cut your window in that area. Then fold the 1/2 sides down and burnish with your bone folder. Adhere to the front of the base using Stampin’ Seal+.
Grab your Pop Out Mechanism and fold back the 1/2″ ends and burnish with your bone folder. Run your bone folder across the mechanism to break down the fibers a bit. Add Stampin’ Seal+ to the ends and adhere the piece to the middle of the open window area.
Decorate your Center Focal Point and don’t forget to add some Wink of Stella because who doesn’t like a little shimmer! Add Stampin’ Seal+ to the Pop Out Mechanism and adhere your Center Focal Point piece on it, centering it in the window.
Add your sentiment or message to the back if desired and you are finished with your masterpiece! **Don’t forget that you might need some extra postage when mailing this card…it’s thick!
Don’t forget to Like and Subscribe to my YouTube channel so you never miss out on a video!
Below are two more cards created with the same fun fold, but using some other great stamp sets and Designer Series Papers.


These pretty cards were made using the Sentimental Park Photopolymer Stamps and Dies and the coordinating paper (sadly retired). I stamped in Night of Navy and Balmy Blue. The base is Night of Navy.


This last card was so much fun. I used the Rhino Ready Photopolymer Stamps and coordinating dies to create this wild scene. I used Basic White, Crumb Cake, and some free paper from last season’s Sale-A-Bration….I love the polka dots! The rhino was stamped on that same paper and then die cut. I added some greenery to the frame and the back of the card using the coordinating dies and cut the center window and center piece using the Radiating Stitches Dies. What a fun design!
I hope you enjoyed this 3D card! Don’t forget to check out my online store for all your favorite Stampin’ Up supplies! Now go get creative!! 🙂

