
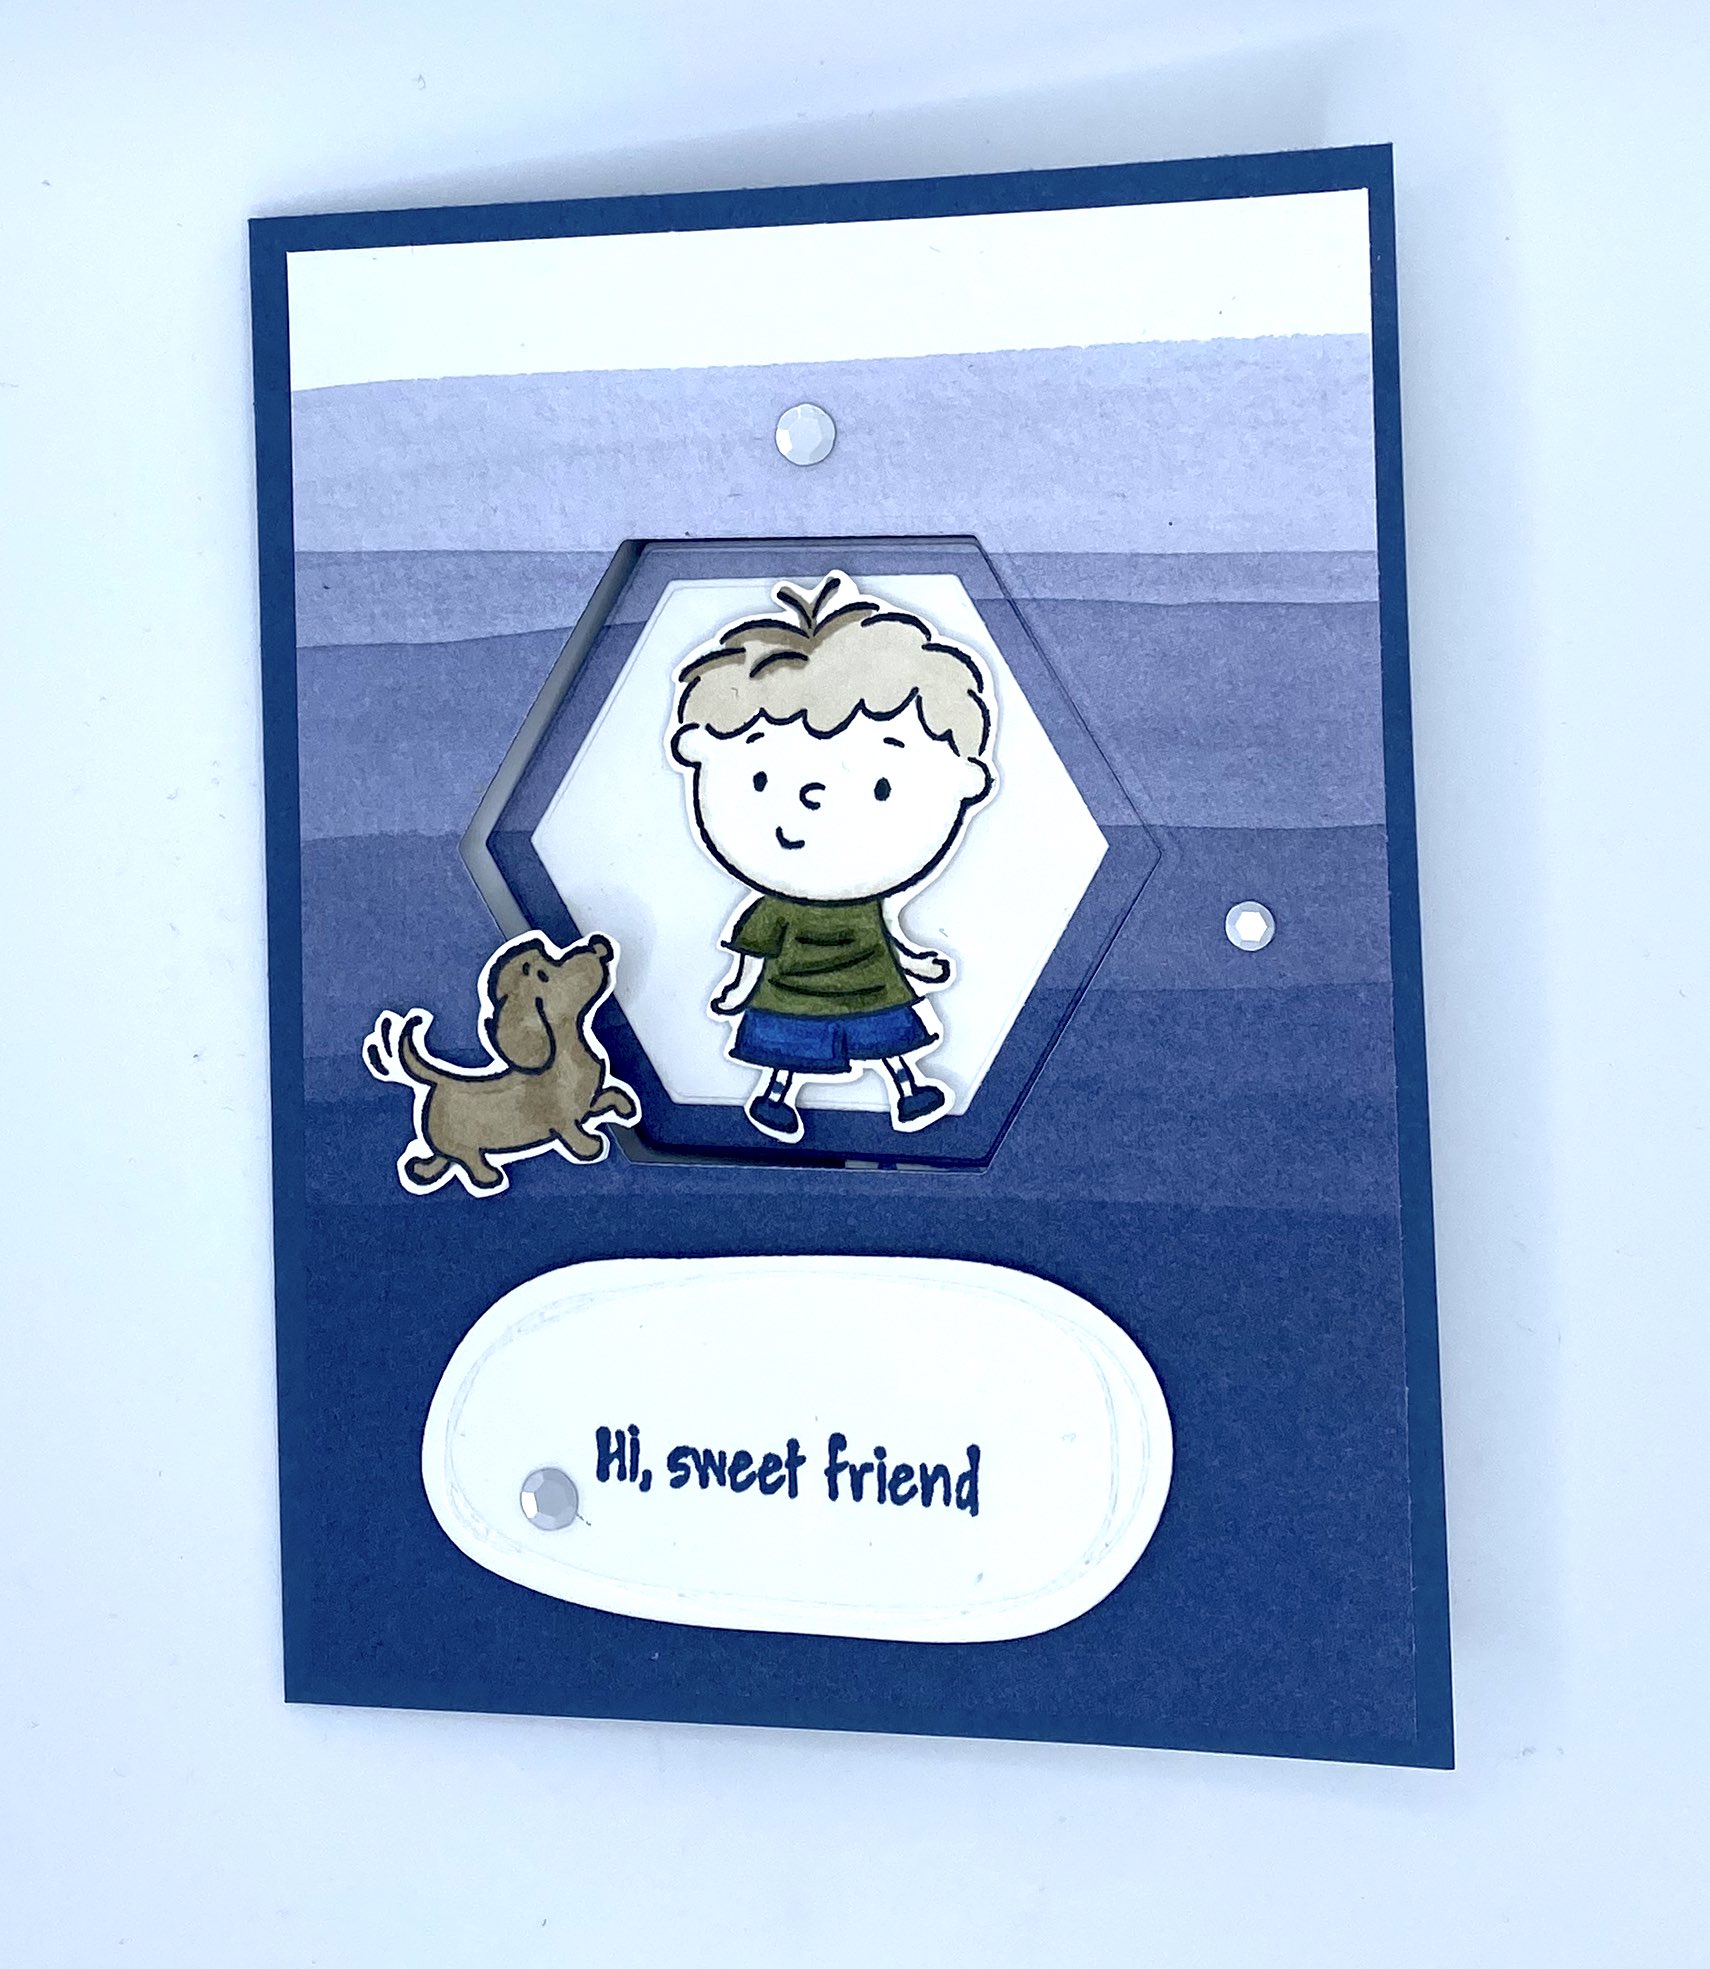


How cute is this little guy and his pup? I love this By My Side stamp set. The 3 friends in the set plus the animals make is so much fun to create with. It originally caught my eye because the little girl with the glasses reminds me of my granddaughter and the little boy resembles my grandson. I knew right then I had to have it.
This easy little Pop Out Fun Fold is a great way to show off these sweet friends. Here’s how I created it.
INSTRUCTIONS:
BASE (Misty Moonlight): start with a standard card base – 5 1/2″x8 1/2″, scored at 4 1/4″
Designer Series Paper (Bright & Beautiful) for front: cut 4″x5 1/4″
INSIDE LAYER: (Basic White) cut 8″x5 1/4″; score at 4″ and 6″; Designer Series Paper (Bright & Beautiful) for Inside panels: cut 1 3/4″x5″ (x2)
Additional pieces: Basic White and Misty Moonlight scraps for stamping and die cutting **I used the piece that was cut and then cut one smaller shape in Basic White to decorate. I also cut one extra piece for the message on the front.
ASSEMBLY: Fold your base cardstock. Adhere the DSP on the front of the card. Decide where you want to die cut your opening and secure your die to the paper. Run your paper through the die cutting machine. Set Aside
Fold your inside layer accordion style so largest area fits inside card. Stamp your images and sentiments and color them in. Adhere your two DSP panels to the panels. Adhere your Inside Layer to the Base.
Now it’s time to decorate the front of your card. Grab your die cut pieces and decorate them. I stamped the boy and the puppy on scrap cardstock and colored them in. Then I just fussy cut them. Close your card so you know where your die cut pieces will sit. Then with the card closed, add some liquid glue where the die cut will sit on the side panel. Add the die cut piece and hold in place for a few seconds to set. Once the glue is set, you can add the boy to it with some dimensionals. Then finish decorating the front with the puppy and some embellishments like the Neutrals Adhesive Backed Sequins.
This card looks so cute and I can’t wait to send it in the mail. As you can see from my other samples, this fold works for holidays, birthdays, feminine cards, masculine cards…it all works.


I hope you enjoy making this fun fold. If you have any questions about this card, feel free to reach out to me. Don’t forget to stop by my online store to purchase your supplies needed for this card. I’d love to take care of you as my customer! Thanks for crafting.

