
I love when Stampin’ Up Creates a product that is fun to use, versatile and makes all your creations look so professional! The brand new Thoughtful Moments Hybrid Embossing Folder and Coordinating Die (a bundle!) does just that. You can create a whole sheet of beautifully embossed sayings or just one. You can color them ahead of time using a brayer, or keep them un-inked and simply embossed. Like I said, options!!


Using a new product can be confusing, and sometimes you don’t know right away how many ways you can use it. So, that’s what I’d like to do. Show you the way!! Here we go!


My preference when using this bundle is to create a whole sheet (that’s 10 sentiments) of the same color. To do this, I cut a 6×6 sheet of Basic White paper. Set that aside and grab your brayer. I choose the ink color I want and ink up the brayer until it’s all covered. I run the brayer over the raised side of the embossing folder until all the sentiments have color on them. You may need to ink up the brayer another time or two. Don’t worry if there is ink on other parts of the folder; it won’t show. Once you’re inking is done, snap your die in place…it will fit on top of the inked words. Then, lay your piece of Basic White on the opposite side and close up your folder. Run it through your Stampin’ Cut & Emboss Machine as you would a hybrid …that’s using plates 1 and 4 only. **Feed your embossing folder through folded side first. One you open it up, all the pieces are cut and ready to remove from the folder. I like to keep my extra pieces in a clear envelope with the name of the ink color. It’s easy to grab one for a quick card that way!

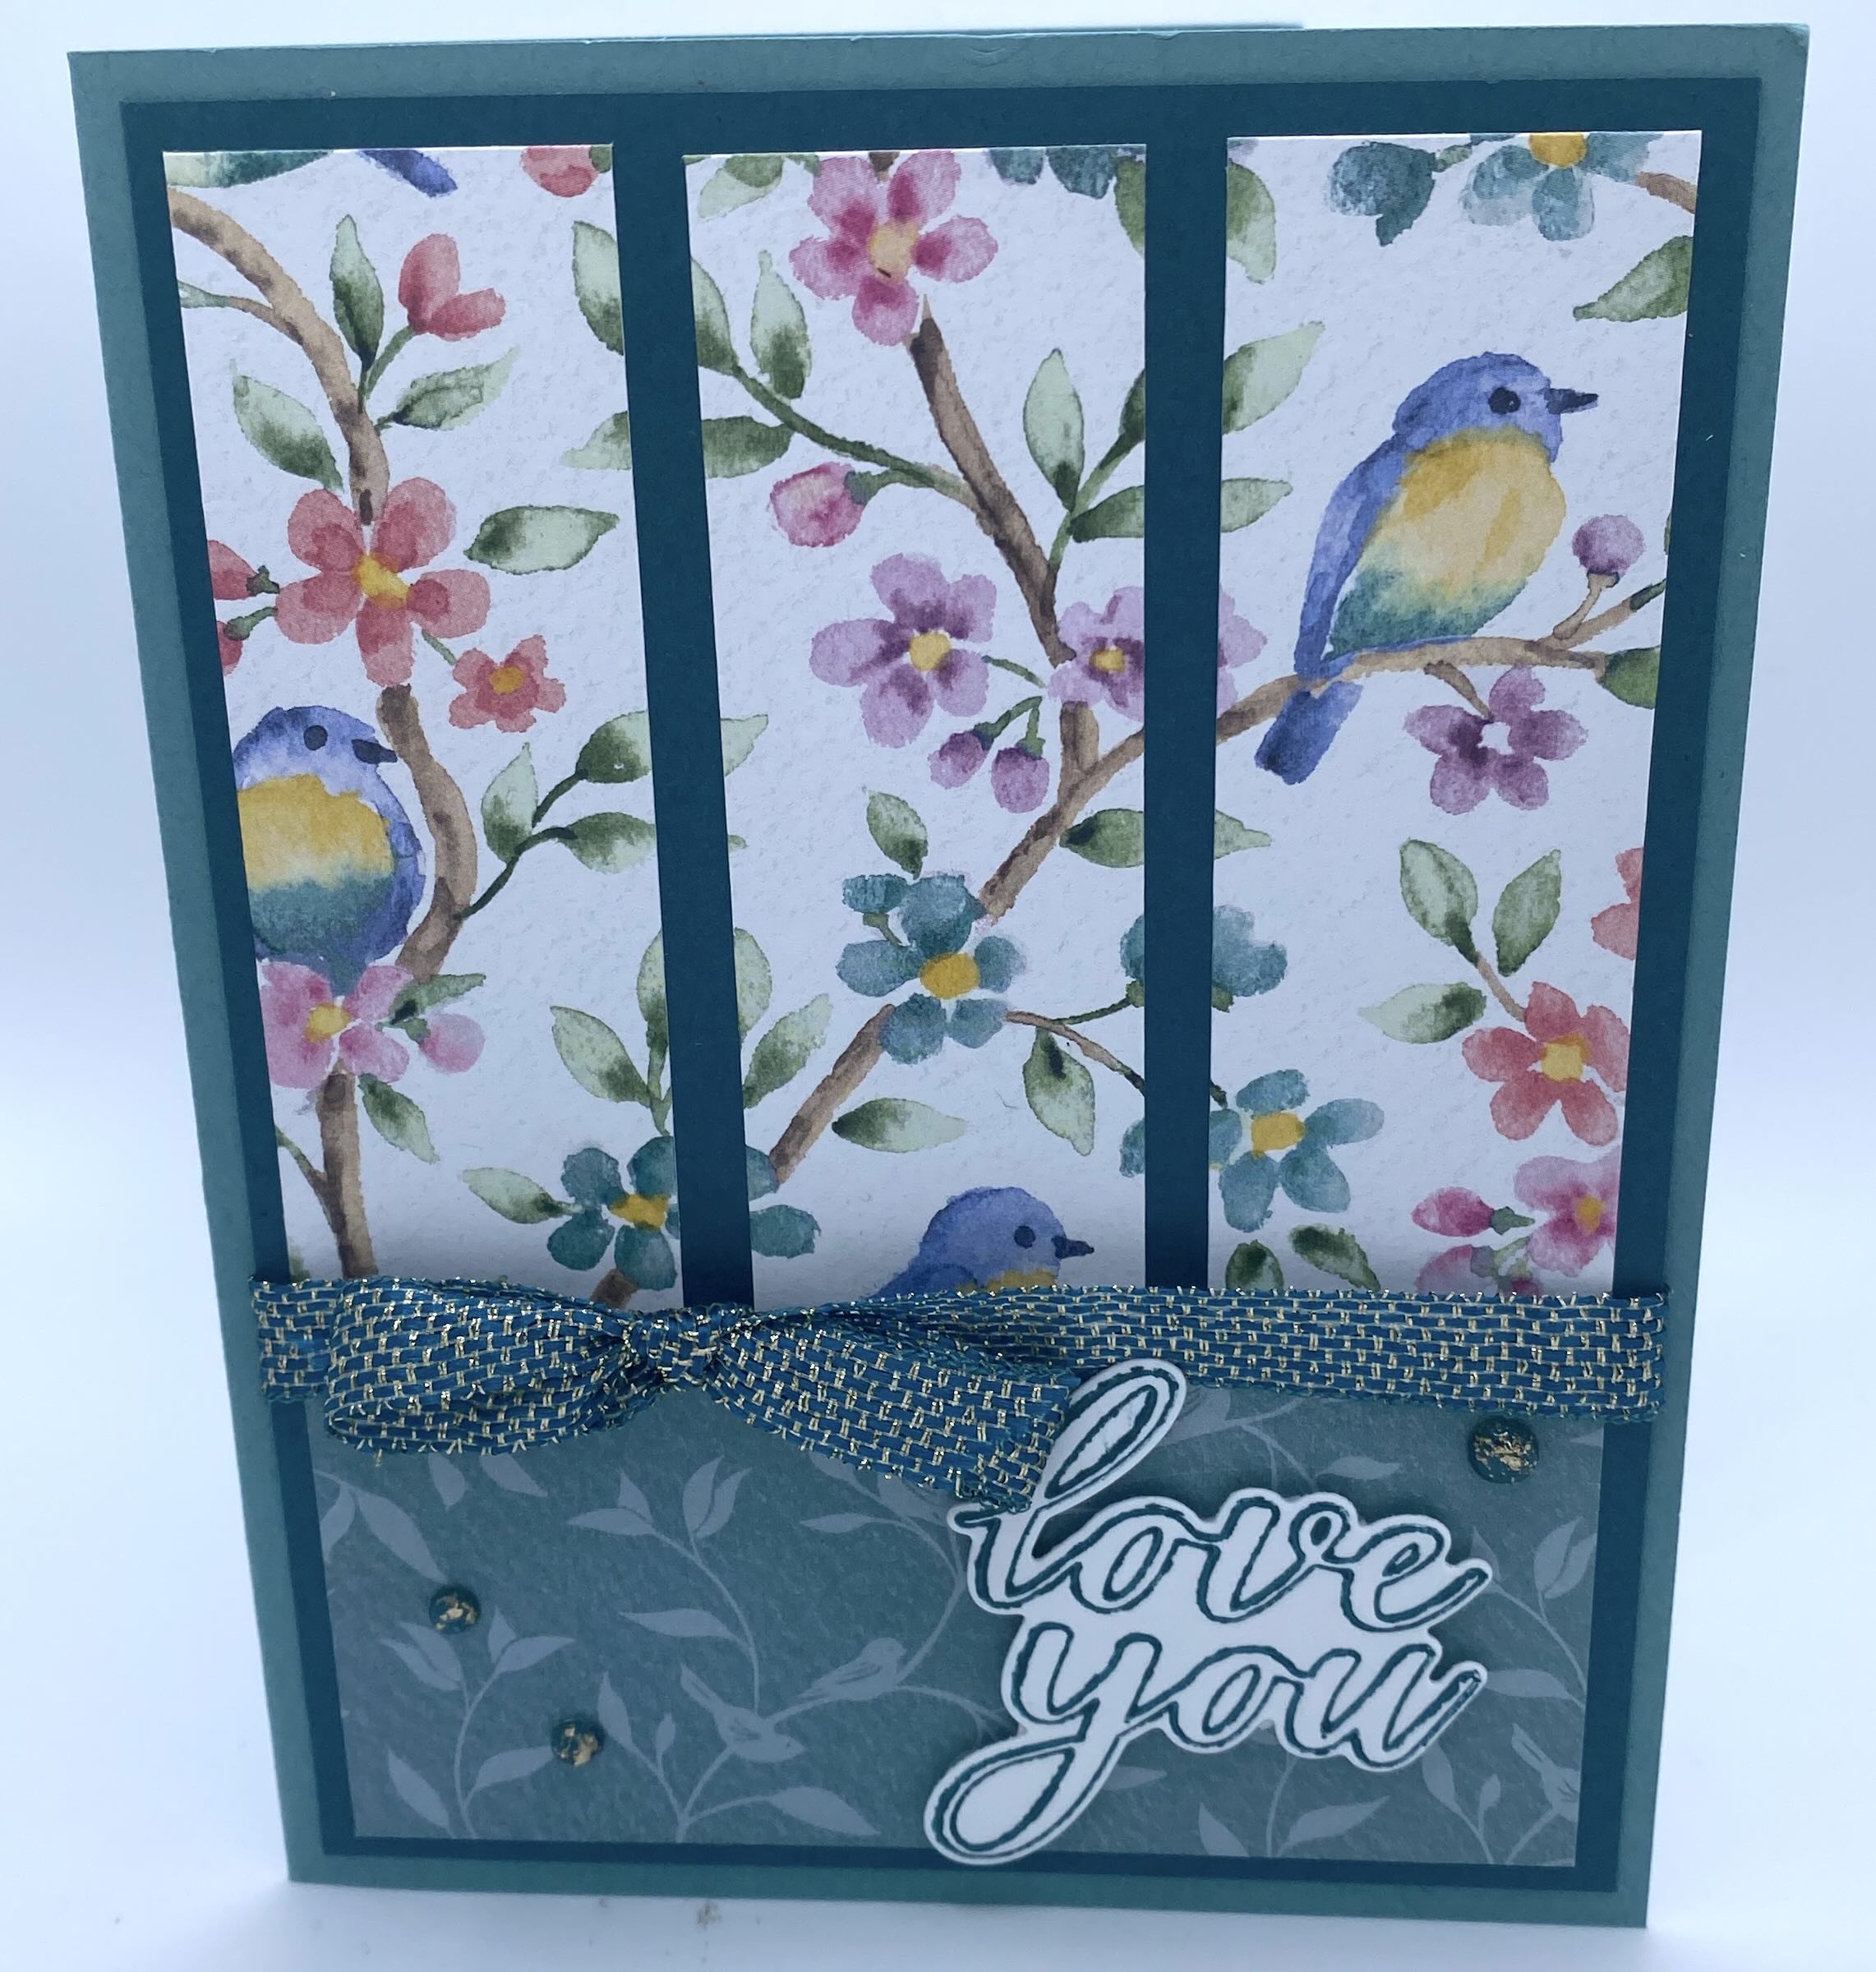
This card was created with the gorgeous Flight & Airy DSP that was free during Sale-A-Bration. I paired it with Lost Lagoon cardstock. It’s a basic card base (5 1/2″x8 1/2″, scored at 4 1/4″.) I added a 4×5 1/4″ layer of Pretty Peacock to the front. Then, I chose two patterns of DSP. The bottom floral piece is 3 3/4″x1 3/4″. The top piece is created by cutting 3 consecutive pieces to create a scene…1 1/8″x3 1/4″ each. The inside has another layer of Pretty Peacock and then Basic White for the message.

On this sample, I used the Something Fancy Dies to create the tags for my sentiment…one in Calypso Coral and one in Basic White, I used Calypso Coral Ink on the sentiment. I also embossed the front of this basic base with the Softly Sophisticated Embossing Folder from the free bundle that was in Sale-A-Bration. The Softly Stippled DSP also came from the free products–I love Sale-A-Bration. On the inside, I glued another of the sentiments to the Basic white AFTER I lightly brushed on some Calypso Coral. I love how the embossing carries over to the inside of the card!

This card was created…you guessed it…from another free product, the Watercolor Melon stamp set. I cut my layers and then on Basic White I brushed on some Poppy Parade and added the seeds in Basic Grey. Then I brushed some Shaded spruce onto the bottom to mimic the watermelon rind. I added a strip of Basic White in the middle section and then added my melon pieces and sentiment with dimensions. Notice, I colored the word “happy” with Poppy Parade to really make it pop. That’s another fun way to make these sentiments really stand out!
I know this bundle will be used again and again for all kinds of cards. Since the Thoughtful Moments Bundle is in the mini catalog, it’s only available until the end of April…and it may very well sell out! Don’t delay if you want to grab up this versatile craft room must have!
Thanks for joining me to check out this great new product. I hope you get to craft today!
-Jill
the Wandering Stamper