

This slider card is so easy and versatile, you’re going to want to try it with all your stamp sets. Just a few simple cuts and scores, a little decorating and you’re done. So much fun!


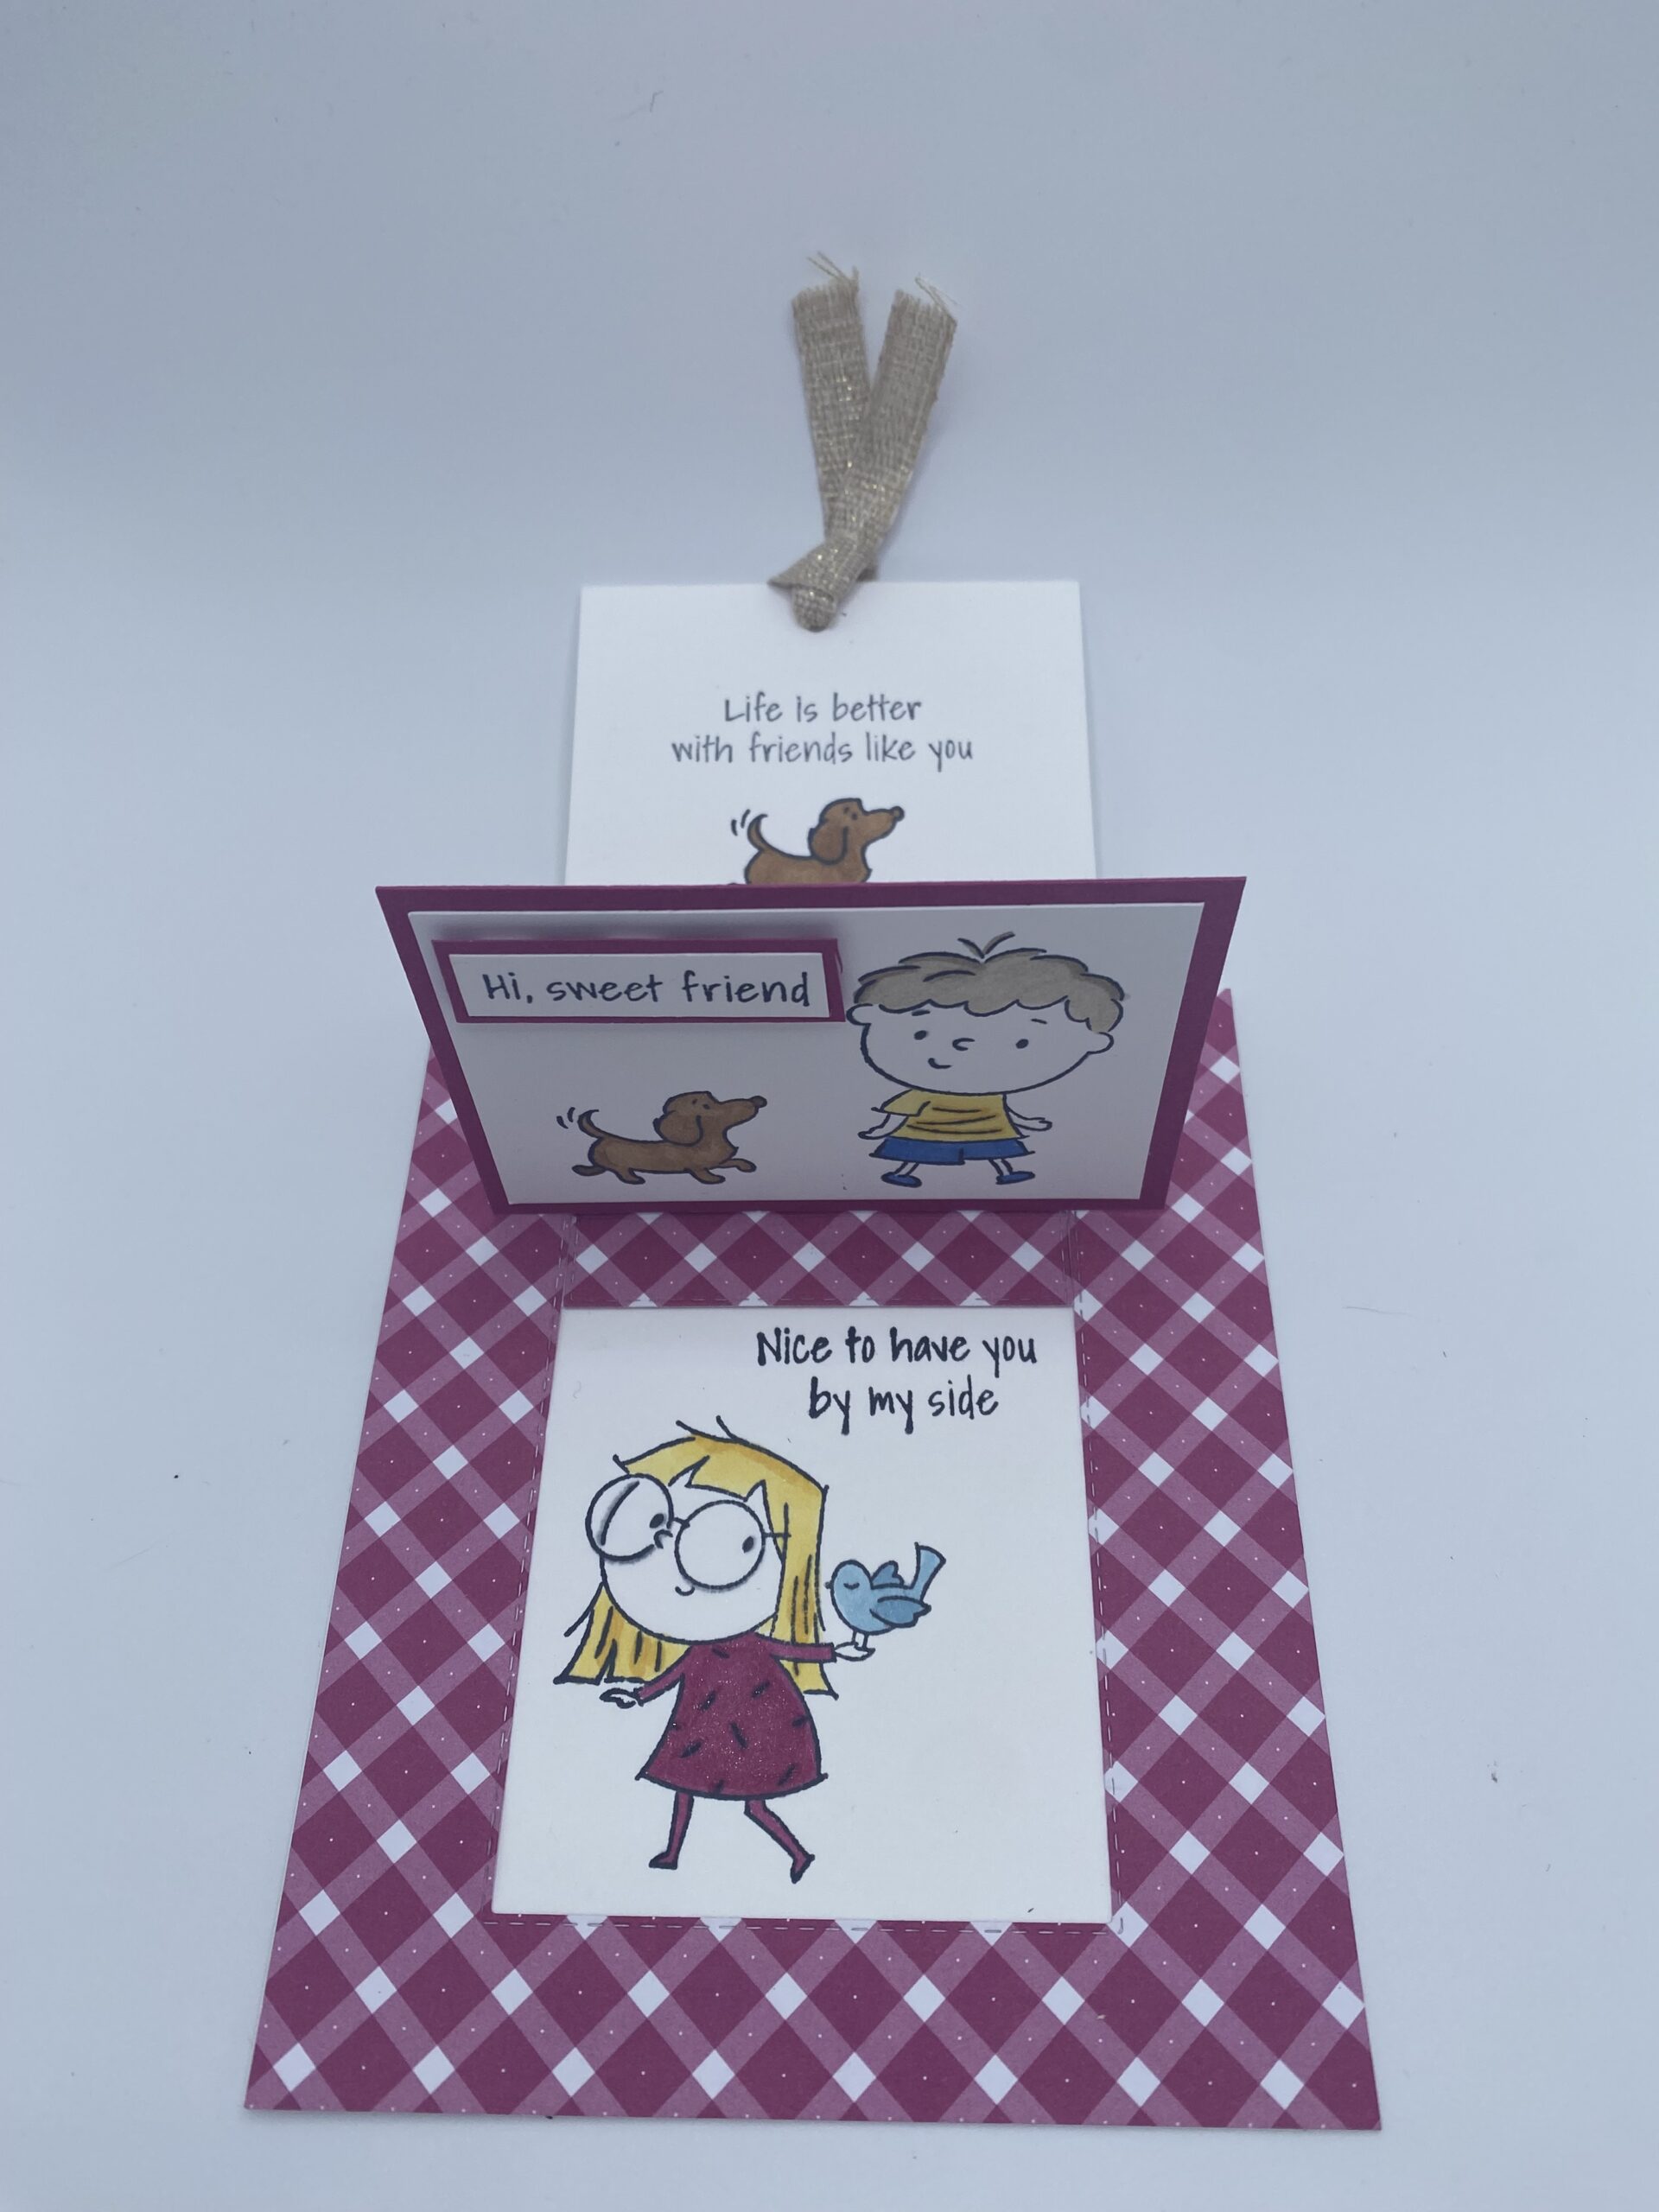
This card was created using the By My Side Cling Stamp Set, stamped with Memento Ink and the Glorious Gingham DSP in Berry Burst. I used Stampin’ Up’s marvelous Alcohol Markers to color everything….Berry Burst, Daffodil Delight, Balmy Blue, Berry Bushel, Grey Granite and Pecan Pie. I finished it off with some ribbon and Wink of Stella on the little girl’s dress. It’s such a sweet little card.
Here’s how it’s made!
INSTRUCTIONS:
**The measurements for the Card Front and Card Back have been adjusted to 5 1/2″x4 1/4″ so they fit in a standard A2 envelope!
Card Front (Glorious Gingham): cut 5 1/2″x4 1/4″
Card Back (white): cut 5 1/2″x4 1/4″ (use two layers or an extra layer of DSP if coloring with alcohol markers..it will bleed to the back)
Slide Out Piece (white): 4 3/4″x3 1/8″
Matte for front (Berry Burst): 3 1/2″x2 1/2″
Front Layer (attach to matte (white): 3 1/4″x2 1/4″
After cutting all your pieces, grab your Card Front (Glorious Gingham) and die cut 3 sides of a rectangle on the center leaving the top of the rectangle uncut. After you cut your rectangle, score the inside rectangle at 1 1/4″, 2 7/8″ and 4 1/2″. If you need to, use your scissors to snip the sides of the rectangle up to the 4 1/2″ score line. Then fold the score lines to create the retractable piece. The 1 1/4″ score line is a valley fold, the 2 7/8″ is a mountain fold and the 4 1/2″ score line is a valley fold.
Turn over the Card Front and add a piece of Tear & Tape to the smallest fold on the rectangle. Center your Slide Out Piece over the rectangle making sure the top of the Slide Out Piece aligns with the top edge of the Card Front. Adhere the Slide Out Piece to the Tear & Tape.
Flip the Slide Out piece out of the way and align your Card Back (don’t forget to add a second back layer if you need to) with the Card Front. Use a circle punch to create a half circle cutout which will be where your pull tab comes out. Return the Slide Out Piece to where it belongs. Add Tear & Tape to the sides and bottom of the back of the Card Front and adhere the Card Front to the Card Back with the Slide Out Piece in the middle. Test your Slide Out to make sure it all works properly. (Adhere your second back layer as well, if you’re using one)
All that’s left is decorating! Stamp your images and sentiments on the white piece for the front layer that will go on the matte using Memento Ink. Color and embellish. Glue the front piece to the matte and then adhere it to the Card Front. It will adhere between the 1 1/4″ and 2 7/8″ score line section. Lastly, slide open the Slide Out Piece and stamp your images to the white piece that is showing (which is actually the white piece making up the back of the card.) You can also decorate the top of the slide out piece if you want to since it will be visible when the card is displayed. (see sample photo above). Don’t forget your embellishments and ribbon for the pull tab!

Here’s another sample I created using the Timeless Arrangements Photopolymer Stamp Set and the coordinating Timeless Arrangement Dies. I used some left over Dainty Flowers DSP and coordinated my stamping and die cutting with the colors in the DSP. I love how easy the dies make “flower arranging” on this card.

I had a lot of fun with this last card. I used the He’s All That Cling Stamp Set and the He’s the Man Designer Series Paper. I didn’t even need the dies since I used the punch out pieces that come with the DSP. I layered the matte in Early Espresso and stamped the sentiment in Early Espresso as well. And, instead of a ribbon, I just glued two arrows together to create the pull tab for the card. Such a fun card…and it’s masculine!
Three cards, three looks, three totally different stamp sets. Once you make one, you’ll want to make many! What can you come up with? I hope you enjoy these cards.
Please check out my online store for all your supplies to make these fun fold cards. And don’t forget to Like and Subscribe to my YouTube Channel so you don’t miss a video! Thank you so very much for your time. I hope you can wander over again soon!!