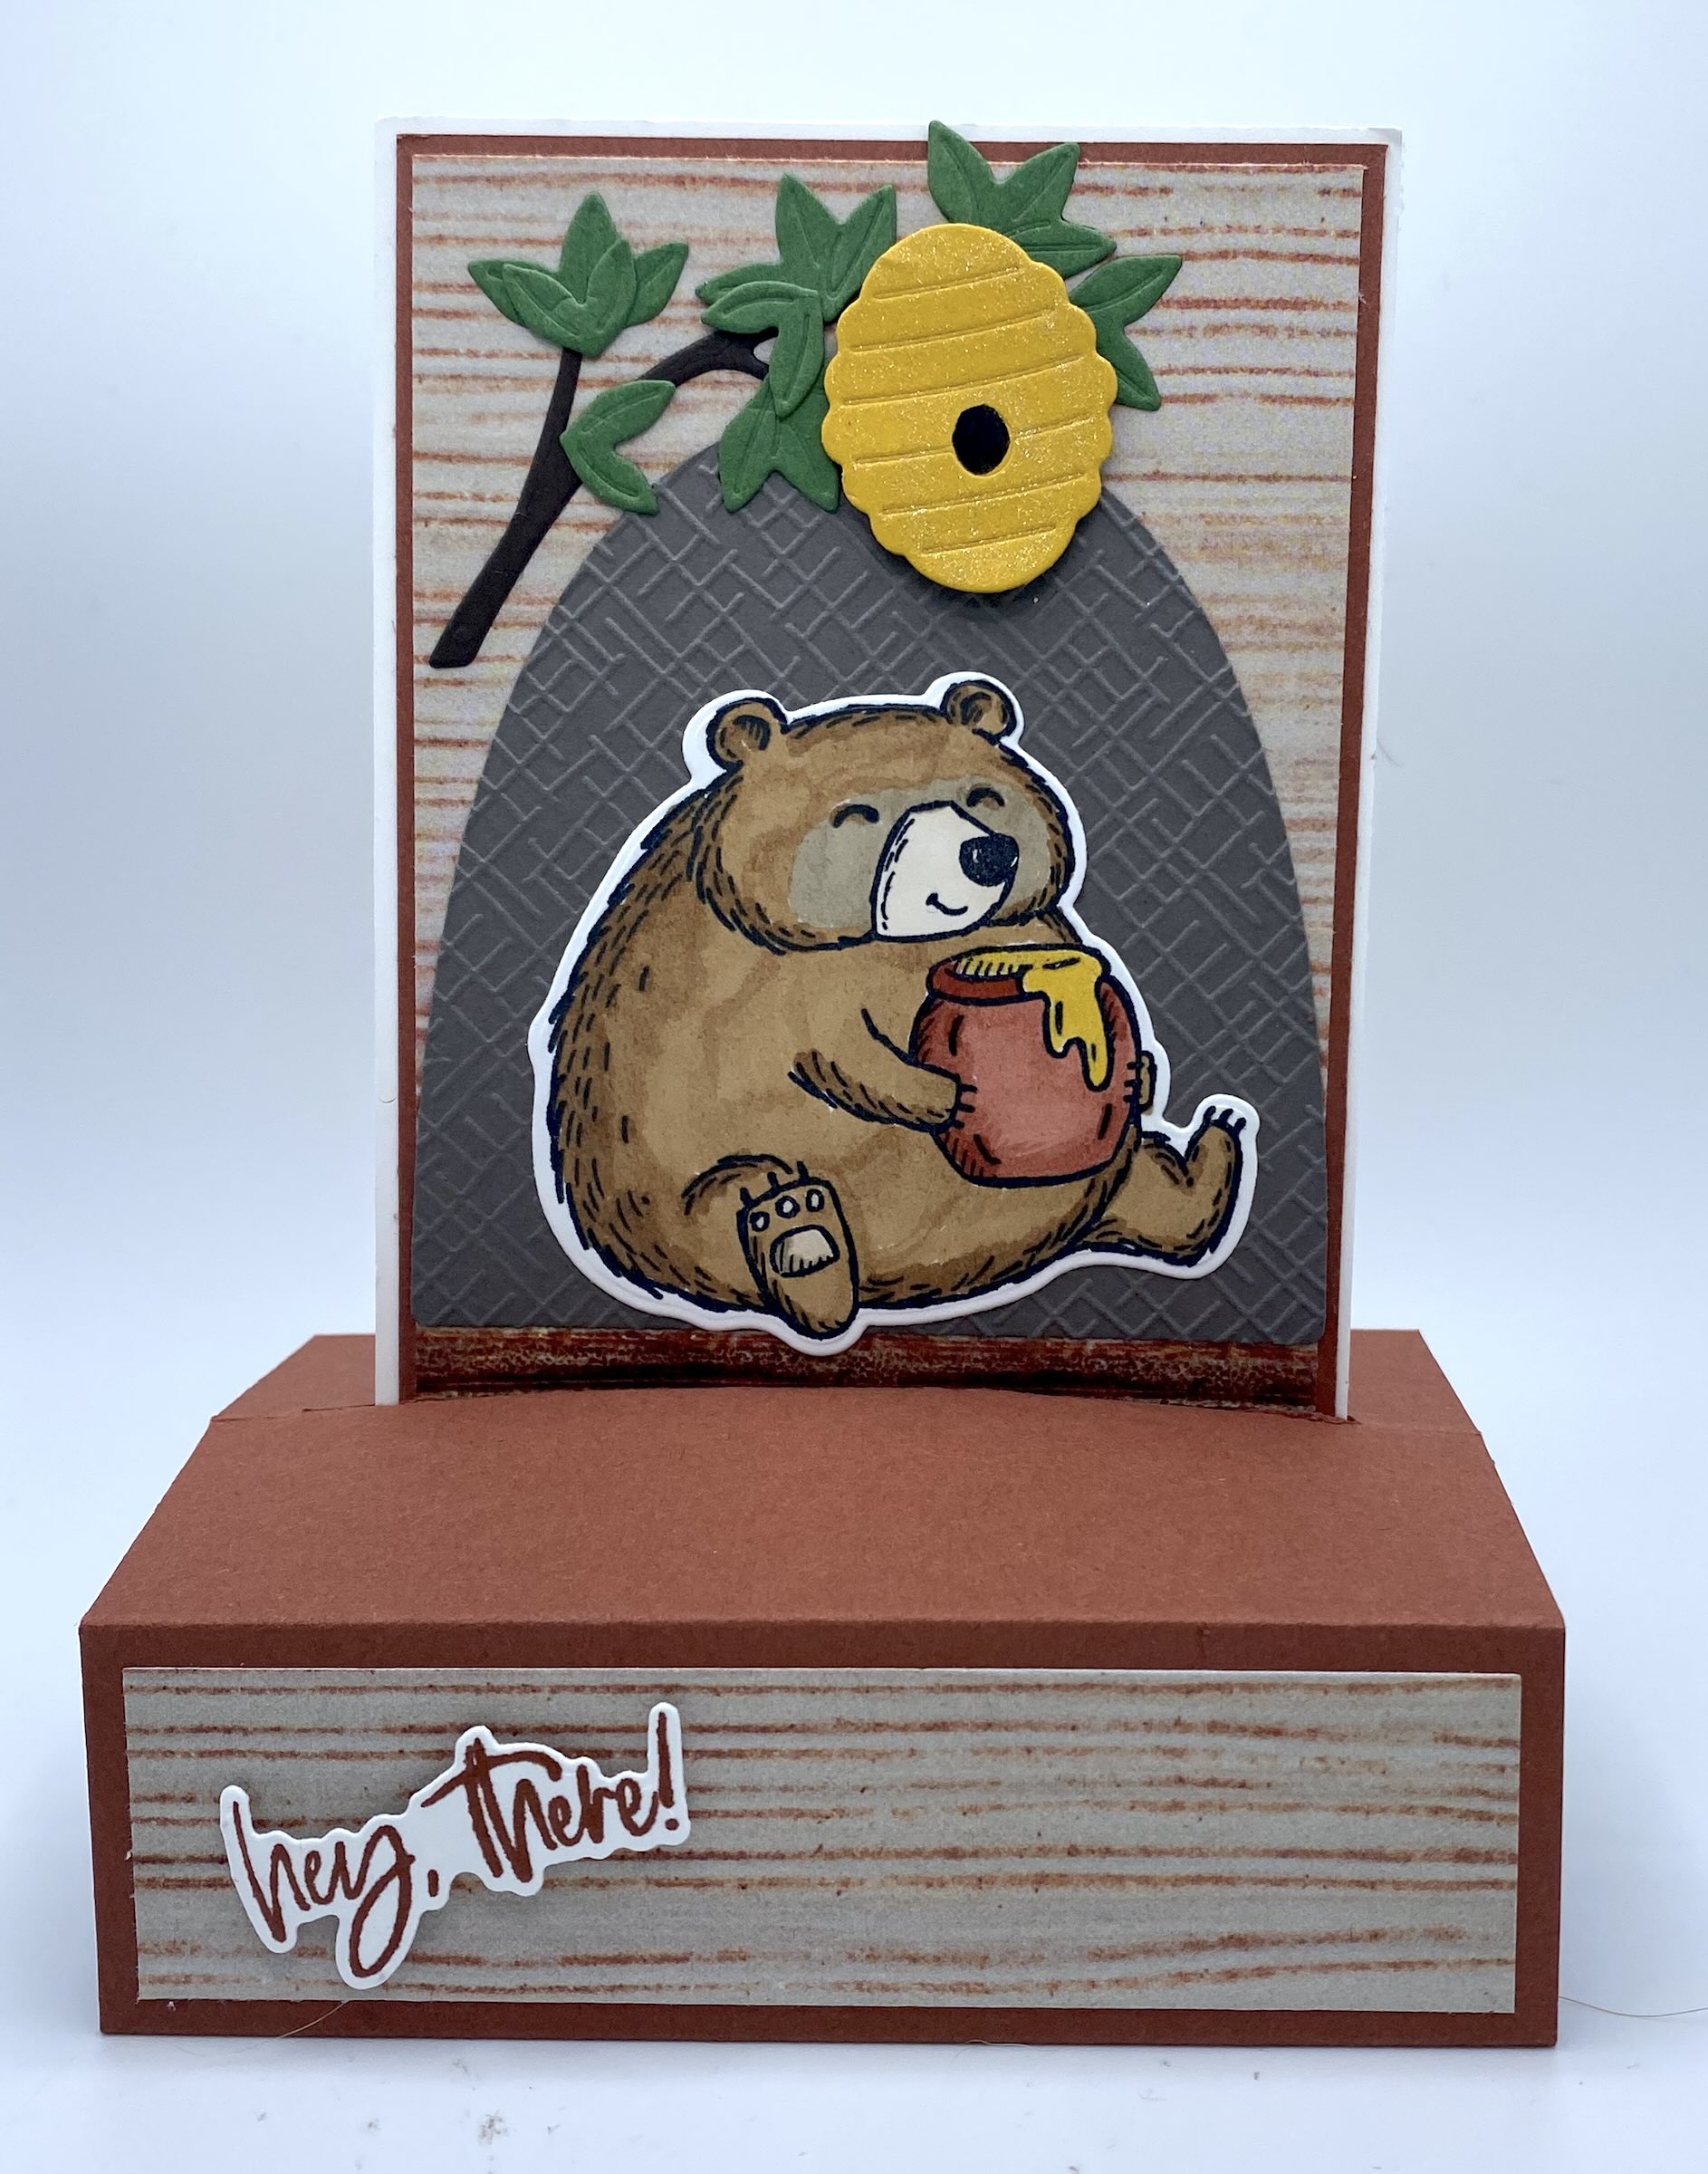

Look at this chubby little cubby! The new Fluffiest Friends Stamp Set available right now as an Online Exclusive is a set you will have so much fun with. There are so many cute critters in this set and when you purchase the bundle, you also get all the wonderful dies that make creating thoughtful cards a lot of fun!
This Interactive Pop Up Fun Fold is not complicated and you’ll love how it slides into itself to fit perfectly in an A2 envelope. It works for any occasion and makes a great masculine card design, too.
Here’s all you need to create this card!
Cutting/Scoring Instructions:
BASE (Copper Clay): 4 1/4″x10″, scored at 1 1/4″, 2 1/2″, 3 3/4″, 5″, 6 1/4″, 7 1/2″, and 8 3/4″; also, you’ll need to cut a slit on the 5″ score line that is 3 1/2″ wide. (This is where the card slides through)
DSP for Base front and back: 1″x4″ (x2)
IMAGE/CARD: Copper Clay 3 1/4″x5 1/2″; DSP 3 1/8″x 4 1/2″; Pebbled Path Bear Den Die Cut; Basic White for back 3 1/8″x 4 1/2″
ASSEMBLY: Cut and score your base; Fold your base in half at the 5″ score line; Measure out a 3 1/2″ slit centered on the 5″ score line for your card to slide through. Next, use your bone folder to crease each score line well. Set aside.
Assemble your Image/Card piece layering the DSP on one side of the Copper Clay and the Basic White on the opposite side (the back of your card). Stamp a message on the Basic White piece. Stamp your bear on Basic White and color it in using Alcohol Markers (I used Pecan Pie, Crumb Cake, Daffodil Delight, and Moody Mauve.) Use your Stampin’ Cut & Emboss Machine to die cut the bear, the bear den (Pebbled Path), a branch (Early Espresso), leaves (Garden Green), and the hive (Daffodil Delight). Emboss your bear den with a textured folder. Add all the die cut pieces to the front of your card. Use a couple dimensionals on the beehive to make it pop out.
Fold up the first panel of your base and add a strong adhesive to that section. Lay the bottom edge of your card front to the edge of your panel and stick it down on the adhesive making sure it is centered so it will slide into the slits at the 5″ mark. Once it is adhered, bend the card a bit to slide it through the slit. Add a bit of strong adhesive to the front bottom of the card and now fold the other panel onto the front of your card. (This is how your card will be folded when it is in the envelope.). Add your two 1″x4″ panels to the middle sections on the front and back of the card. Add a message to the front panel if you wish. I stamped and die cut “Hey there” from the Charming Sentiments set and added a couple dimensionals.
Now, just pop up your card and try it out. Isn’t it adorable!
Please note, the above measurements are specifically for the card I created with the bear den. Since the den is 3″ wide, I needed to widen the card and the slit to accommodate everything. Below are the “normal” measurements for this fold.
If that isn’t cute enough, check out these other samples I created.
Here are the cutting/scoring measurements:
CUTTING/SCORING:
BASE is the same 4 1/4″x10″, scored at 1 1/4″, 2 1/2″, 3 3/4″, 5″, 6 1/4″, 7 1/2″, and 8 3/4. Place a mark 1/2″ from each end of the 5″ slit and then slice between the marks to create a 3 1/4″ slit.
PANELS for BASE: DSP 1″x4″ (x2)
CARD: Colored Cardstock 2 3/4″x5 1/2″; Front/Back in Basic White 2 1/2×4 1/2″ (x2)


I hope you enjoy making this fun fold card and have fun designing your own creations! Please stop by my online shop for any supplies you may need. Every one of my customers is a VIP!
Thanks for stopping by and Happy Crafting!!

