

Have you seen the brand new 2024 Annual Catalog from Stampin’ Up? It’s just full of amazing new products. One of them really caught my eye…the Take to the Sky Suite is AMAZING! I knew I needed to grab it up and start creating. This suite of products is so much fun. The paper so super unique with planes, maps, texture patterns, and even tags. Pair them with your stamps, dies, and accoutrements and you’ve got a masterpiece in the making.
Let’s learn how to create a fun Buckle Fold Card using this fabulous suite of products. Of course, this fold works for any stamps and dies you want so keep this fold on hand whenever you want a simple to make fun fold.


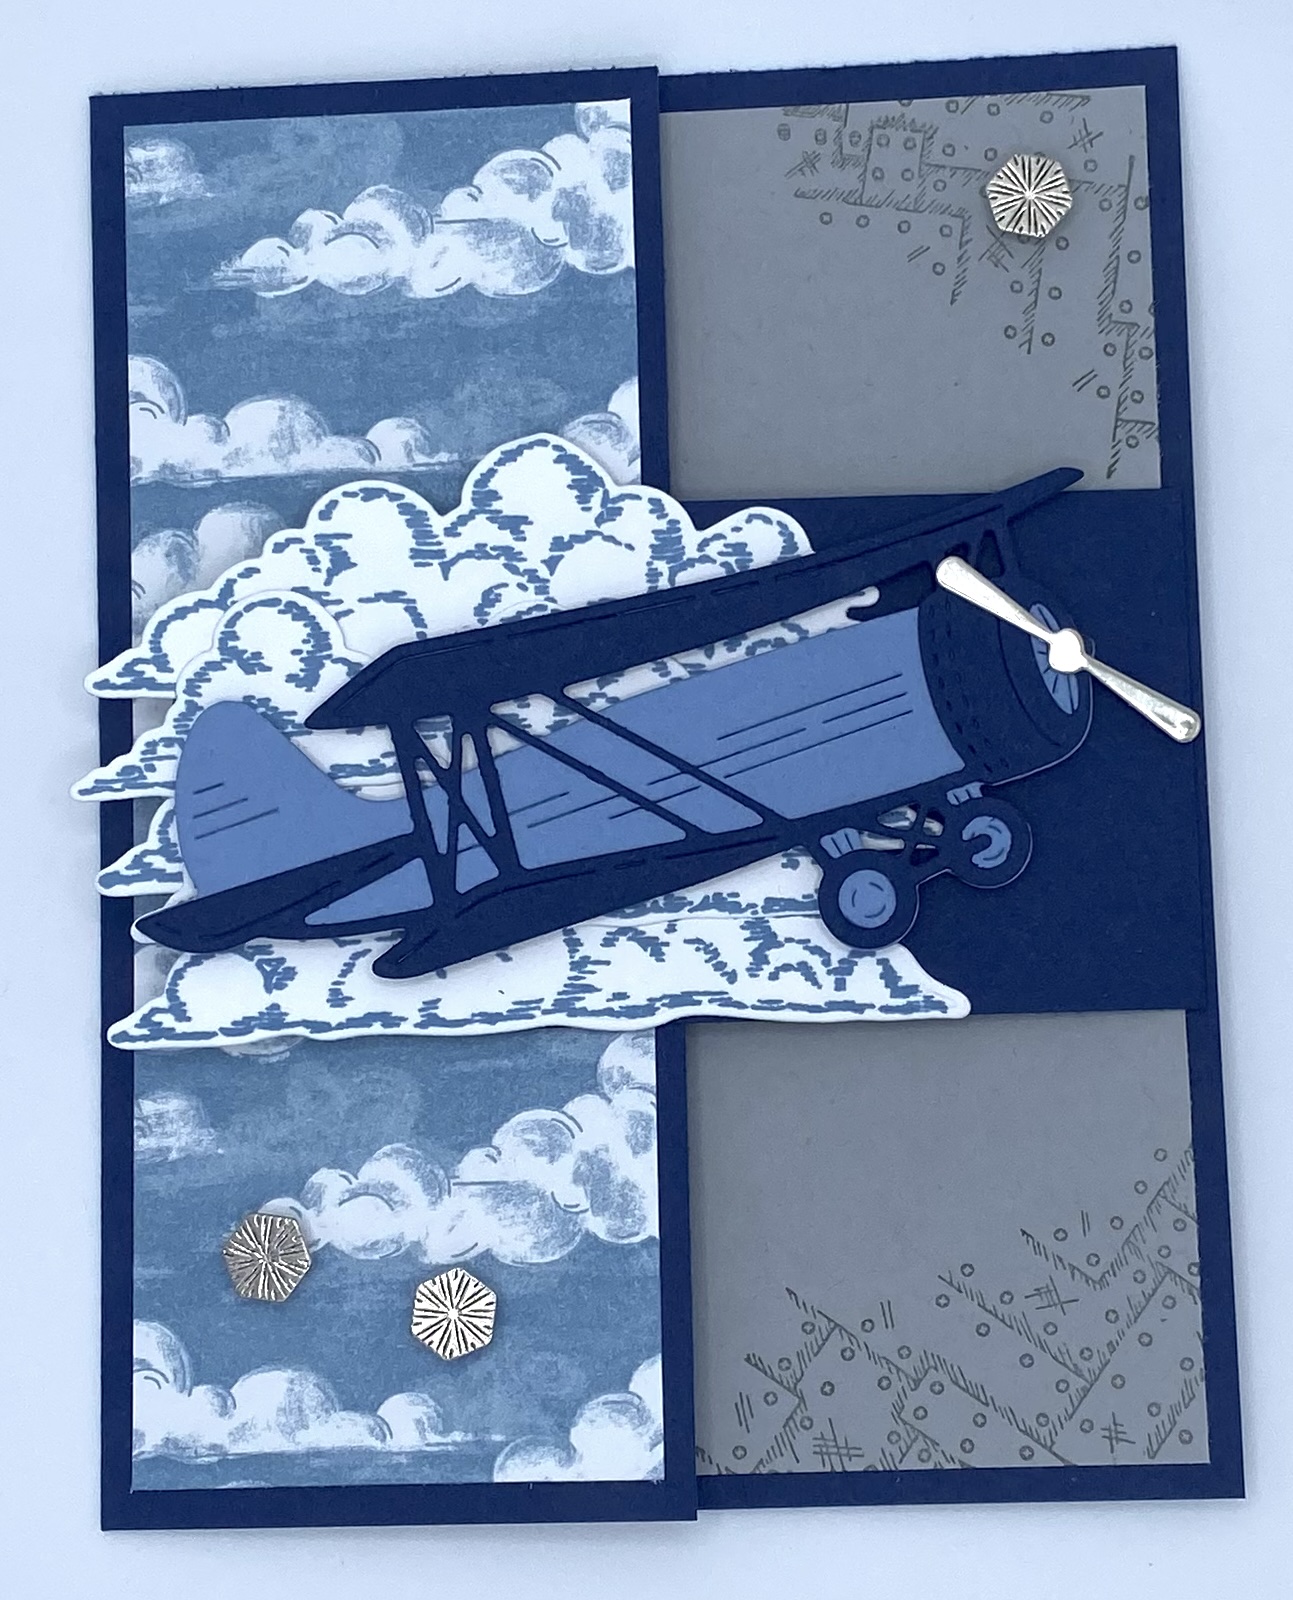
Here’s how to create this Buckle Fold Card.
CUTTING/SCORING:
BASE (Night of Navy): 8 1/2″ x 5 1/2″, score at 4 1/4″ and then cut off 2″ on one end.
BELT (Night of Navy): 2″ x 5 1/2″, score at 2 3/4″
INSIDE LAYER (Smoky Slate): 4″ x 5 1/4″
DSP (Take to the Sky): 2″ x 5 1/4″ (x2)
OTHER: Buckle (can be a circle, square, rectangle or even a punched out piece like I used and covered with clouds).
ASSEMBLY INSTRUCTIONS:
Grab your belt and glue the belt half onto the middle right of the base to create the flap the airplane will be attached to. Now it’s time to stamp your Smoky Slate inside layer so you can adhere that to the inside over the belt half. You can also adhere your DSP pieces to the short flap on the outside and on the inside. Next, die cut your airplane pieces (I used Boho Blue and Night of Navy) and assemble your airplane. Also, stamp and die cut your clouds (I stamped in Boho Blue). Decide what you want for your buckle; I used the modern oval punch because my buckle wouldn’t be showing since the clouds would be layered over it. Glue half of the oval (or whatever shape you used) onto the belt. Now you can layer the clouds onto that buckle. All that’s left is adding the airplane with some dimensionals and finishing your card off with some bling such as the Industrial Trinkets. See, I told you it was easy!
Here are some other examples!


On this card, I switched the cardstock to Copper Clay and Smoky Slate. I cut 2 different DSP pieces and placed one on the inside left this time, still leaving an area on the Smoky Slate to write on. The DSP looks so vibrant with it. I used the Deckled Circles Dies to cut out 2 circles. I stamped the Smoky Slate circle with the stamp with the metal design on it. Then, I stamped the larger airplane and colored it in with Copper Clay and Smoky Slate Alcohol Blends. The propeller was die cut from silver metallic cardstock. I used some Smoky Slate Pearls to embellish the card. TIP: run some Clear Wink of Stella over the whirring propeller image and it has a shiny look like it’s twirling!


This card was super simple. I used Mossy Meadow and Smoky Slate Cardstock. I cut out the airplane image on the front buckle from the DSP paper pack. I stamped it with “You’re the Best Plane & Simple” in Mossy Meadow and added the Industrial Trinkets. This one only took minutes to create!
So there’s a glimpse of some of the wonderful cards you can create with the Take to the Sky Suite. Don’t overlook this very unique set of products all new from Stampin’ Up!!
Happy Crafting!