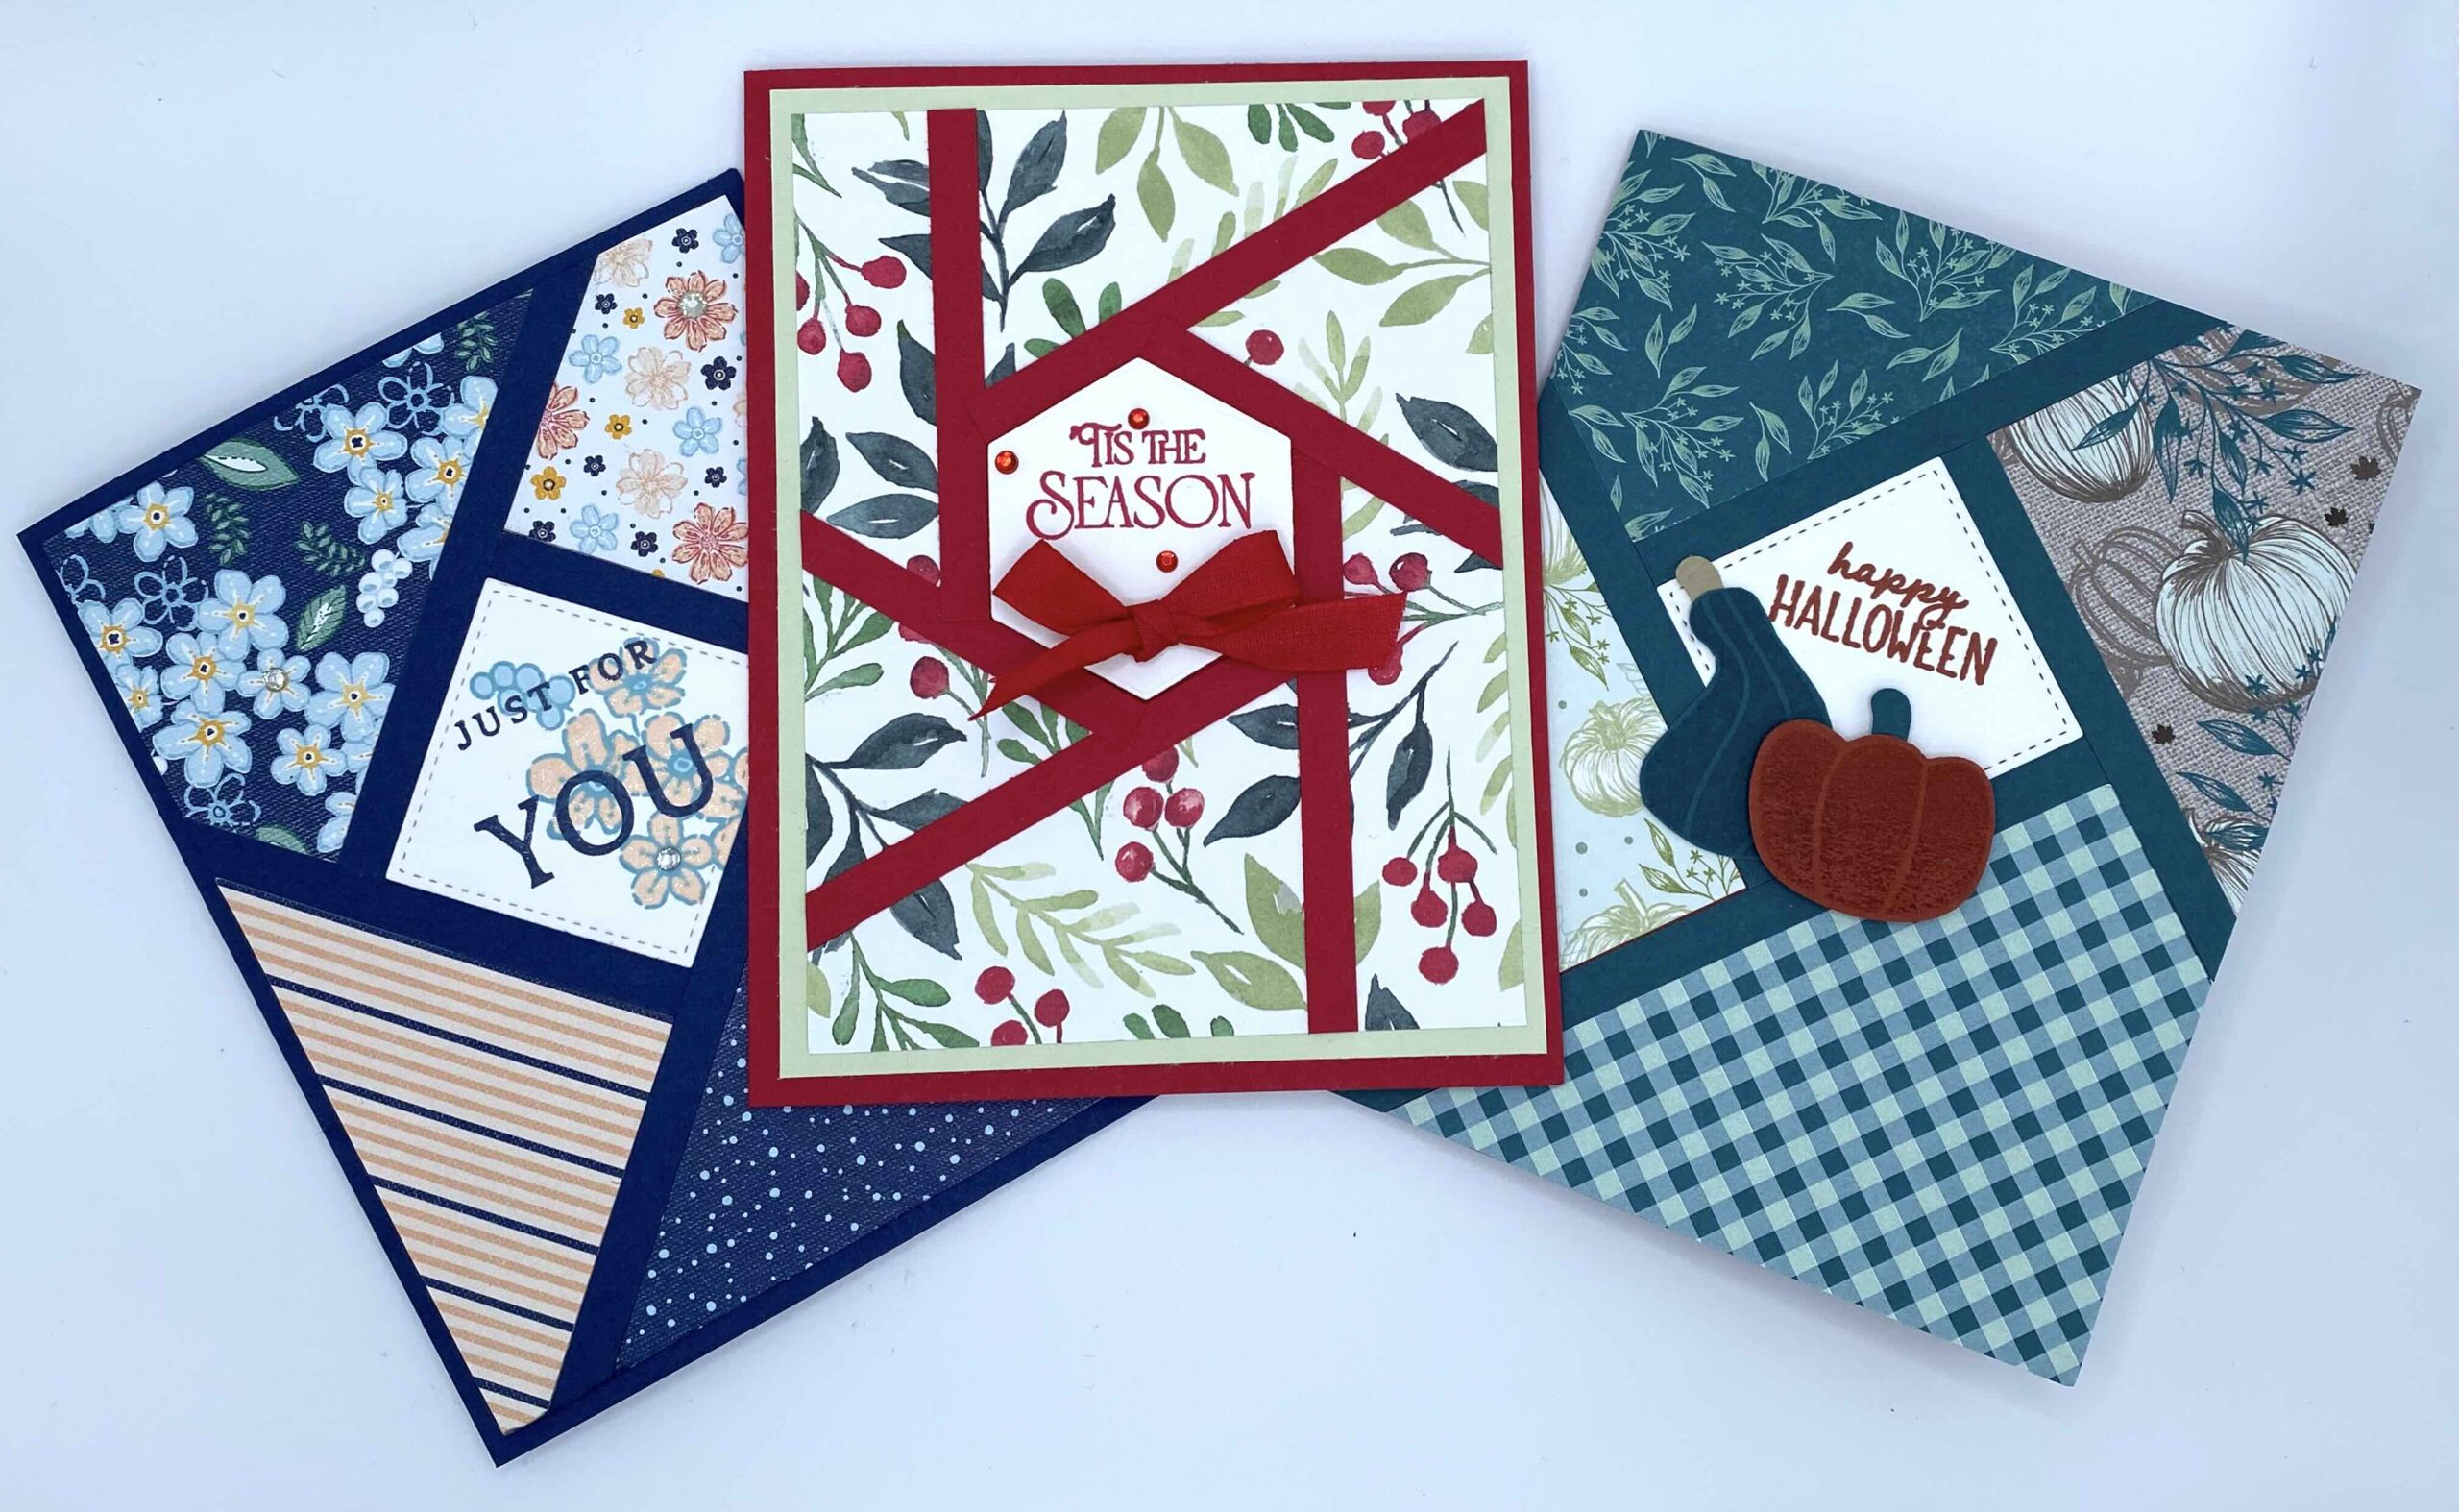
I love it when I try out something new that I’ve been admiring for a bit. I’ve seen this fun card and always loved the look so why not give it a try! It’s so easy and very versatile. I absolutely love how you can change up the shape in the middle to create different looks. Whether you use one solid sheet of DSP on the front of go crazy with lots of different DSP scraps, each of your cards is a work of art.

This card is a great way to use your DSP scraps. If you’re anything like me, you might be a scrap hoarder (yes, it’s a problem!!) and this is such a satisfying way to use those scraps. Since Stampin’ Up coordinates everything, it’s a great way to make a perfectly coordinated work of art. Let’s see how it’s made.
The card in my video was created using the gorgeous Regency Park Suite. I love the paper so much! Pair it with Night of Navy and Petal Pink coordinated paper, ink and markers for a perfect match.
INSTRUCTIONS:
BASE: 5 1/2″x8 1/2″, scored at 4 1/4″
LAYER: 5 1/4″x4″ (this goes on the front of the base, under the DSP)
Fracture Strips: you can make these any width; I used 1/4″ for my card. Cut as many strips as you have edges on your center shape (4 for a square/diamond, 6 for a polygon, etc). The strips just need to go past the edge of your base.
Die cut the shape you desire for your card….just make sure it’s a straight sided shape.
INSIDE LAYER: 5 1/4″ x 4″ and 5 1/8″ x 3 7/8″, depending on if you want to use two layers in different colors. If just using one layer then just cut the 5 1/4″ x 4″ piece.
Designer Series Paper for the front. If using a square or rectangle, you can use scrap pieces of varying designs. **If using a polygon, hexagon, etc., with lots of sides, use a single piece of 5″x3 3/4″ DSP and add the center shape and cardstock strips to the top of the single piece of DSP instead of using lots of DSP strips.
ASSEMBLY: Cut, score and crease your base with the bone folder to give it a good fold; set aside. Die cut your shape for the middle and stamp your sentiment on it and set aside. Cut your layer piece for the front of the card. Adhere your stamped shape to the middle area of the card (it doesn’t have to be perfectly in the center.). Next, start gluing down your strips around the middle shape. The strip should start at the edge of one side of your center shape and then run off the edge of the card. Use liquid glue to add a straight line of glue from the edge of the shape to the edge of your paper and then add your strip. Keep doing that around the shape until all the sides are finished. Next, lay your DSP pieces in place where you them to make sure you’re happy with the patterns. Then glue down each piece in between the cardstock strips. Once your liquid glue is set, flip the cardstock layer over and cut off the excess DSP and strips. Now you just have to adhere the finished layer to the card base. Stamp your inside sentiment and adhere that piece to the inside of the card. All that’s left is embellishments! A ribbon bow, some gems or sequins and you have a beautiful work of art!! Cool card, huh?


What I love about this card design is that it can be made to match any mood by simply by changing up the paper. It’s simple but packs quite a wow factor on the front!
I hope you enjoy making this Fractured Front Panel Card! If you need any supplies, please visit my online store. Also, check out my other YouTube videos for more fun folds and card layouts I know you’ll enjoy.
Thank you!!

