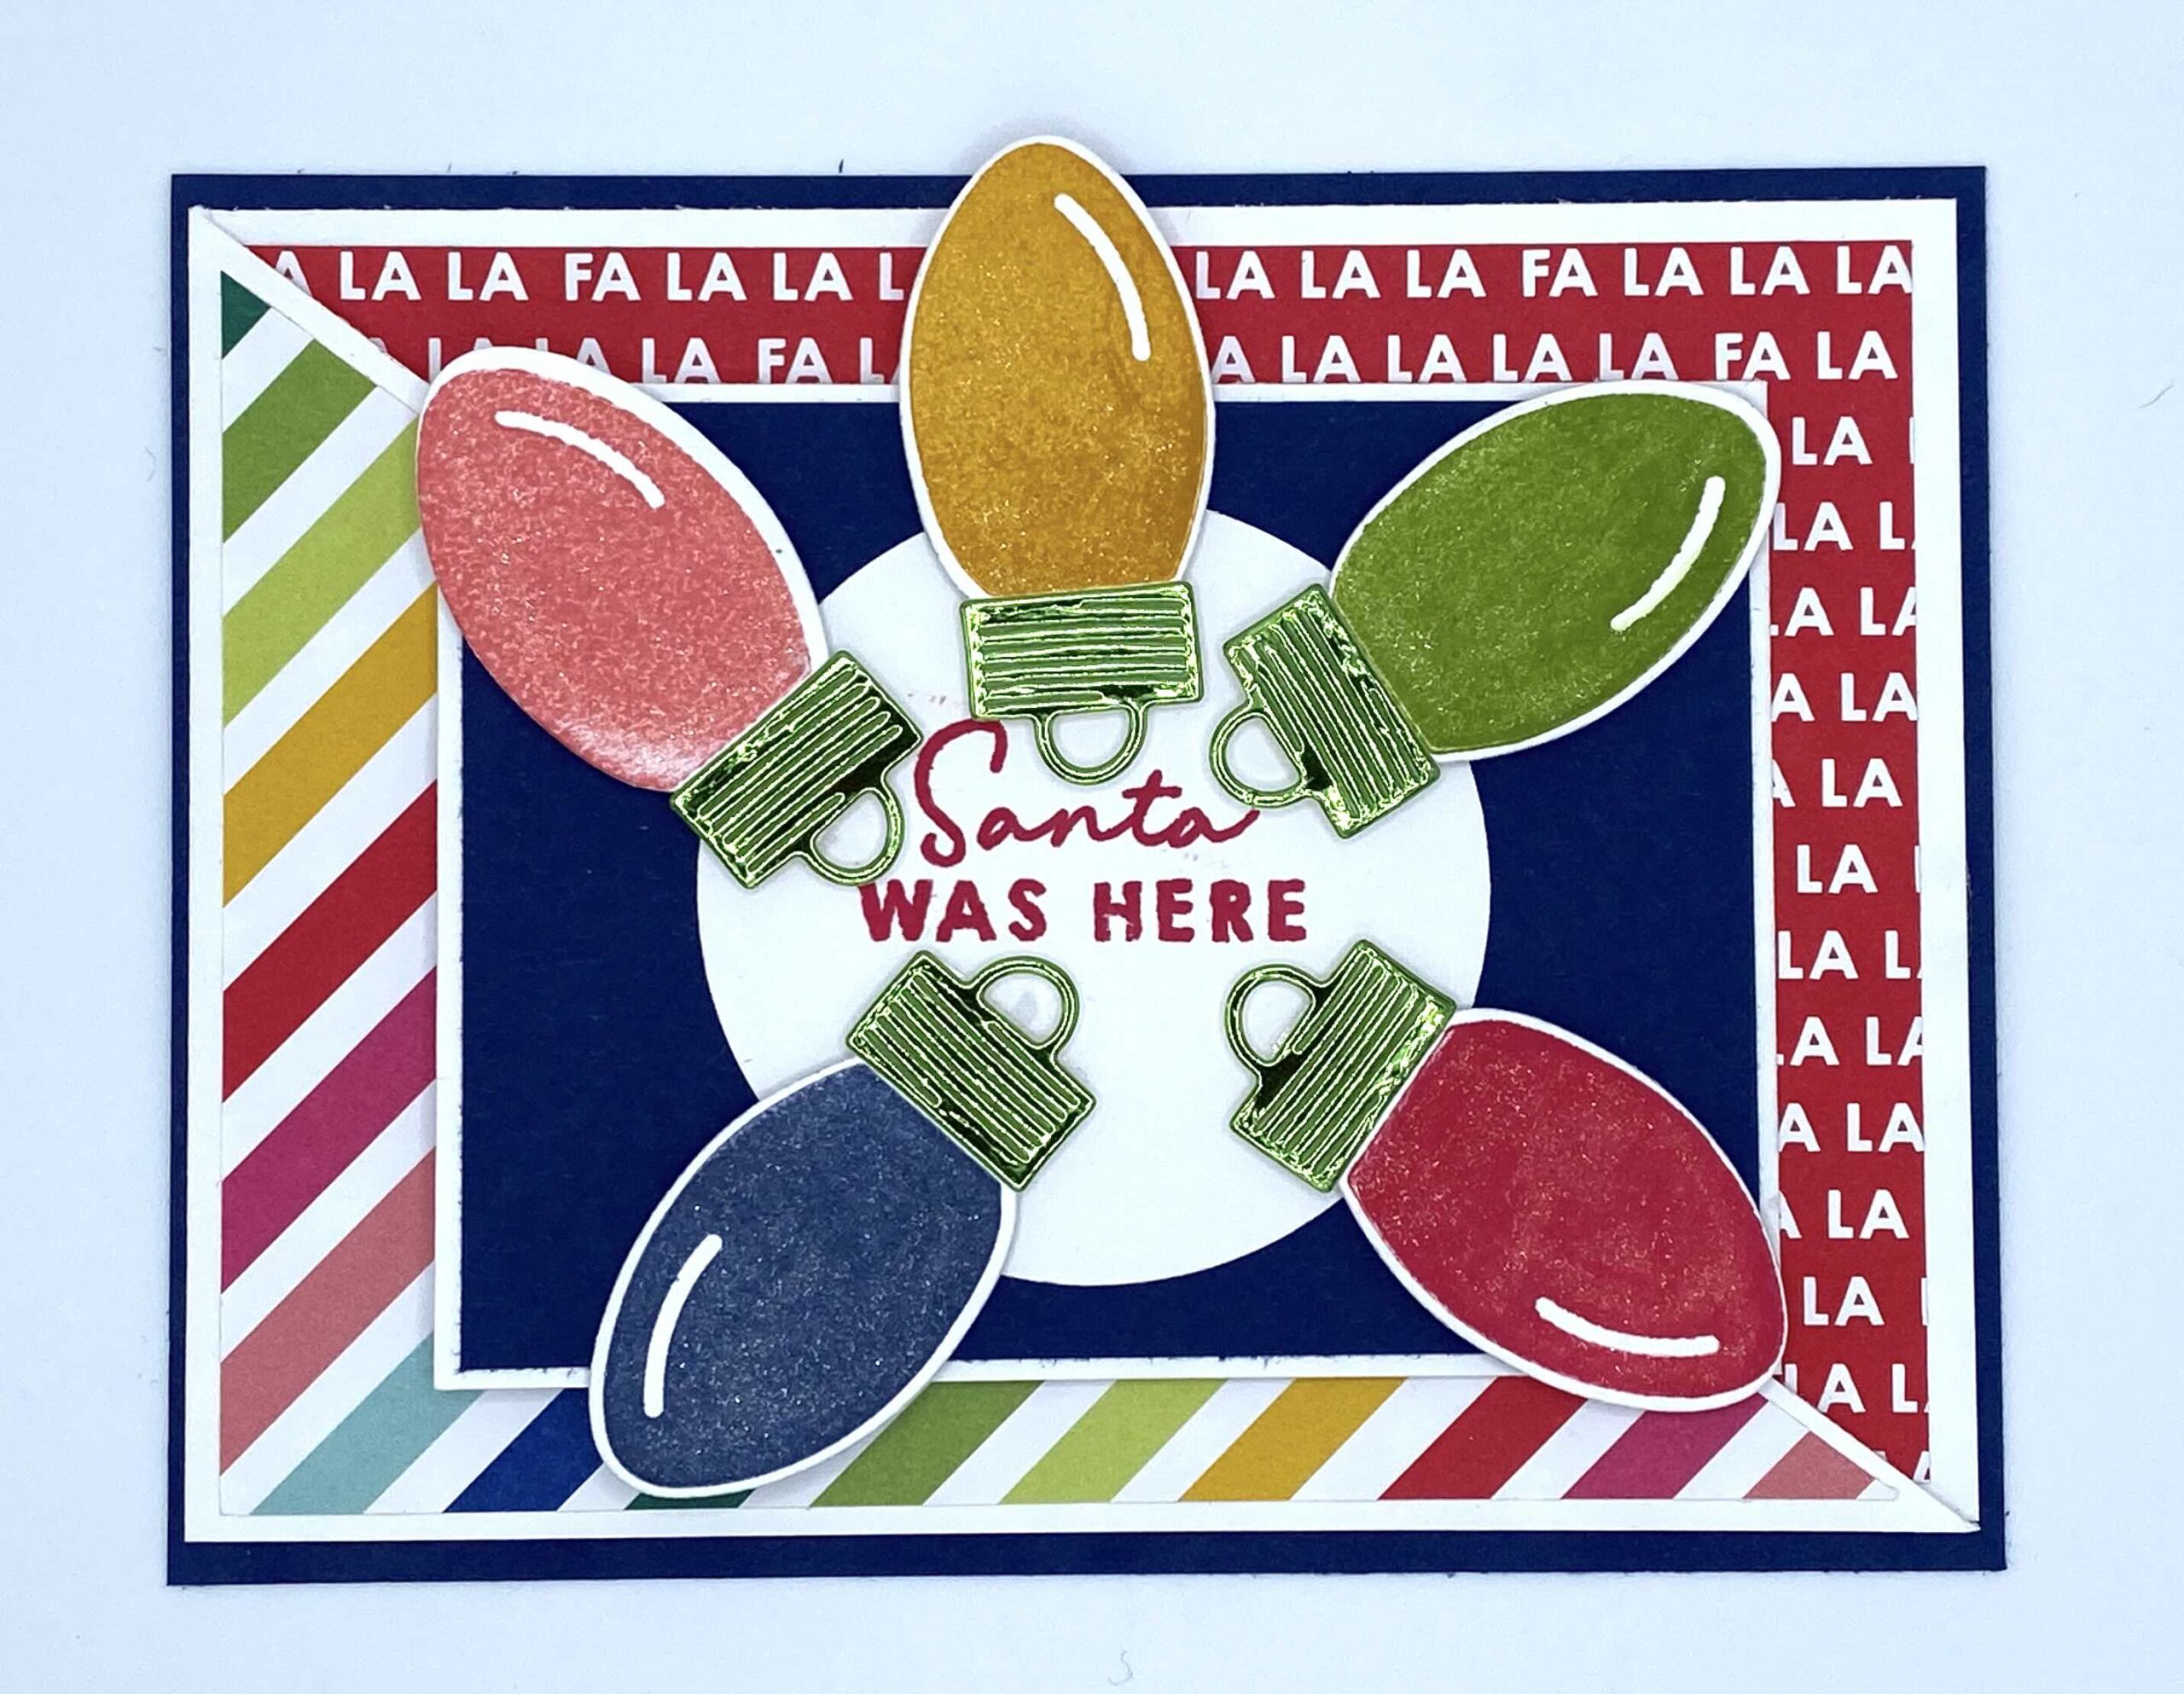
Here’s a diagonal spin on last week’s Joy Fold Card. Same card with a little extra pizzazz! I love when you can learn a fun fold and then also learn a couple variations on that same basic design. And, this fold can also be created so it’s in a portrait layout rather than landscape…so it’s very versatile. Joy Fold, Diagonal Joy Fold, Portrait, Landscape, lots of layers, fewer layers…the design is all your own!


I just can’t seem to get enough of the Merry & Bright Suite. Stampin’ Up did such a great job of putting vibrant colors together in the gorgeous Designer Series Paper. I also love the Granny Apple Green and Melon Mambo metallic paper pack….those shiny papers make great accent pieces. In this card, I paired up my ink colors to match the stripes on the DSP…Night of Navy, Crushed Curry, Flirty Flamingo, Real Red and Granny Apple Green inks bring it all together. You have tons of options!!
Here is everything you need to know to create your own Merry & Bright Masterpiece!
INSTRUCTIONS (using the Night of Navy back panel):
BACK PANEL (Night of Navy): cut 4 1/2″x5 1/2″
BASE (Basic White): 4″x10 3/4″, score at 5 3/8″, fold in half and cut front panel at a diagonal from top of the score line to the bottom right corner
Designer Series Paper Layers: INSIDE LAYER (red FALALALALALALALALA) cut 3 7/8″x5 1/8″; OUTSIDE LAYER (Stripes) cut 3 3/4″x5″ and cut diagonally
MIDDLE CARD (Basic White): 3″x8″, score at 4″
LAYER FOR MIDDLE CARD (Night of Navy): 2 3/4″x3 3/4″
OTHER: Die cut shape (such as a circle) for front sentiment; various die cuts (such as bulbs); embellishments, ribbon, clear Wink of Stella, etc.
ASSEMBLY: Fold your card base and burnish your crease line with your bold folder. Use liquid glue to attach the base to the Night of Navy back panel. Adhere your inside layer (red FALALALALALALALALA DSP) to base and also outside triangular layer (stripes) to base.
Stamp your middle card with a sentiment. **Remember that this card opens in the opposite direction as the base. Add the Night of Navy layer to the top. Adhere the middle card to the card base.
Stamp your greeting on your die cut shape (circle) and adhere that shape to the front of the middle card. Then decorate with your bulbs, ribbon, Wink of Stella, etc.
If you choose to have a card without the back layer, here are the cutting and scoring dimensions:
BASE (Basic White): 4 1/4″x11″, score at 5 1/2″, fold in half and cut front panel at a diagonal from top of the score line to the bottom right corner
Designer Series Paper Layers: INSIDE LAYER (red FALALALALALALALALA) cut 4″x5 1/4″; OUTSIDE LAYER (Stripes) cut 4″x5 1/4″ and cut diagonally
MIDDLE CARD (Basic White): 3″x8″, score at 4″
LAYER FOR MIDDLE CARD (Night of Navy): 2 3/4″x3 3/4″
OTHER: Die cut shape (such as a circle) for front sentiment; various die cuts (such as bulbs); embellishments, ribbon, clear Wink of Stella, etc.
Now for the other samples. As you can see, you can make this fold work for any mood!


This card uses the Irresistible Blooms Suite. I used a Flirty Flamingo Base, Granny Apple Green for the die cut leaves, Daffodil Delight for the die cut branches, and die cut the flowers from the Designer Series Paper and used the DSP for the layers on the inside and outside of the base. I also used matching ink to stamp my greetings. Super simple, minimal stamping one, but so, so pretty!


This card showcases the versatility of the Cheerful Daisies Suite of products. I used a Crushed Curry base and only added an outside layer of DSP. For the middle card, I stamped the Daisies and leaves using Early Espresso, Crushed Curry and Garden Green ink to match the DSP on the front. I added a die cut tag from the coordinating dies and layered it on a tag I punched out using Early Espresso cardstock. I also added an Early Espresso ribbon to pull it all together.
This layout was super fun and I know it will work for any occasion and any mood. I hope you get a chance to play with this fun fold and create your own masterpiece!
If you need any of the supplies shown in these cards, please stop by my online shop. Also, don’t forget to check out my YouTube video and channel and please hit the subscribe button so you won’t miss the videos I post every Wednesday! Thank you so very much for being here with me! I hope you get some time to craft today!
Thank you for your time!

