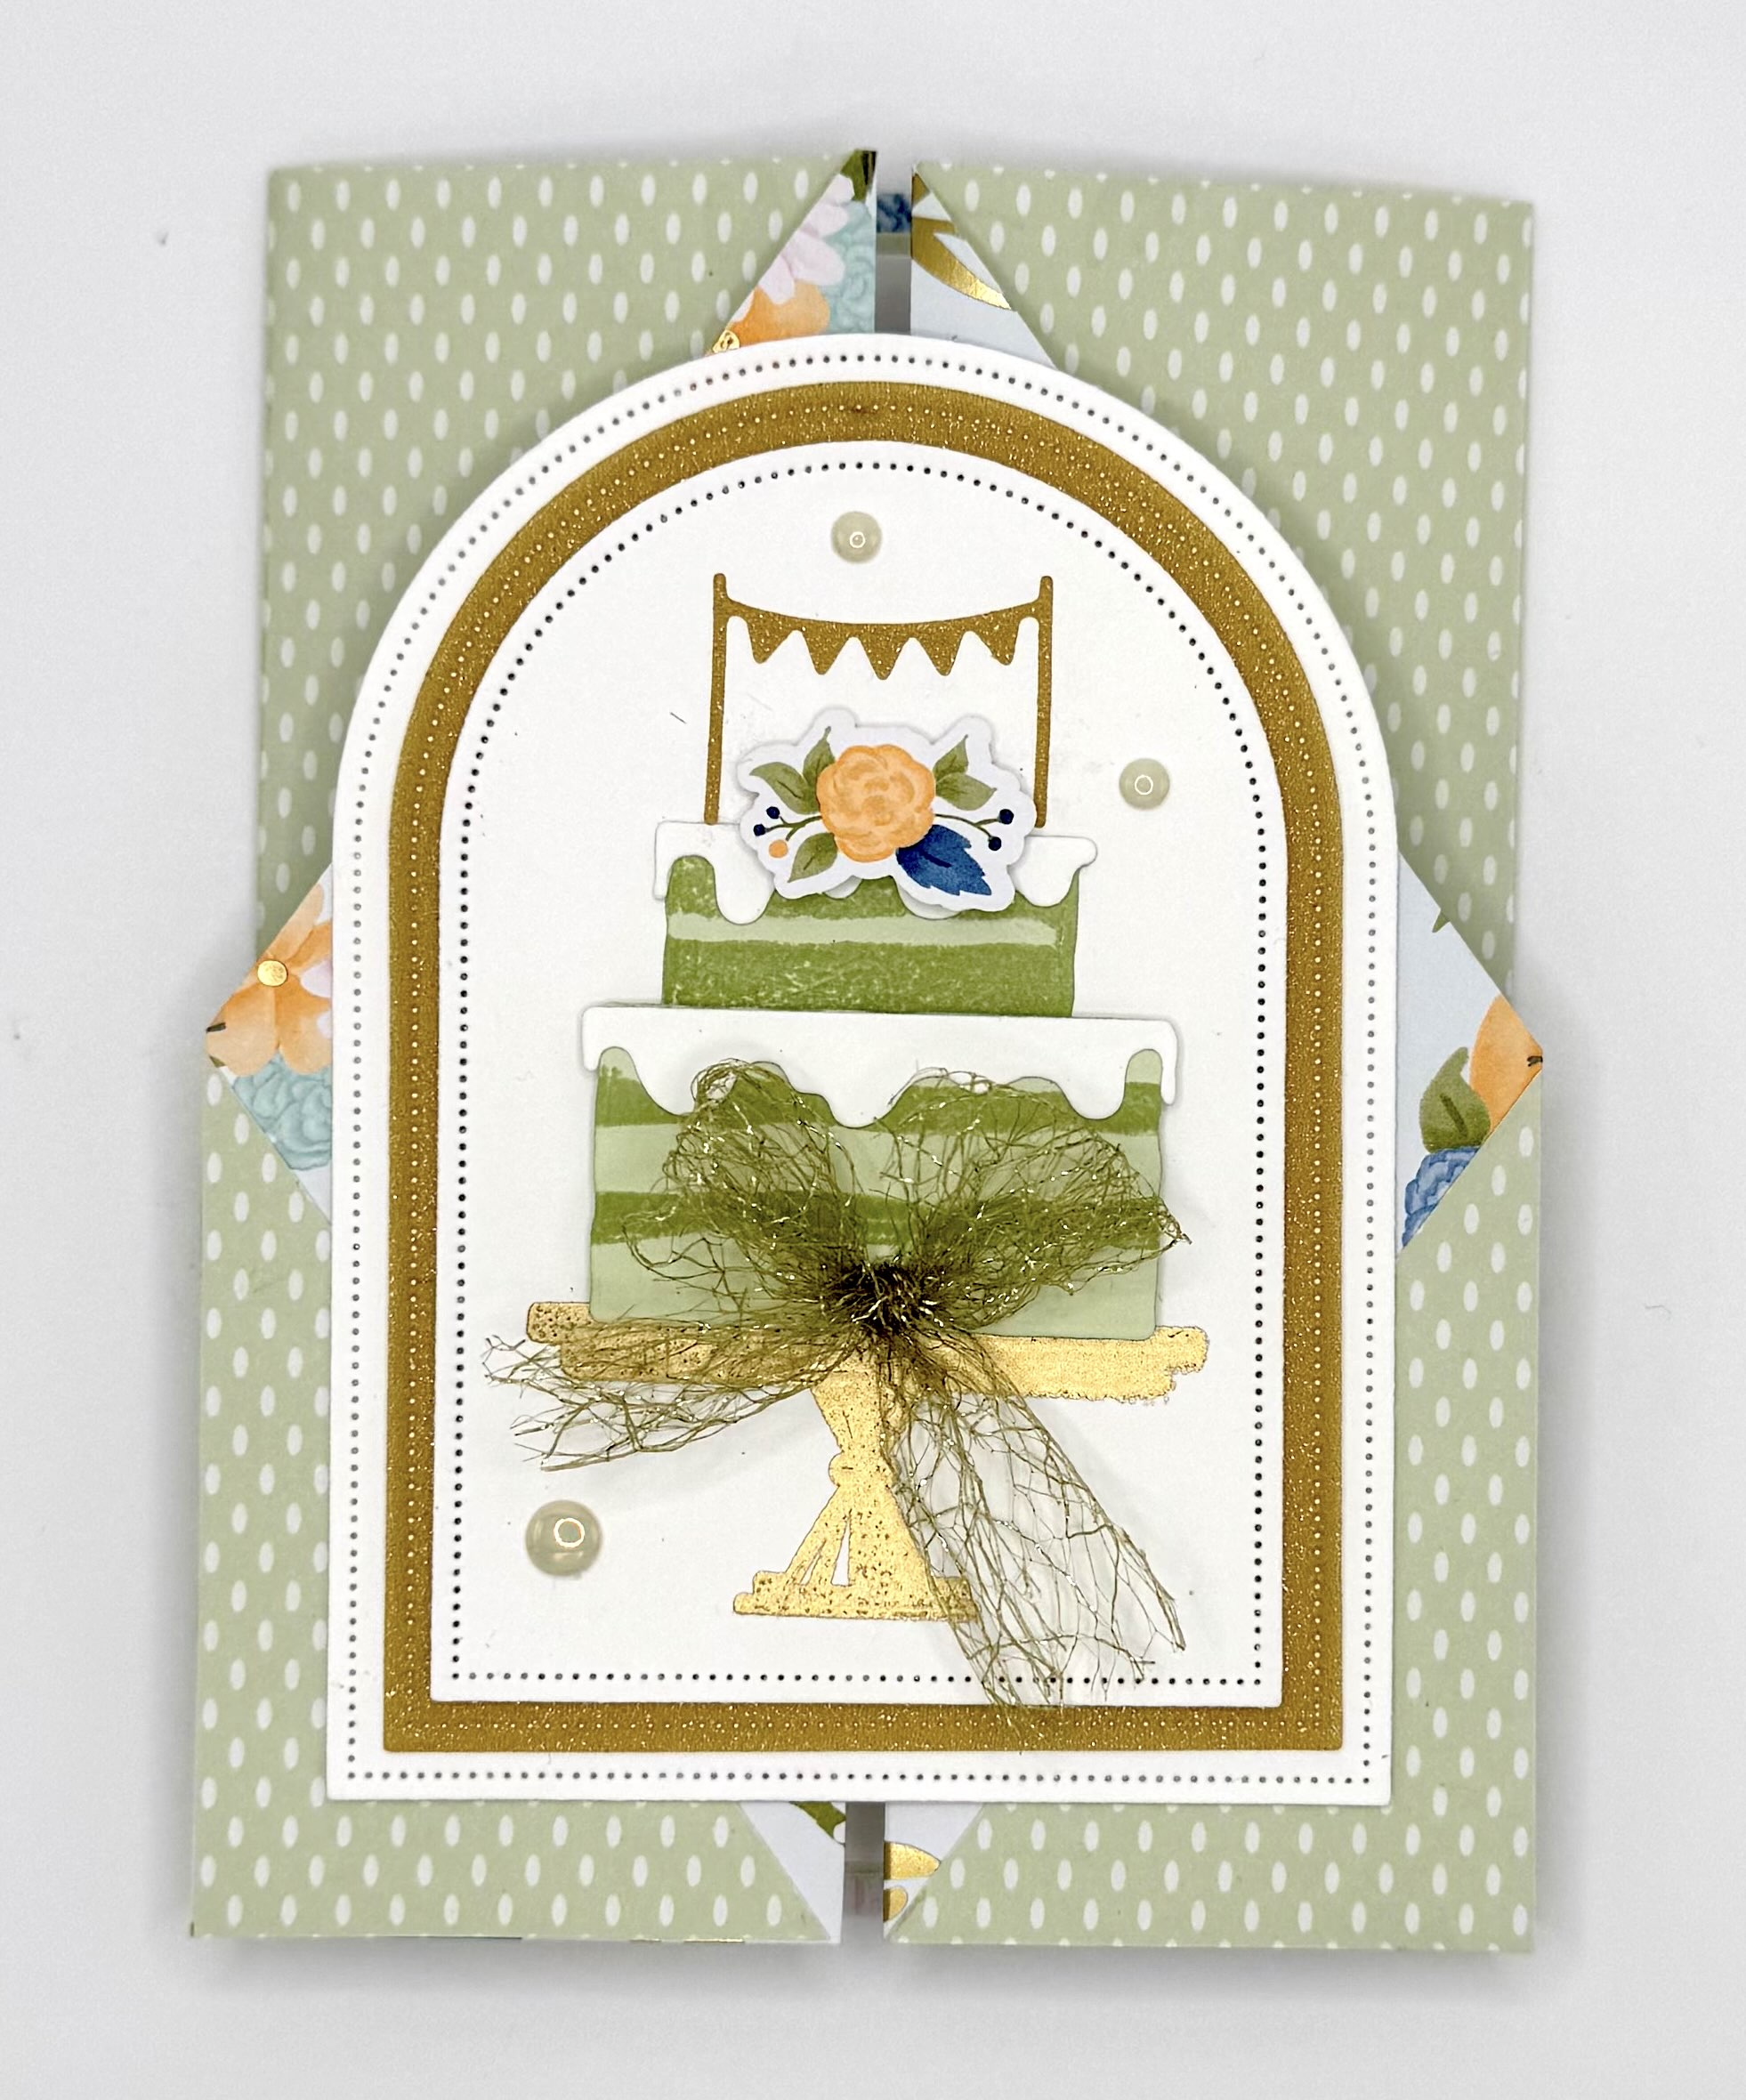
Don’t you just love a fun fold that is easy, but looks intricate! This one is exactly that. It’s a simple fold that utilized vibrant Designer Series Paper to make it look fancy. You spend just a few minutes cutting, scoring and folding and then focus on stamping, die cutting and embellishing…the fun part!! My inspiration for this card came to me while planning a really pretty card for my mom’s birthday. Happy Birthday, Mom!!


For this beautiful card, I used the Cake Celebrations Stamp set and coordinating dies…it’s a new Online Exclusive. I also used the new Wildflower Birthday Designer Series paper from the Mini Catalog. That paper pairs with the Birthday Celebrations Stamp set, but it also works perfect with Cake Celebrations! I love a good mix and match swaportunity! I used Soft Sea Foam and Basic White cardstock for the inside layers. To create the arched shapes on the front of the card, I die cut two white pieces and a piece of Gold Shimmer Vellum using the Everyday Arches Dies (they pair with the Everyday Arches stamps)..another new Online Exclusive AND another mix and match opportunity. I love those dies because they’re so versatile. I stamped in Soft Sea Foam and Pecan Pie and embossed the cake stand in Gold Embossing Powder. Don’t forget your embellishments. I added some Antique Pearl gems and a Gold Open Weave Trim bow.
CUTTING/SCORING
BASE: (Wildflower Birthday DSP) 5 1/2″x12″, score at 2″, 4″, 8″ & 10″ *see template below for cutting
INSIDE LAYERS: (Soft Seafoam). 3 3/4″x5 1/4″; (Basic White) 3 5/8″x 5 1/8″
FRONT LAYERS: **Use any die shape or simply cut rectangles in the size you desire.
TEMPLATE: **use the triangles you cut away for the bottom front of your card base!


This is the card I made for my mom for her birthday. She’s going to love it. I used the same Designer Series Paper and changed up the decorations. I layered Pretty in Pink Cardstock on the inside layer. I love the prepunched dies included in the paper pack…it makes the cards extra fancy! The only difference on this card is the inside. Since I know I’ll write a lot more in her card, I created a card inside the card. To do this, I cut my normal color layer and basic white layer per the instructions, but added a basic white card underneath..it’s 3 3/4″x10 1/2″, scored at 5 1/4. Super simple addition to the card but adds a special touch.


This cute card utilizes those amazing free products from the Sale-A-Bration Catalog. I used the Bloom Impressions 12×12 DSP and the Pick A Season stamps…both free! The layers are Basic White and Peach Pie to match the paper. I also stamped in Shy Shamrock. I used the sentiments from Documenting the Day – another Sale-A-Bration set but since the word DAY was too big to fit this panel, I used the Mini Alphabet Dies to spell DAY instead. These are some great products that will only be around through February so grab them up while you can. Documenting the Day is great for scrapbookers as well!


This card might just be my favorite – mostly because of all the bright colors. This card showcases the Friends of the Ocean Suite of products. I LOVEEEE the DSP…it’s so vibrant and fresh! I also used the Soft Waves 3D Embossing Folder that is part of the suite for the front of the card. My layers are Summer Splash and Basic White. I stamped in Melon Mambo, Lemon Lime Twist, Summer Splash and Pumpkin Pie. I had so much fun layering my scene.
So there you have it! 4 cards with lots of brand new products. Check out the new Mini Catalog and coordinating Sale-A-Bration catalog. There are so many great new product in there. Also there are some fabulous new Onine Exclusives as well. One thing I love about Stampin’ Up is their constant release of new, fun, vibrant and versatile products. You don’t want to wait for one catalog of new products each year- new treasures are always appearing.
Happy Crafting!!


2 responses to “How to Make a Fancy Gatefold with Cake Celebrations”
•
Lovely card, and I plan on casing it if that is ok with you. I make around 200 cards per year as packages of 10 to give as gifts at Christmas time.
•
I’m honored! Thanks for the kind words and happy crafting!