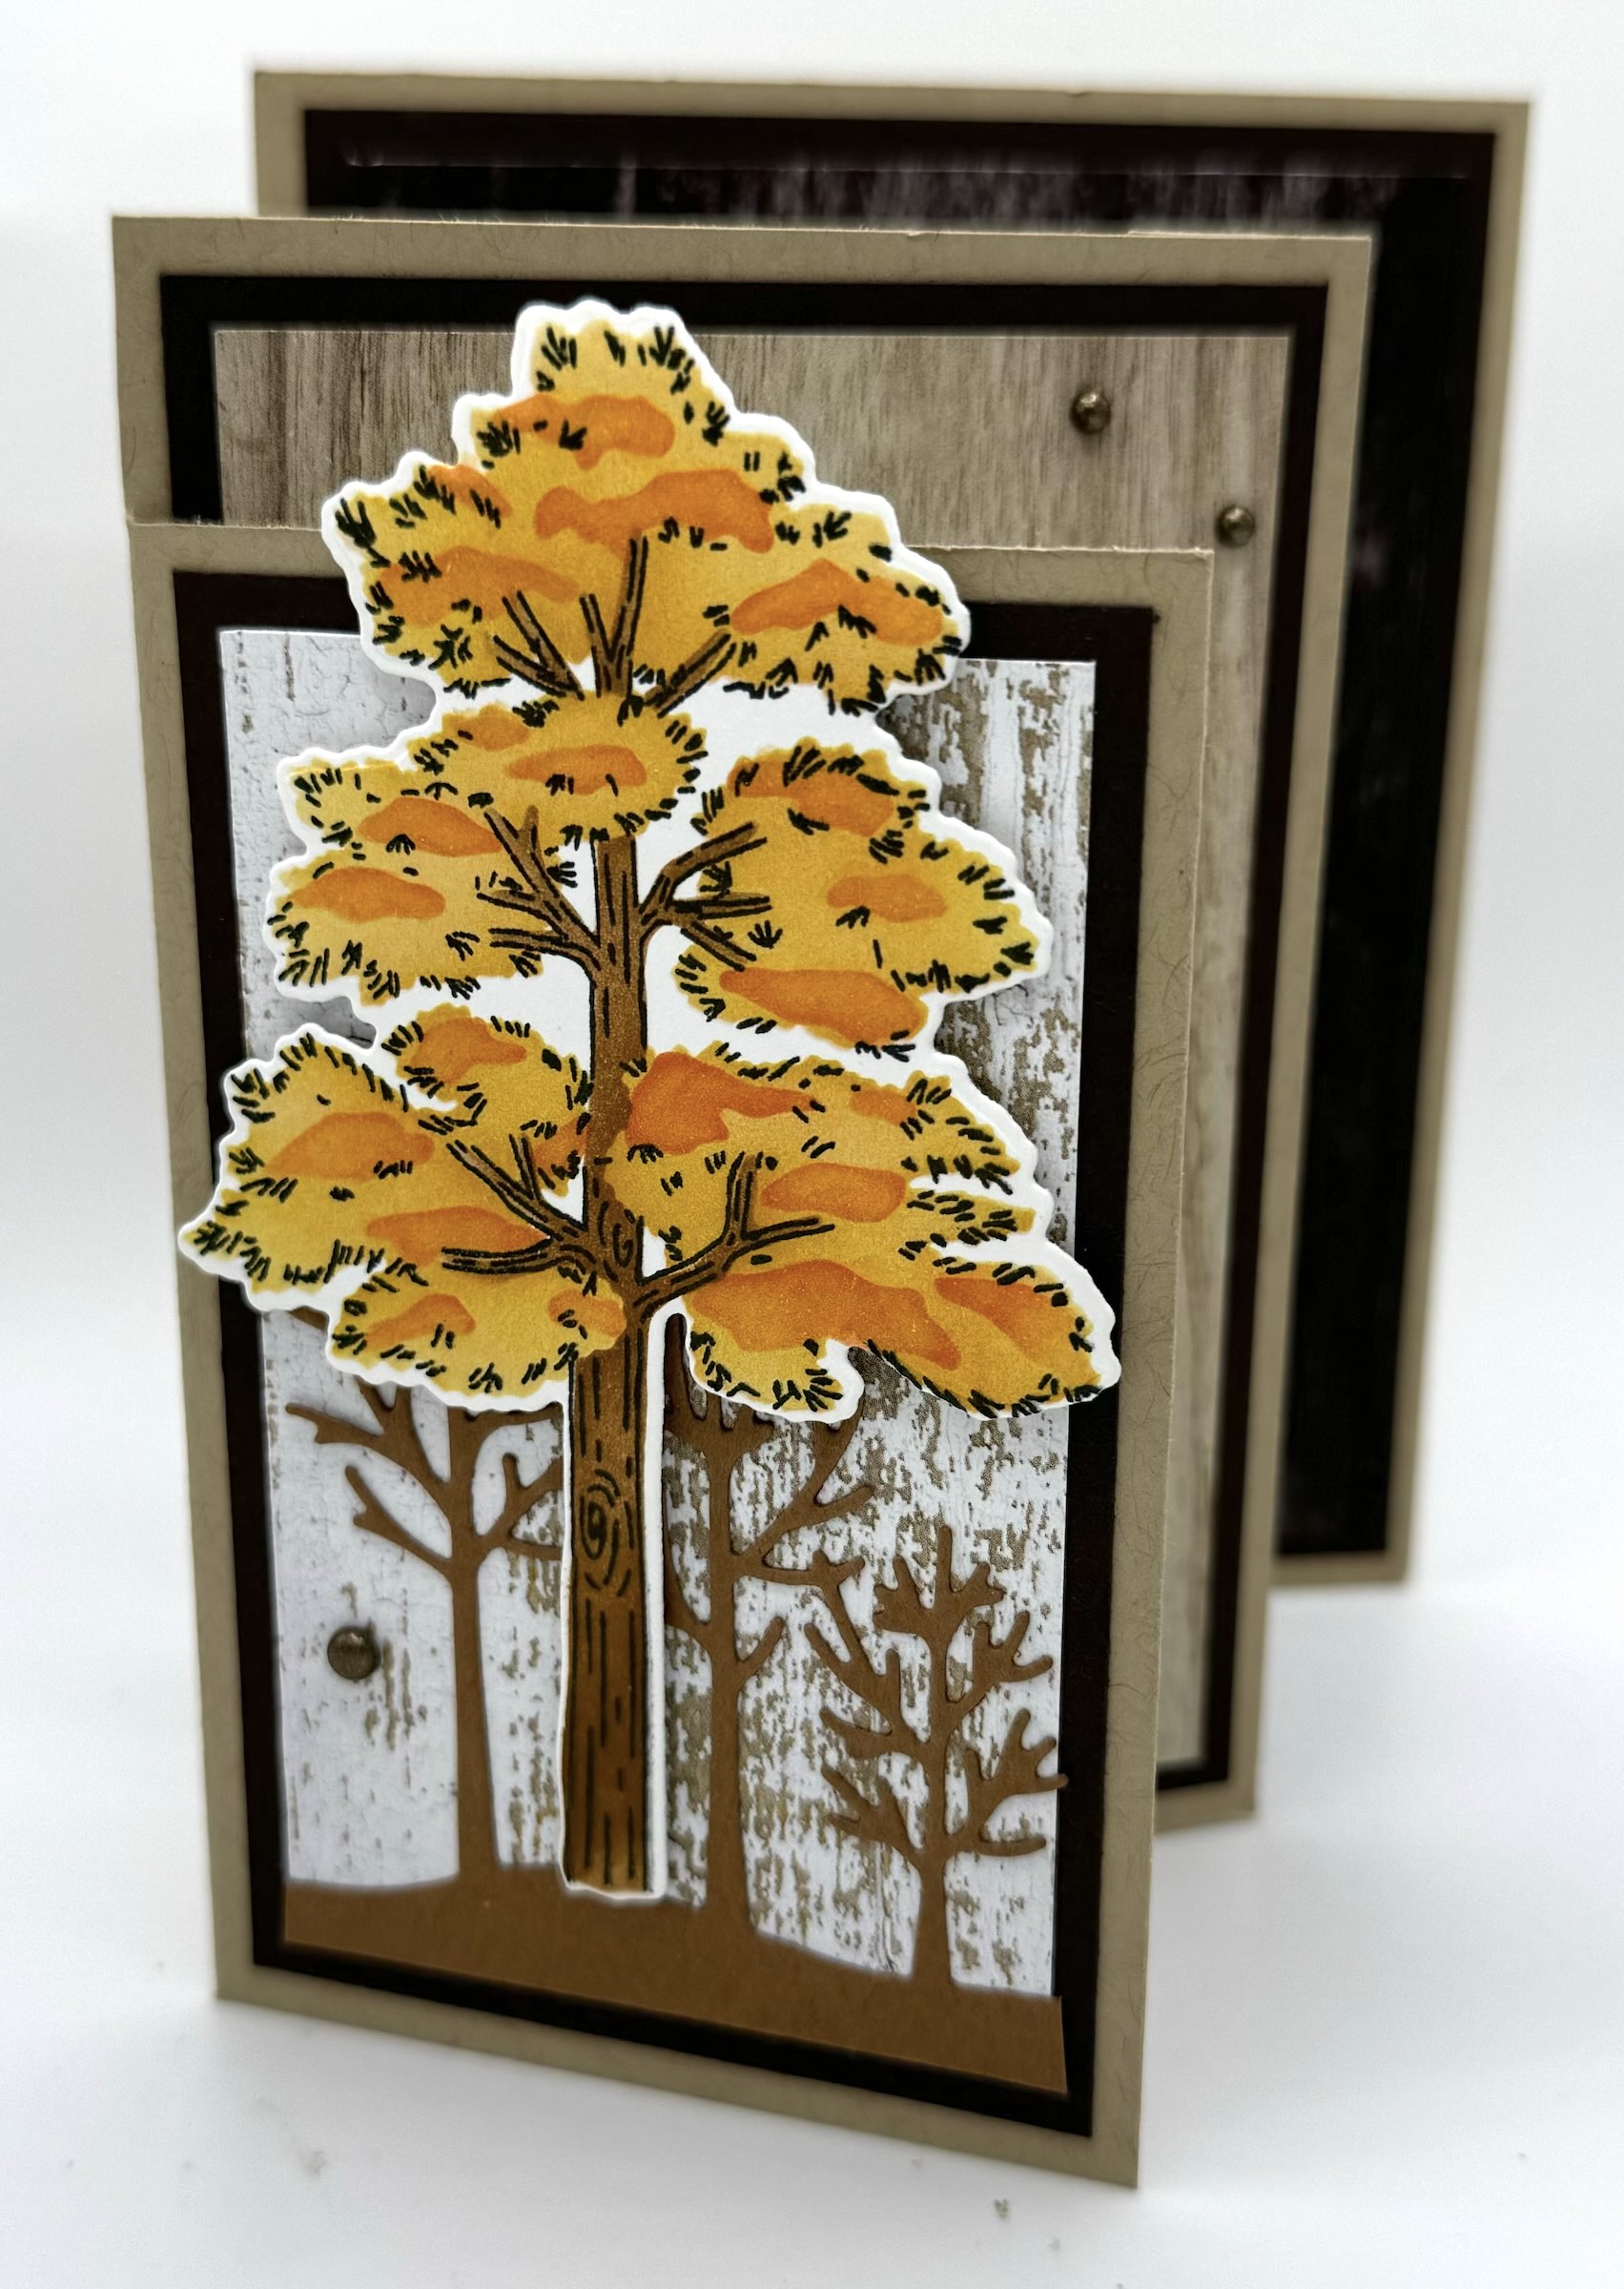
Hey, can you believe it’s almost Fall! This is my first Fall card of the year and I think you’re going to love it. I used the new Frosted Forest Stamps, Dies and Decorative Masks and paired it with the Country Woods Designer Series Paper and lots of pretty Fall Colors. Don’t forget to check out the other samples at the bottom of the page. I used Country Flowers Stamps Country Lace DSP for one sample and Thoughtful Wishes Stamps and Thoughtful Journey DSP for the other. Plus, there’s a bonus trick to create a totally different card using one strip of adhesive!! What!! I hope you enjoy this card as much as I did!!


Isn’t she lovely? I love trees…one of my favorite parts of hiking are being among the beautiful trees. Each part of the country has different varieties and they are all beautiful to me! This card has a Fall look to it. Just by changing your cardstock colors and ink colors you can go from season to season with this set. I plan to make some holiday cards with this set as well…I’m thinking some snow on the leaves!!
Here’s everything you need to know to create this fun fold card.
CUTTING/SCORING/ASSEMBLY – BASE
BASE (Crumb Cake): 5 1/2″ x 8 1/2″; 5″ x 6 1/4″
Place your larger base piece on the paper cutter with the long side at the top and score at 3/4″ and at 4 1/4″. Then, rotate your cardstock counter-clockwise so your 3/4″ score mark is at the bottom. Place the edge of the paper at the 1/2″ line and then cut from the bottom up to the score line. Then use your paper snips to clip off the cut piece at the score line. Next, grab the smaller base piece. Again, with the long side at the top, score at 2 3/4″. Rotate counter-clockwise again and then place the edge of the paper at the 3/4″ line. Cut from the bottom up to the score line. Then, use your paper ships to snip off the cut piece at the score line.
Add Stampin’ Seal + or Tear & Tape to the 3/4″ panel on your larger base. Then, adhere the smaller base to that flap so it all lines up and creates 4 panels. Fold your panels so they look like an “M” when you look from the top. So you have a Mountain/Valley/Mountain.
CUTTING – COORDINATED CARDSTOCK COLOR
(Early Espresso): From an 8 1/2″x11″ sheet, with the short end at the top, cut at 4″. Take the 4″ strip and place the long end at the top of the cutter and cut one piece at 5 1/4″ and two pieces at 2 1/2″. Now, take the remaining paper and with the short side at the top, cut at 3 1/4″. Then with that piece, cut two pieces that are 4 3/4″.
BASIC WHITE: 2 1/4″ x 3 3/4″; 3″ x 4 1/2″
DSP (Country Woods): Use 3 different designs. 3 3/4″ x 5″, 3″ x 4 1/2″, 2 1/4″ x 3 3/4″
ASSEMBLY: Stamp and decorate your two Basic White pieces. Then adhere all the Basic White and DSP pieces to their corresponding sized coordinated cardstock pieces. Then adhere those to your card base. On a scrap of Basic White Cardstock, stamp your tree. Use the decorative masks to apply color to the tree. (I used Pecan Pie for the wood (mask 1), Crushed Curry for the leaves (mask 2), and Pumpkin Pie for the details (mask 3).) Add some Clear Wink of Stella to the Pumpkin Pie if you wish for a little shimmer! Attach the tree to the front of the card with some dimensions.
***Here’s a simple hack to turn the Four Panel Fun Fold into a Book Fold!! All you have to do is add some Tear & Tape or Stampin Seal + to the back of the 2nd panel and close the card. Now you have a book fold….and it makes a great little card to add photos to!! See below for photos.


As you see, by gluing down the middle section, you have a book! Such a simple change!!
Now for the other samples.


Although very pretty, this one was so simple to make. I used Blackberry Bliss for the base and Petunia Pop for the coordinated cardstock color. I based my cardstock colors off the Thoughtful Journey Designer Series Paper I picked out before I started. I also used a shimmery piece from the Thoughtful Designs Specialty Paper. Then, I simply stamped my panels with stamps from Thoughtful Wishes.


This final sample uses the super popular Country Flowers stamps and dies, and Country Lace and Country Woods DSP. My base is Basic Beige and I coordinated it with Misty Moonlight. I stamped, colored and die cut the flowers on the front. Also, as you know I always have “spare pieces” in my stamp cases from previous projects. Well, I had spare buckets so I didn’t even need to create them! I love when that works out.
Thanks for stopping by to check out these cards! I hope you get to try this fun fold out soon!
Happy Crafting!

