
Yes, I’m in love. In love with this new suite of products from Stampin’ Up! The new Flowering Zinnias Suite was just released on March 4 and let me tell you that’s it’s gorgeous. The Simply Zinnia Stamps are beautiful; the coordinating dies are well designed and offer so many extra options when creating your cards; the Zinnia 3D Embossing Folder gives you beautiful backgrounds; and, the sparkly and vibrant Adhesive Backed Shiny Sequins finish it all off. But the icing on the cake…it’s the Flowering Zinnias 12×12 Designer Series Paper. The patterns are just stunning and the colors that pair with it just want to make you craft all day. You want this suite, trust me!!


Don’t you agree? Super gorge!!
Now here’s something even better! How about using these beauties to create a Notecard & Envelope Set? This pretty little holder makes a great gift. Add a pretty pen and a gift card and you’re going to make someone’s day!!


To create this beautiful set I used Old Olive Cardstock for the base and the inside pocket pieces. I created six 3 1/2 x 5 notecards – 2 with Melon Mambo cardstock, 2 with Old Olive Cardstock and 2 with Blackberry Bliss cardstock. The DSP matches so well with these colors. I stamped in Melon Mambo ink. I embellished the card holder with ribbon from the Ribbon Duo Combo Pack and the Adhesive Backed Shiny Sequins. Here’s how to create this Notecard and Envelope Holder Set
CUTTING/SCORING INSTRUCTIONS
BASE (Old Olive): 9″ x 5 1/2″, scored at 4″ and 5″
DSP (for base front & back): 4″x 5 1/2″ (x2)
INSIDE POCKET (Old Olive): 9 1/4″ x 2 3/4″, with the long side at the top, score at 3/4″, 4 3/8″, 5 1/8″, and 8 3/4″, then turn so the short side is at the top and score 3/4″
DSP (for inside pocket): 3 1/2″ x 1 7/8″
ENVELOPE HOLDER (Old Olive): 1″ x 11″ plus a scrap to connect the two ends (or use a 12″ piece if you have that cardstock in 12 x 12 size)
DSP (for envelope holder): 5 1/8″ x 7/8″
SIDE BAR (Basic White): 5 3/8″ x 7/8″
NOTECARDS (use Basic White or Colored Cardstock): 5″ x 7″, scored at 3 1/2″ (x6)
INSIDE (if using colored cardstock): 4 3/4″ x 3 1/4″ (x6)
ENVELOPES (Envelope Weight Printer Paper or Designer Series Paper): 7 1/4″ x 7 1/4″ (x6) scored per Envelope Punch Board at 3 1/8″ **Follow your punch board recommendations for a 3 1/2″x5″ card size.
EXTRAS: 24″ ribbon, Stampin’ Tear & Tape, Adhesive Backed Shiny Sequins, Dimensionals, Very Best Trio Punch
ASSEMBLY: Start with the base of the notecard holder. Cut, score and fold the base and burnish with your bone folder. Set aside. Now cut, score and fold your notecard holder box piece. Once folded, hold it so the 3/4″ score line is on the left and the 8 3/4″ score line is on the right. Your long 3/4″ score line will be across the bottom. Use your paper snips to cut out the bottom right corner. Then slit the other score lines from the bottom up to the 3/4″ mark. Then, create a slanted notch for each tab. **Refer to the template below.

Once you have all your notches completed, you’re ready to fold it and burnish each fold with your bone folder. Glue the two ends together first, then fold up your bottoms and blue the last flap to hold the bottom closed. You should fold the sides and flaps so that all the edges face the back of the card – this will make it look very clean from the front. Add your front DSP piece to the front. Set that aside to dry a bit while you work on the base again.
Lay the base so the back faces up. Mark the center of each side so you know where your ribbon will go. Add some Stampin’ Seal+ or Tear & Tape across where your ribbon will lay, taking care not to get it on the middle section. Now you can center your ribbon over the adhesive leaving the same amount of ribbon ends on each side. Once this is done you can use more adhesive or liquid glue and add your DSP to the front and back.
Next, you can add your little box to the inside of the base to hold the cards you will make next! Use liquid glue so you can adjust it a bit and make sure it’s just slightly above the bottom of the base. You don’t want to put it too high and have your n notecards sticking out of the top.
Time to make the notecards. Super simple! Just cut, score and fold your cardstock. Then add the designer series paper to the fronts. You can stamp the inside you want, but since these are notecards if I do anything it’s just a stamp or die cut piece for interest. Now put them in the holder box.
If you don’t have envelopes for 3 1/2″ x 5″ cards, you can make some using an Envelope Punch Board. I’ve found this to be a very handy tool in the craft room. I have a link for it under Craft Room Must Haves. For my cards, I cut high quality printer paper at 7 1/4″ x 7 1/4″ (x6) and scored/punched it as noted on the punch board . Fold your envelope use your favorite adhesive to close up the bottom portion. For the top flap, I add Tear & Tape so when the recipient wants to send a card, all they have to do is peel off the tape paper and it’s ready to go. If you’d like, you can decorate your envelopes.
Now that your envelopes are made, grab that 1″x11″ piece of cardstock and fold it gently around the envelopes. The ends won’t quite meet so just add a little scrap of the same color cardstock to meet the edges. (I use Tear & Tape because it’s strong and instantly ready to adhere onto the base.). Now just add your adhesive to the back of the envelope holder and press the whole thing onto the base, envelopes and all.
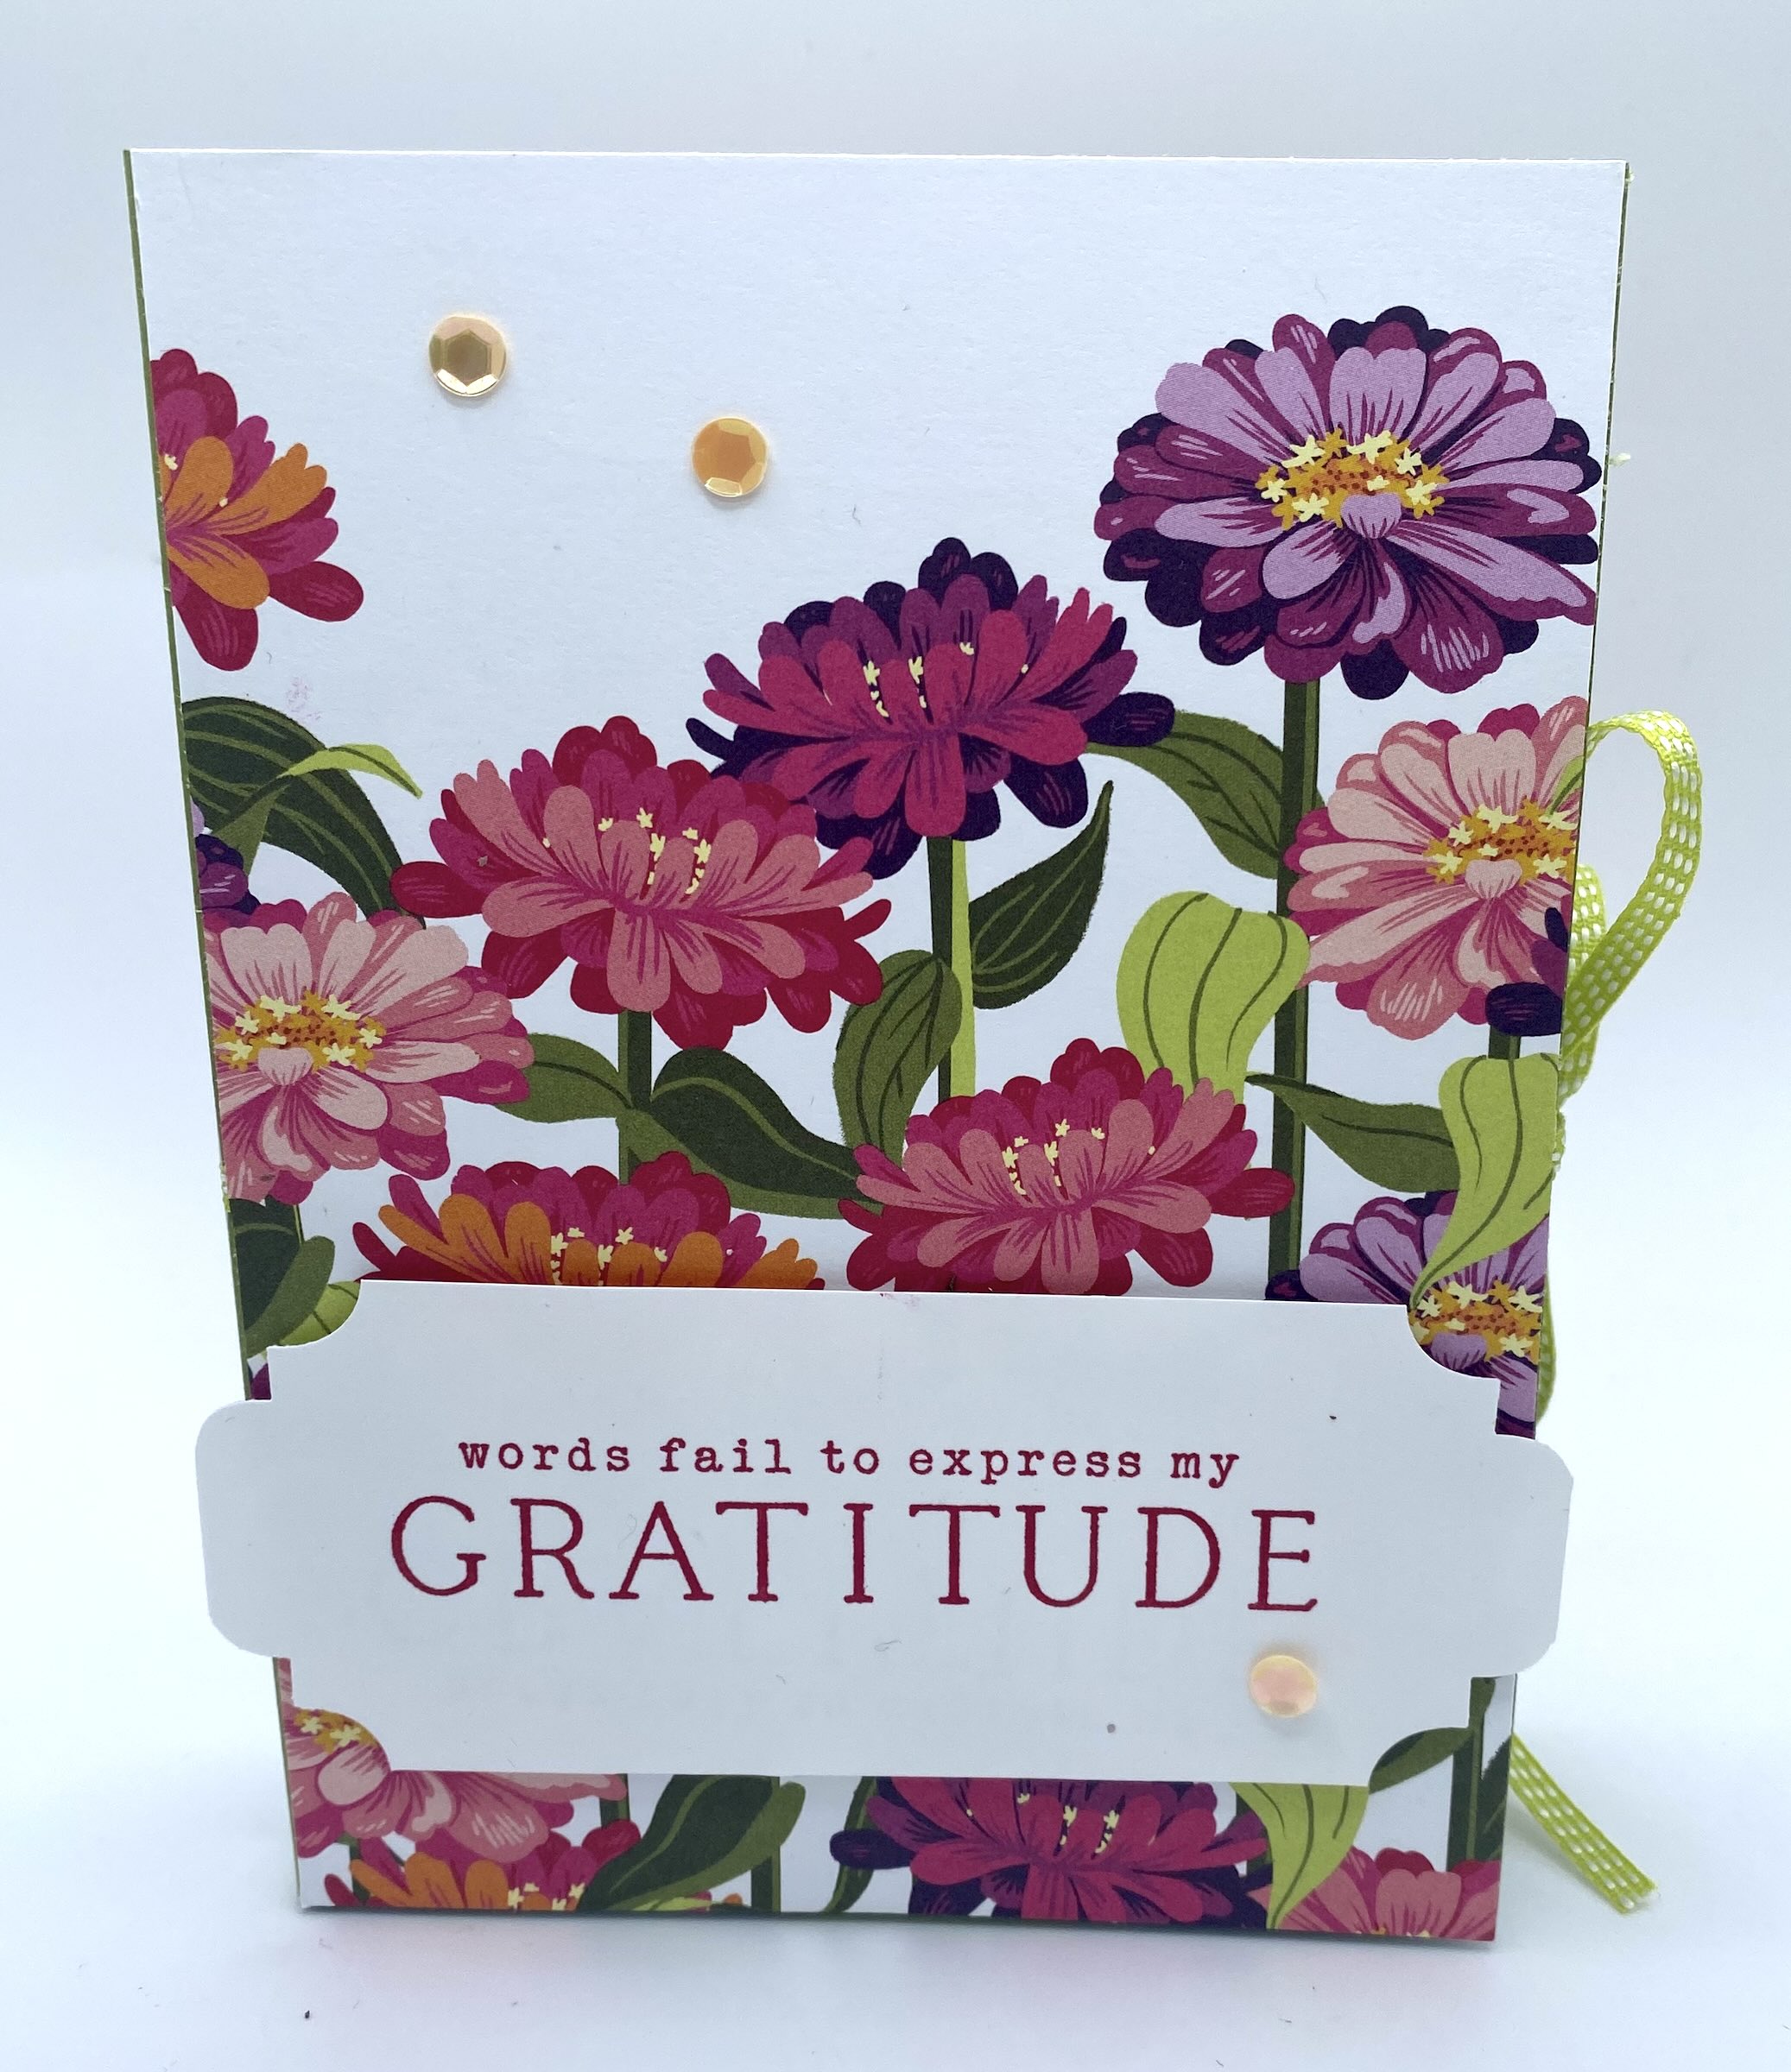
Once everything is loaded into the holder, tie the ribbon into a bow and get ready to finish up the outside. For the outside front, I added a tag with the sentiment. I cut a strip of Basic White and stamped my sentiment. Then I used the Very Best Trio Punch to make it extra pretty! I added a few of the sequins to the front as well. I decide to decorate the side edge of the holder so I stamped on the strip of Basic White we cut for it, stamped it and glued it in place. Who will you share your masterpiece with? It’s really hard to not keep it for yourself!! 😉


There are only a few changes on this other sample. I, of course, changed up the colors using Blackberry Bliss for the base and a different pieces of Flowering Zinnia DSP on the front. I added a die cut flower to 3 of the notecards. The main difference is on the front though. I decided to try out the flower dies and made 3 of the prettiest zinnias. One in Highlander Heather, one in Pumpkin Pie and one in Melon Mambo. The leaves are Shaded Spruce. I love both of these so much and just can’t decide which is my favorite.
I hope you get inspired to make your own set for yourself or a friend. I can’t wait to make more of these!
Happy Crafting!!