
Today I totally switched gears. I was preparing one fun fold and came across another that I immediately wanted to make! This looked fun and simple and it was perfect for my mood at the moment. I just finished working on some quite complicated cards for family…they had a gazillion moving parts. Once I made a few, I knew I needed to share it with you. I know you’re going to love making these.


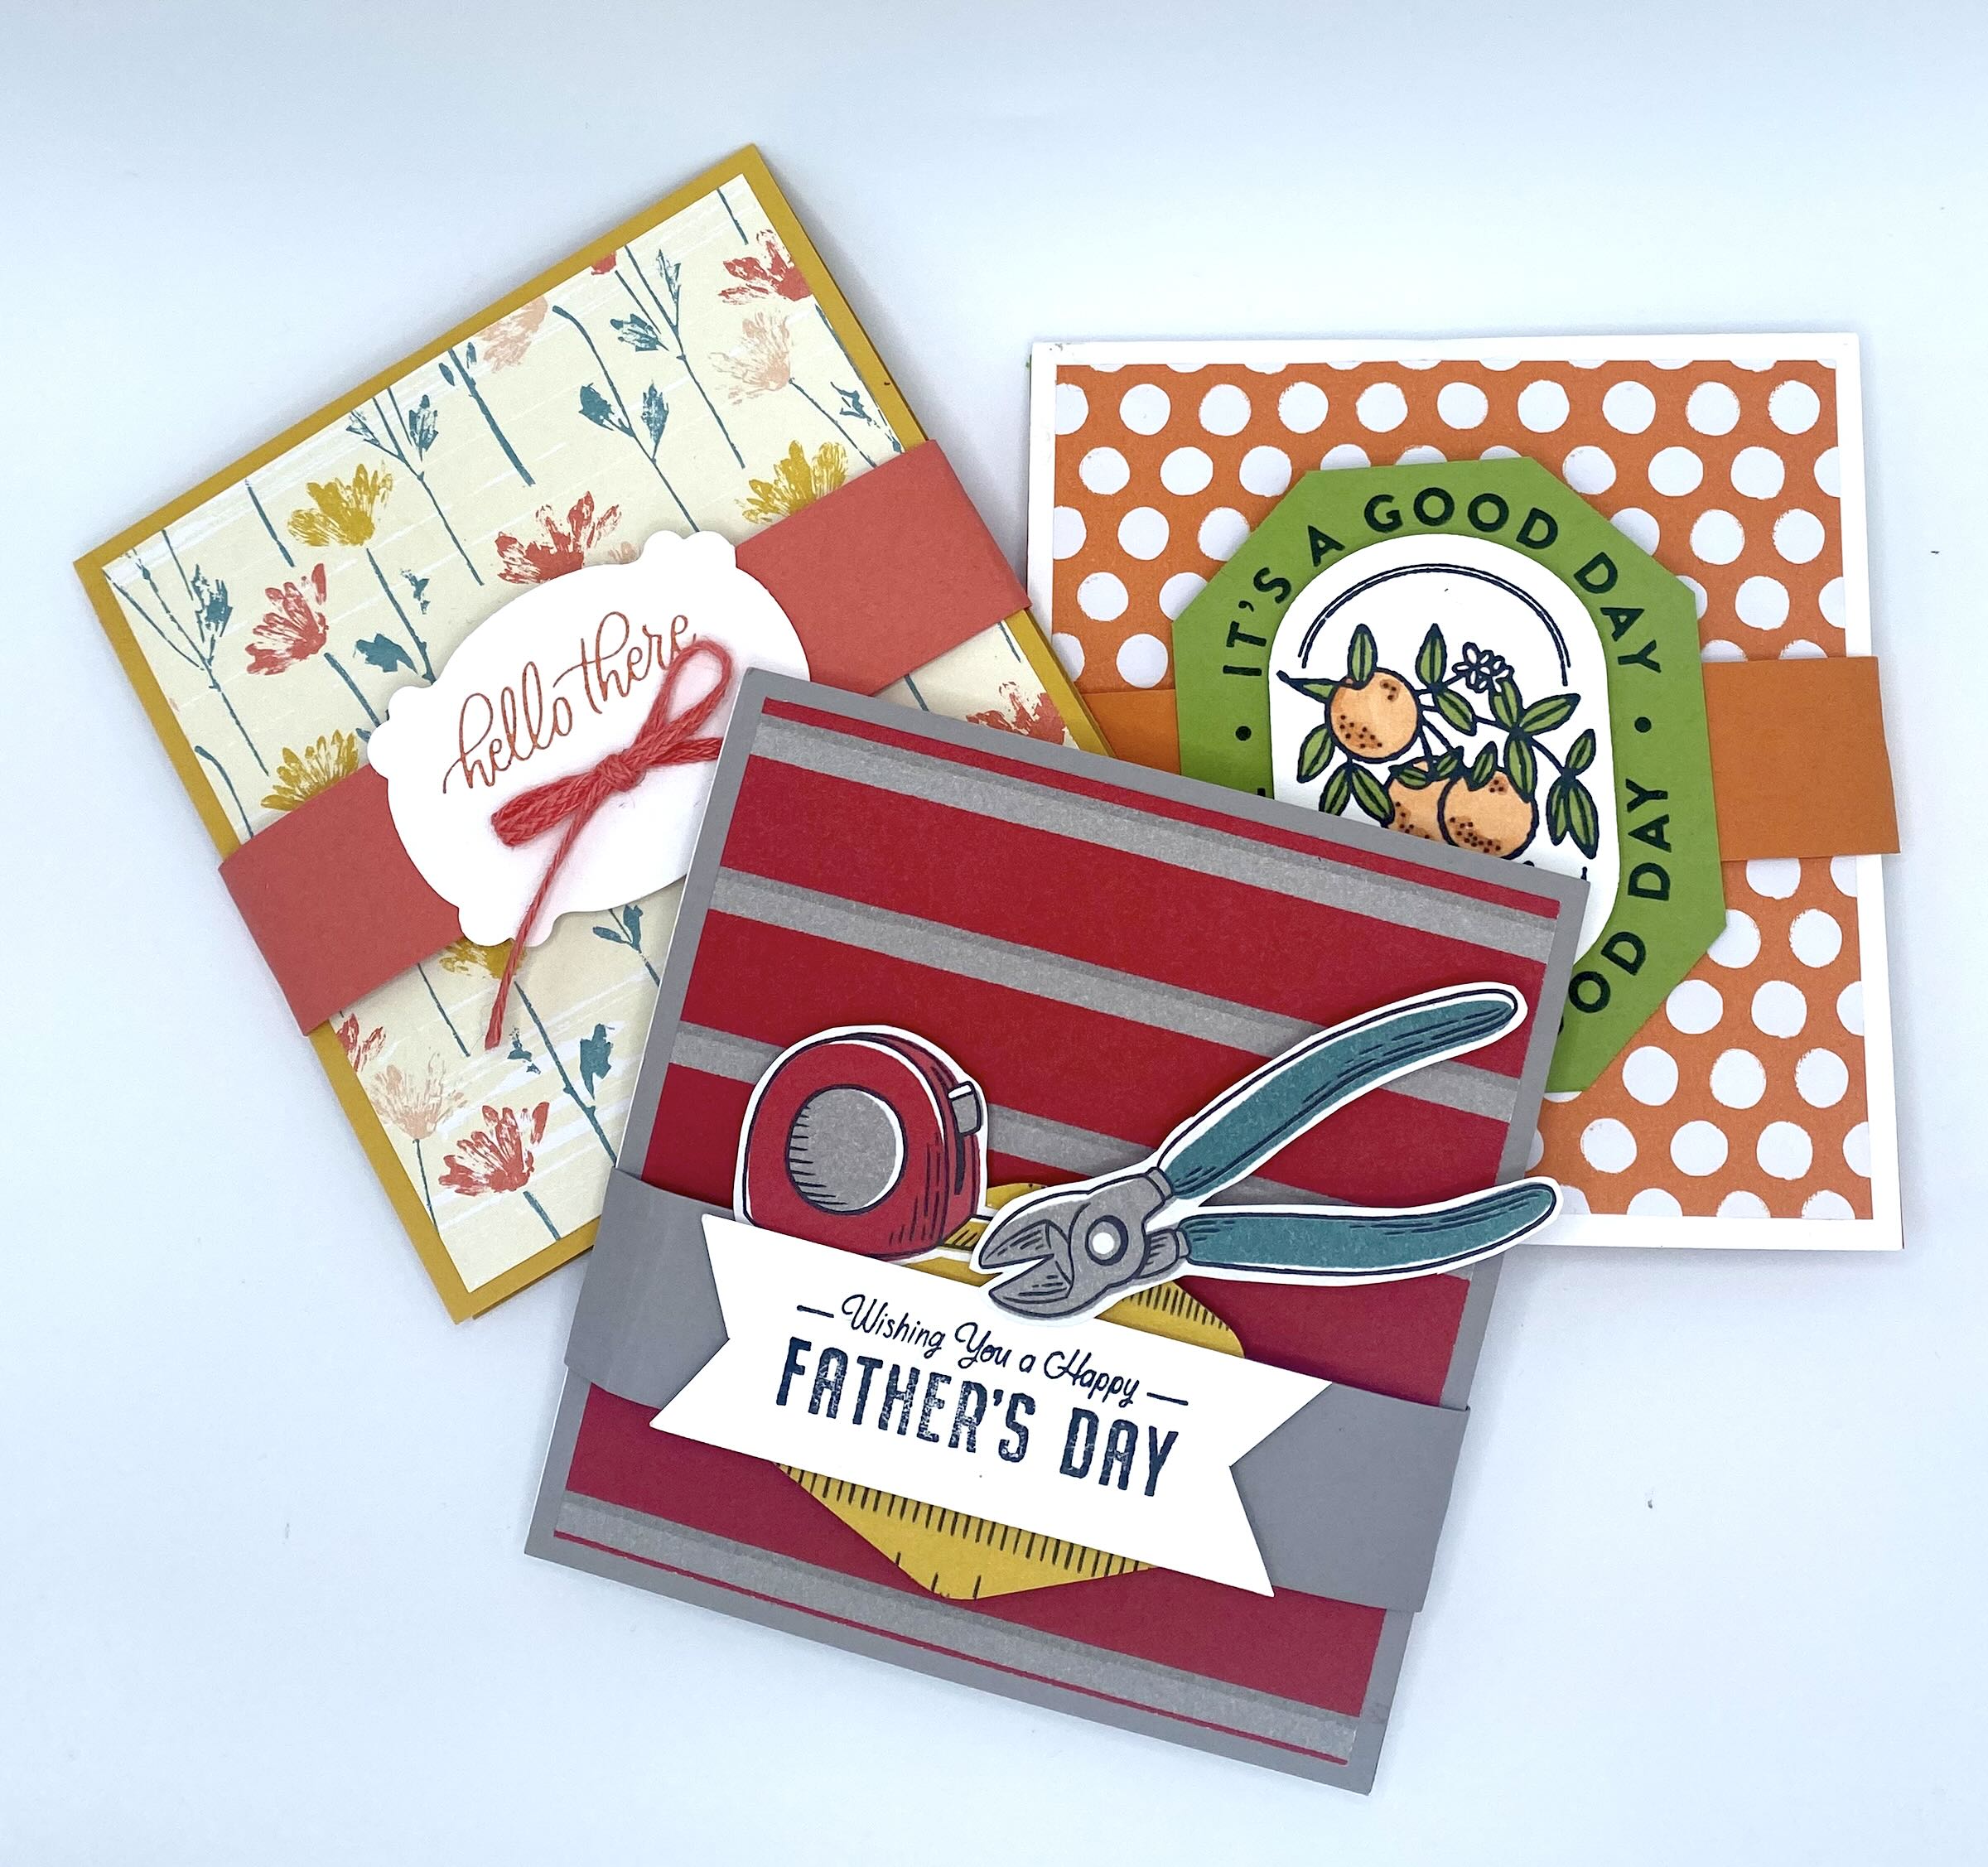
How much fun is this when it’s opened up! I created this card with Crushed Curry and Calypso Coral cardstock and pared it with Inked Botanicals 6×6 DSP. I always appreciate how easy Stampin’ Up makes it to color coordinate your creations! Here’s how to create this card!
CUTTING/SCORING
BASE (Crushed Curry): 4 1/4″x 9″, scored at 4 1/2″
EXPLOSION INSIDE (Calypso Coral): 6″x6″, scored at 3″, rotate and score at 3″ again so you have 4 equal squares. Then, rotate a half turn and score across from corner to corner diagonally.
DSP OUTSIDE (Inked Botanicals): 4″x 4 1/4″
DSP INSIDE: Inked Botanicals 2 3/4″x2 3/4″ (x2), stack together and cut diagonally so you have 4 triangles- 2 of each design you want. Basic White 2 7/8″x 2 7/8″ (x2)
BELLY BAND (Calypso Coral): 1″ x 10″
**OPTIONAL DSP INSIDE PANELS: 4 1/4″ x 4 3/8″ **these go inside underneath where the pop out will go.
EXTRAS: Lasting Label Punch, ribbon and embellishments
ASSEMBLY: Fold your base, crease with bone folder. Now add your DSP to the front and set the base aside. Fold your explosion piece for the inside by first folding in half and then in half again in the same direction. Fold the diagonal crease in the opposite direction. Now it should easily fold into the explosion. Crease with the bone folder to make it crisp and compact.
Next, glue your triangles onto the pop out piece. I like to alternate the DSP. Lay out your Basic White pieces so they are in a diamond shape, stamp them and then adhere them to your pop out. With your pop out folded, apply strong adhesive like Stampin’ Seal+ or Tear & Tape to the bottom of the folded pop out. Adhere it to the inside of your card base, taking care to keep it a little below the fold line on the base (so your card closes properly). Once that is glued down, add more adhesive to the top of the pop out and simply close the top of your card base down on it.
All that is left is your belly band. I like to use my bone folder to break up the fibers on the belly band so it bends easily around the card. Once you fold it loosely around the card, use strong adhesive to the ends to glue them together. Now grab a scrap of Basic White and punch out the tag for the front using the Lasting Label Punch. Stamp it and add it to your belly band. Add some ribbon and gems if you wish and your card is done!
Here are a few other samples I created.


This card was created with Basic Grey and Basic White Cardstock, free Trusty Toolbox DSP from Sale-A-Bration and the He’s All That stamp set in the Annual Catalog. I stamped in Basic Grey as well. The main piece on the belly band is a scrap of cardstock punched out with the Heartfelt Hexagon punch. I also cut a piece of the DSP that looks like a measuring tape with the same punch and layered them together. The tag on the front was created by cutting a strip of Basic White and snipping tails on each end. Then, I fussy cut some of the tools from the DSP and added them to the tag. I can’t wait to send it to my son-in-law for Father’s Day!


This bright summery card was made with Basic White, Granny Apple Green and Pumpkin Pie cardstock and DSP from the Brights 6×6 paper pack. I used the Filled With Happiness Stamps on the inside. The belly band was created by stamping the It’s a Good Day stamp on the Granny Apple Green and then again on a scrap of Basic White. I used the Modern Oval Punch to punch out the middle citrus portion from the Basic White and colored it in with matching Alcohol Markers. Then I added some dimensionals and layered it on the Granny Apple Green cardstock piece. At the last minute I decided to use the Very Best Trio punch to snip off the corners to give the tag a geometric look.
I love how all these cards came out. It’s a great card to show off all your favorite Designer Series Papers. What will you use to create your cards? The sky is the limit!!
Thanks for joining me today! Happy Crafting!