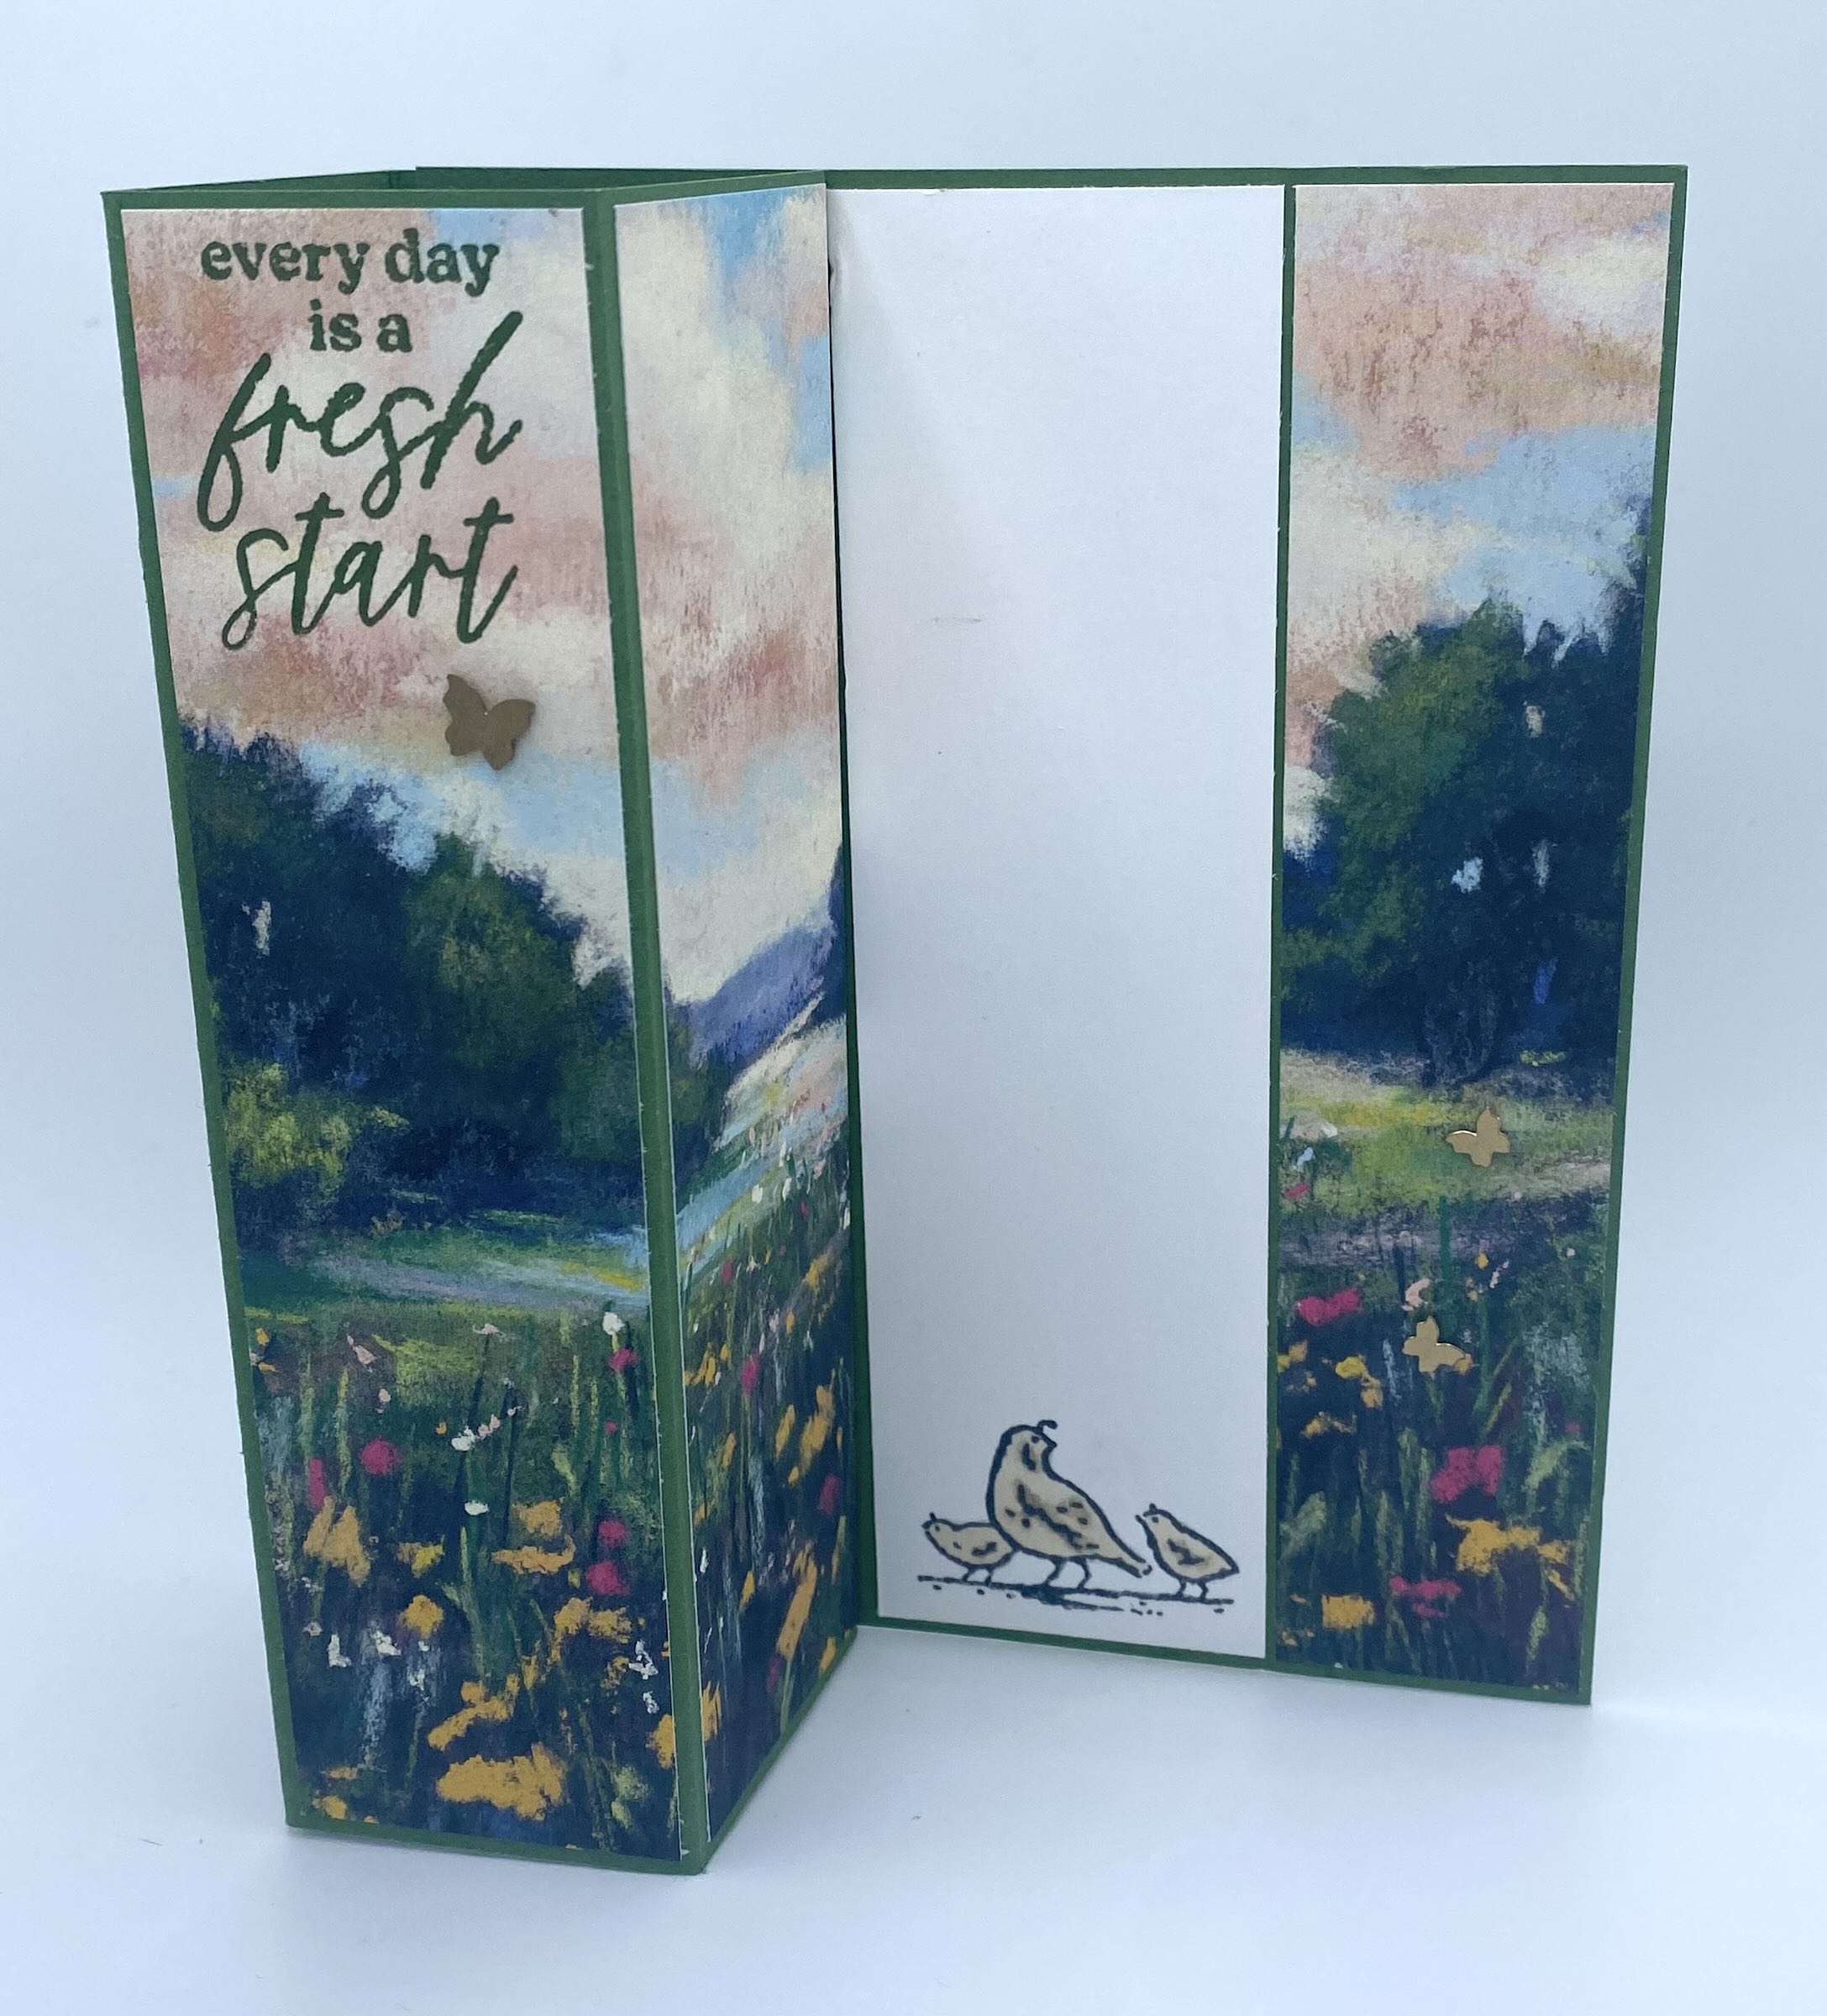
I love a fun fold that you can create any type of card with easily. This fold can work perfectly with DSP that has a scene like the Meandering Meadows DSP I used in the card below, or you can create something unique by changing up the cardstock you use. Fancy, whimsical, formal, funny, elegant…it all works.

When I saw this fold, I knew I needed to try it with scenic DSP. It just works! In this card I used a piece of Meandering Meadows DSP along with Garden Green and Basic White cardstock. Using the Garden Meadow stamps, I stamped right onto the DSP in Garden Green ink. On the Basic White center panel, I stamped the little quail family in Memento Ink and colored them in with Crumb Cake alcohol markers. I added some Brass Butterflies and that’s it. It took mere minutes to create and is very pretty! The big question will be…who is going to get this card!! Here’s how to create this fun fold card.
CUTTING/SCORING
BASE (Garden Green): 5 1/2″ x 10 1/8″, score at 4 1/4″, 5 3/4″, 7 1/4″, and 8 3/4″
DSP (Meandering Meadows): 1 1/8″x5 3/8″, 1 3/8″x5 3/8″ (x2) **cut in sequence
MESSAGE PANEL (Basic White): 1 1/2″x5 3/8″
EXTRAS: Embellishments; optional panel for an additional note: 4″x5 1/4″
ASSEMBLY: Cut, score and fold base to create the column. Crease well with your bone folder. Cut your DSP pieces. Stamp greeting on your front column piece and attach the DSP to the coordinating columns. Add strong adhesive such as Stampin’ Seal+ to the last fold to close your column. Stamp your Basic White panel and adhere that to the last spot. If you want to add additional space on the back of the card for writing, add a 4″x5 1/4″ piece of Basic White. Add some embellishments like the Brass Butterflies and you are done. So easy and so pretty!


Check out these other two samples.
The one on the left was created on a Crumb Cake base. I added Perennial Lavender DSP to decorate the panels and used the Painted Lavender Stamps and coordinating dies to create the beautiful bouquet of flowers for the front. The sentiments come from the Perennial Postage stamps and dies. You can get all these products as Suite Collection called the Perennial Lavender Suite Collection. It also comes with Purple Fine Shimmer Gems and Paper Butterfly Accents that match beautifully. I also added some Pretty Peacock Gold Metallic Ribbon to finish it off. Wow, right!
The card on the right was a lot of fun. I used the Watercolor Melon stamps from Sale-A-Bration to create all the melon pieces. The Modern Oval Punch punches the large melon out perfectly. I decided to use Poppy Parade cardstock as the base. I also cut a strip of Shaded Spruce and Soft Sea Foam to create a melon rind. I stamped the little seeds in Memento Ink to make it look like a watermelon slice. The front was created by cutting a piece of Basic White and stamping It’s a Good Day to Have a Good Day from the Filled With Happiness stamps in the Mini Catalog. I used the coordinating Modern Oval Punch to punch out the melon from the Watercolor Melons stamps and popped that on top with dimensionals. I also stamped and fussy cut some melon leaves and added them to the large melon. I added a piece of Basic White paper to the back for my message.
I’ve been thinking up all kinds of ways to use this fold with my stamps. It’s so much fun to play around with this one.
I hope you get a chance to try this one out soon. I think you’ll agree it’s fun to build a card that can turn into anything you want it to. That’s what I love about crafting cards. You are only limited by your own imagination.
Happy Crafting!

