I’m in love…with the Bee Mine Suite. These are so fun to create with. From the bright, happy Designer Series Paper, the fun little bees, and the coordinating dies, what’s not to live. These will definitely be used a lot all year long. Don’t wait too long to order. They’ll only be around until the end of April, but they may sell out fast since they’ve been wildly popular.

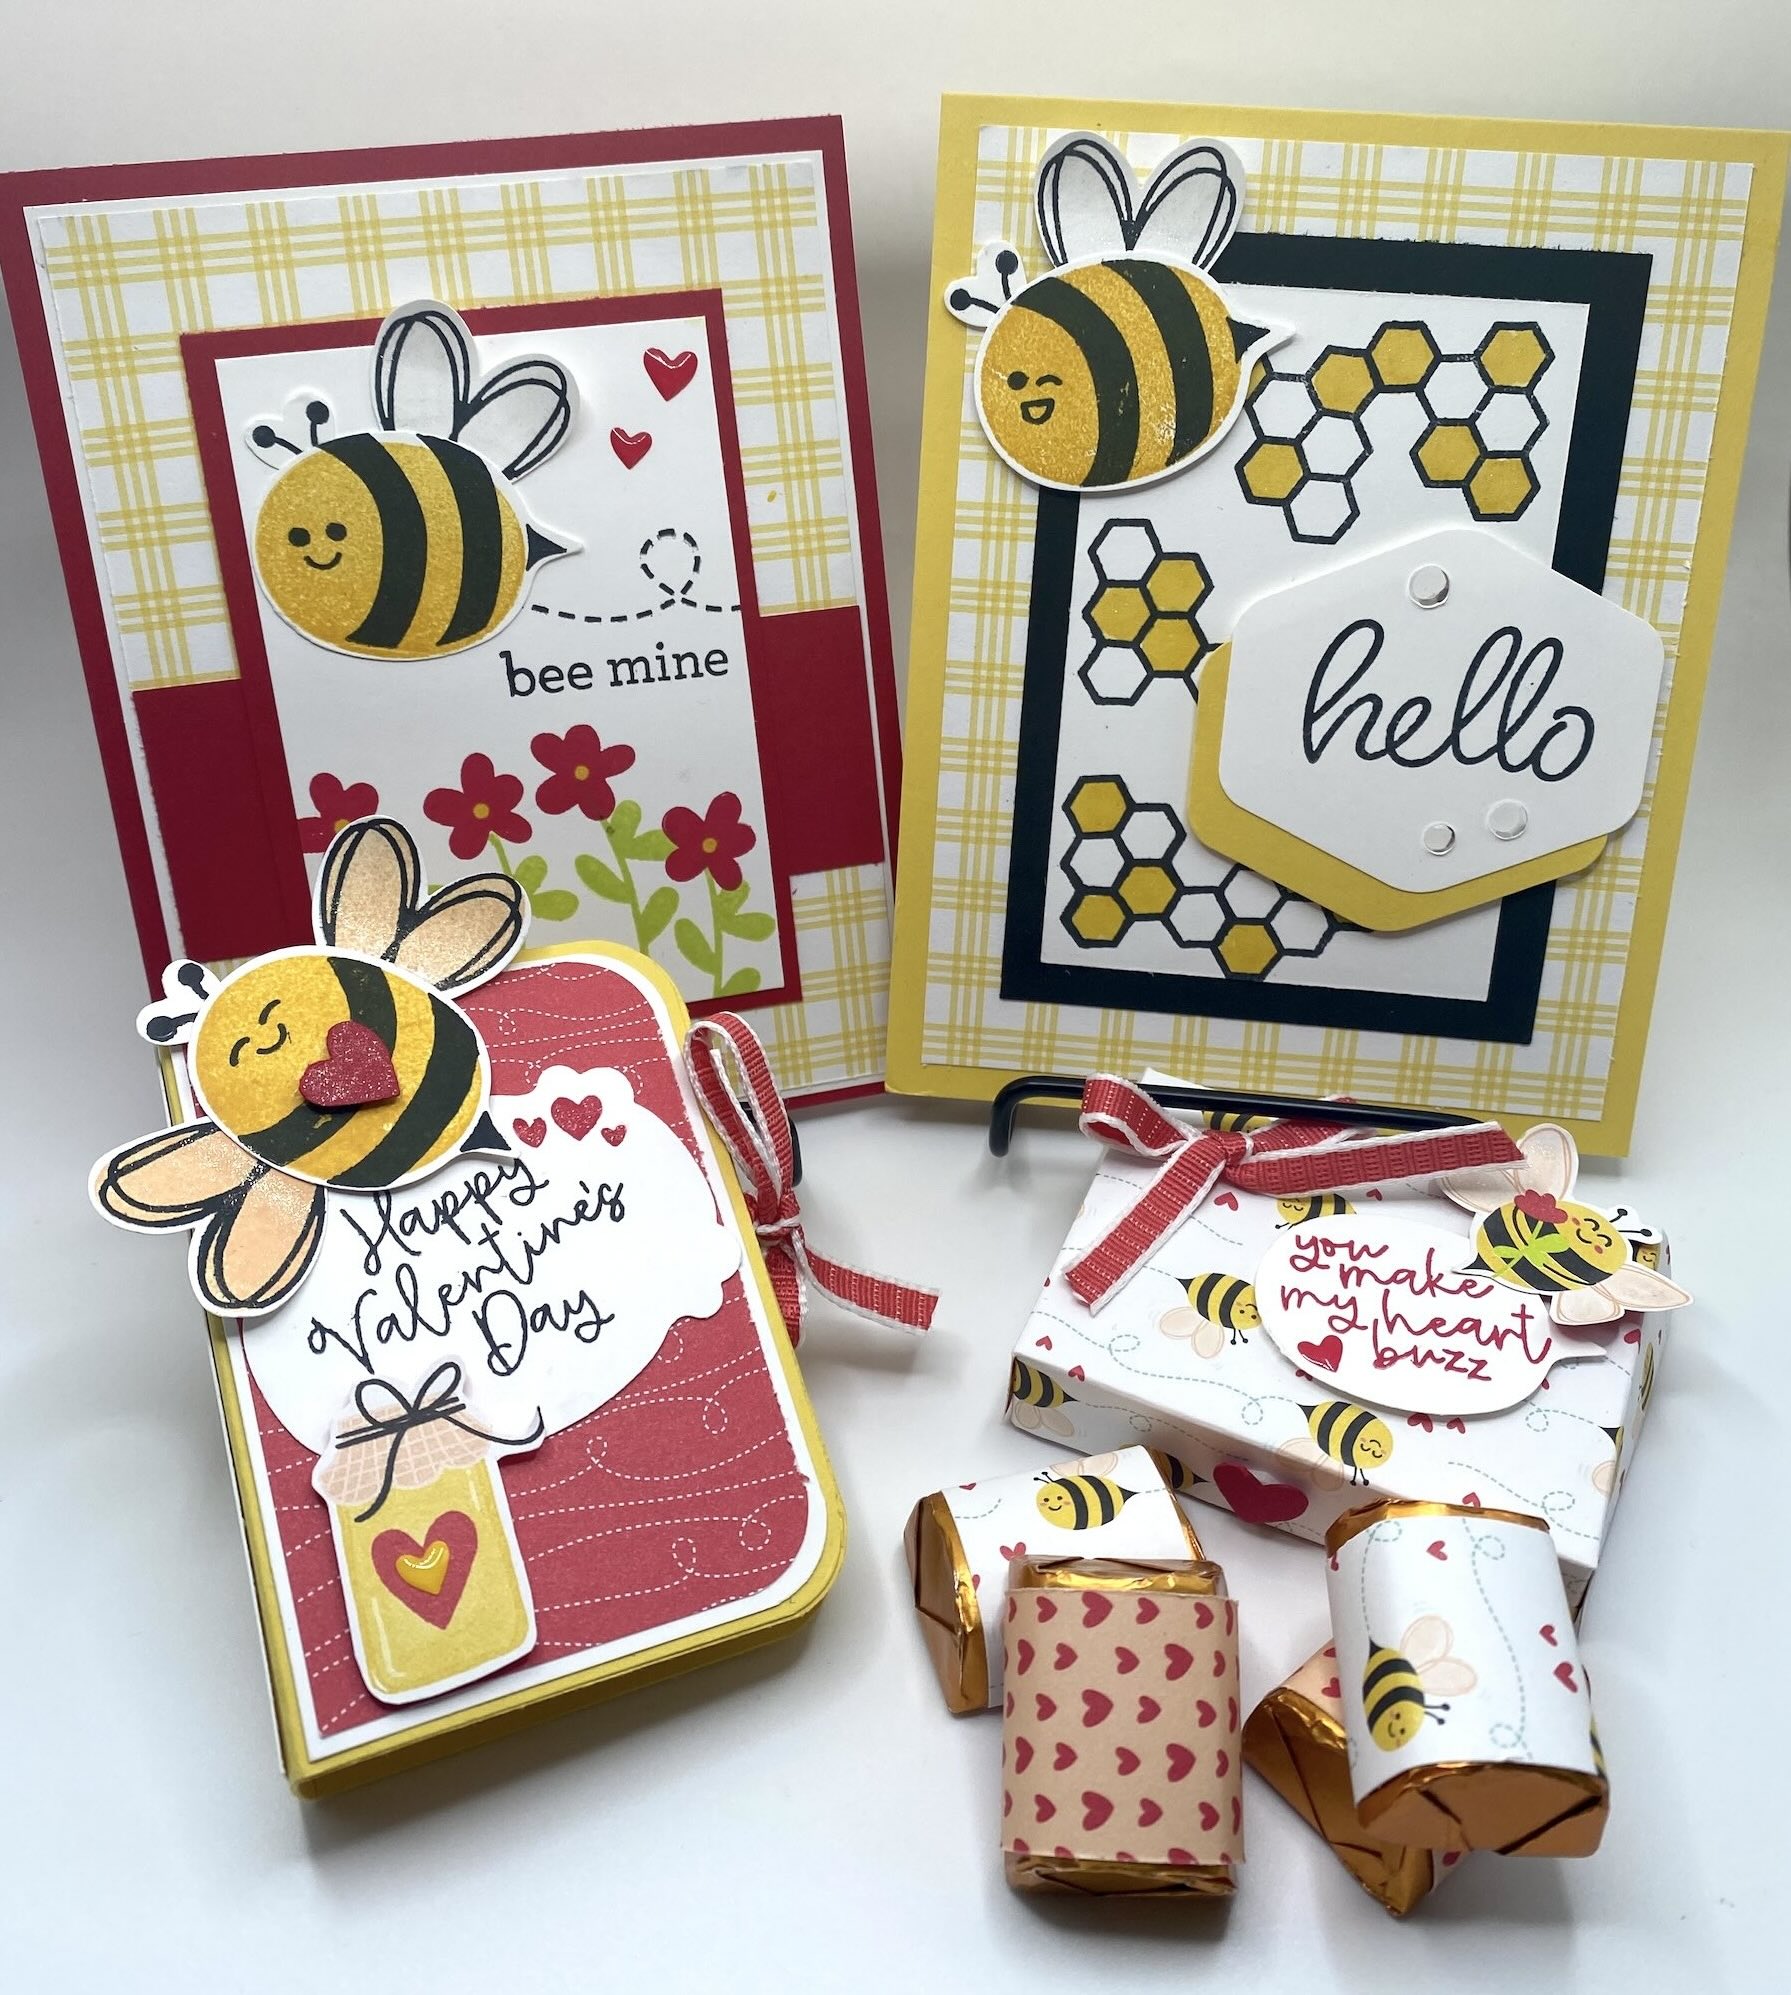
What’s better than giving someone special a handcrafted card? I’ll tell you…it’s a sweet treat to go with it. Like the super cute little box that holds 4 Hershey Nuggets, and the crafty little book card that holds a tube of Burt’s Bees Lip Balm…see the bee theme here! I just love these bees.


Let’s start with the candy…because CANDY! Here’s how to make the sweet little Hershey Nugget treat box.
INSTRUCTIONS:
Designer Series Paper (Bee Mine): 6″x6″, cut 2″ off the paper. That leaves you with a 4″x6″ piece and a 2″x6″ piece.
With the 2×6 piece, cut in half to get two 1×6 pieces. Then stack those together and cut them in half again so you have four 1″x3″ pieces. The four 1″x3″ pieces will cover your nuggets so they match the box! Just add a dab of adhesive on each end and wrap them around each nugget.
Take your 4″x6″ piece and score all four sides at 5/8″. Then with the 6″ side at the top of the cutter, score at 2 5/8″ and 3 1/4″. Now that your scoring is done, fold all the score lines. Next, you’ll use your paper snips to cut the little tabs for the box. Two for the top flap, two for the middle fold and two for the bottom flaps. (Refer to the video for assistance!)
Now you can add a bit of adhesive to each tab and build your box. The larger section is the top of the box and that will close over the bottom.
To decorate, add a tag with your sentiment, a piece of Sweet Sorbet Ribbon, and of course one of the cute little bees you can create with the coordinating Bee Builder Punch. I like to add a little red heart as a “knob” to open the box. Or you can use a 3/4″ circle punch and add a notch instead.


The next thing we’ll create is this cute little book card that holds your favorite tube of lip balm. I love Burt’s Bees and it’s perfect for the bee theme we are embracing with this suite of products. Here’s how to make it!
INSTRUCTIONS:
BASE (Daffodil Delight Cardstock): 3 1/2″x5 3/4″ (x2)
With the long side at the top, score both pieces at 2 1/2″ and 3 1/4″.
On only ONE PIECE, use a pencil to mark where you’d like the bottom of your lip balm to sit (this will be the stopper). Then mark the middle area where you’d like the piece that will hold the lip balm to the card. This will help you decide where to make your score lines. (again, refer to the video). Using a craft blade or your paper cutter, create a 3/4″ long slice where the bottom of the lip balm will sit. The slice will begin before the first score line and end after the first score line (just center that evenly). Then make a second slice to match to create a thin popup. This acts as the stopper for your lip balm so it doesn’t fall out of the card. Do the same thing for the middle section, but make it 1 1/2″ long and about 1″ in width. The slice will begin 1 1/2″ before the second score line and will end there. This will hold your lip balm to the card.
You can keep your corners square, but if you’d like to be more decorative, you can round the corners with a punch or use the Very Best Trio punch to create some decorative corners. Do this with both pieces of card stock. Next, lay out the cardstock piece that does NOT have the stopper and holder cut out of it. Add some adhesive to both sides, taking care not to get adhesive in the middle section (the book end part). Then, add a 13″ piece of ribbon so the ends are sticking out in equal lengths. Add your middle section so you adhere both pieces together. Now pop out your little stopper and lip balm holder to make sure everything works. Add your lip balm.
Now you’re just decorating. For the inside, cut a piece of Basic White cardstock 2 1/4″x3 1/4″. Round or decoratively punch your corners to match the base and do your stamping. Adhere it to your base.
For the spine of the card, cut Basic White 5/8″X3 3/8″; stamp your sentiment.
For the outside, cut a piece of coordinating cardstock (I used Basic White) 2 3/8″x3 3/8″ and a piece of DSP 2 1/4″x 3 1/4″. Again, round or decoratively cut the corners to match your base. Add a tag with a message, another bee and maybe even some honey pots you fussy cut from the designer series paper. Add some other embellishments and you have the cutest little treat!


For the Bee Mine Card, I just folded a standard card base (Real Red) 5 1/2″x8 1/2″, scored at 4 1/4″. My inside layer is Basic White cut at 4″x5 1/4″. I stamped in Basic Black, Real Red and Lemon Lime Twist. For the layers on the front, I cut Basic White 4″x5 1/4″, DSP 3 7/8″ 5 1/8″, Real Red 2 3/4″x4″ and 1 1/2″x3 7/8″, Basic White 2 1/2″x3 3/4″ (this is the front piece you’ll stamp on). Add your stamps, bee and embellishments and you’re done. I used the same ink colors as well as a dab of Daffodil Delight in the middle of each flower. Super Simple.


I really love how this card came out. I wanted to show you that you can create a fun card for any occasion with this suite. For this card, I cut the base from Daffodil Delight cardstock cut 4 1/4″x11″, scored at 5 1/2″. For the inside I cut Basic Black 4 1/8″x5 3/8″ and Basic White 4″x5 1/4″. I stamped Enjoy Your Day in Basic Black using the free Heartfelt Hellos stamps from the Sale-A-Bration catalog. On the front of the card, I cut DSP 4″x5 1/4″, Basic Black 3″x4 1/4″, and Basic White 2 1/2″x3 3/4″. I stamped the honeycomb image several times on the Basic White (you can line the honeycombs up to create interesting shapes). I colored them in with Daffodil Delight Alcohol Blends and finished them up with a bit of Clear Wink of Stella to make it look like juicy honey. For the tag, I used the Yellow from the same Heartfelt Hellos stamp set and punched it out with the coordinating Heartfelt Hexagon punch. I added a second piece of Daffodil Delight punched with the same punch for extra pizzazz! Add one more bee and you have one sweet card!
There you go, everything you need to know to create these fun projects and they all coordinate! I can’t wait to try this out with some of my other Designer Series Paper. What a great way to give a friend a little pick-me-up during a rough time. Or to brighten a coworker’s day. There are so man reasons to make these.
I hop you enjoyed these as much as I did!! Don’t forget to head over to my online store for all your crafting materials. Remember, Sale-A-Bration continues until the end of February and you don’t want to miss out on all the free products. They are all so wonderful!
Thank you for joining me today. Happy Crafting!

