
Today I was looking for an interesting fold that would use a variety of pretty paper scraps. Boy, did I discover the perfect fold to do just that! This Trifold Shutter Card uses lots of small pieces of DSP so it’s a great way to use up some of those scraps I’ve been hoarding. Yes, I never throw a scrap away…it’s a problem.

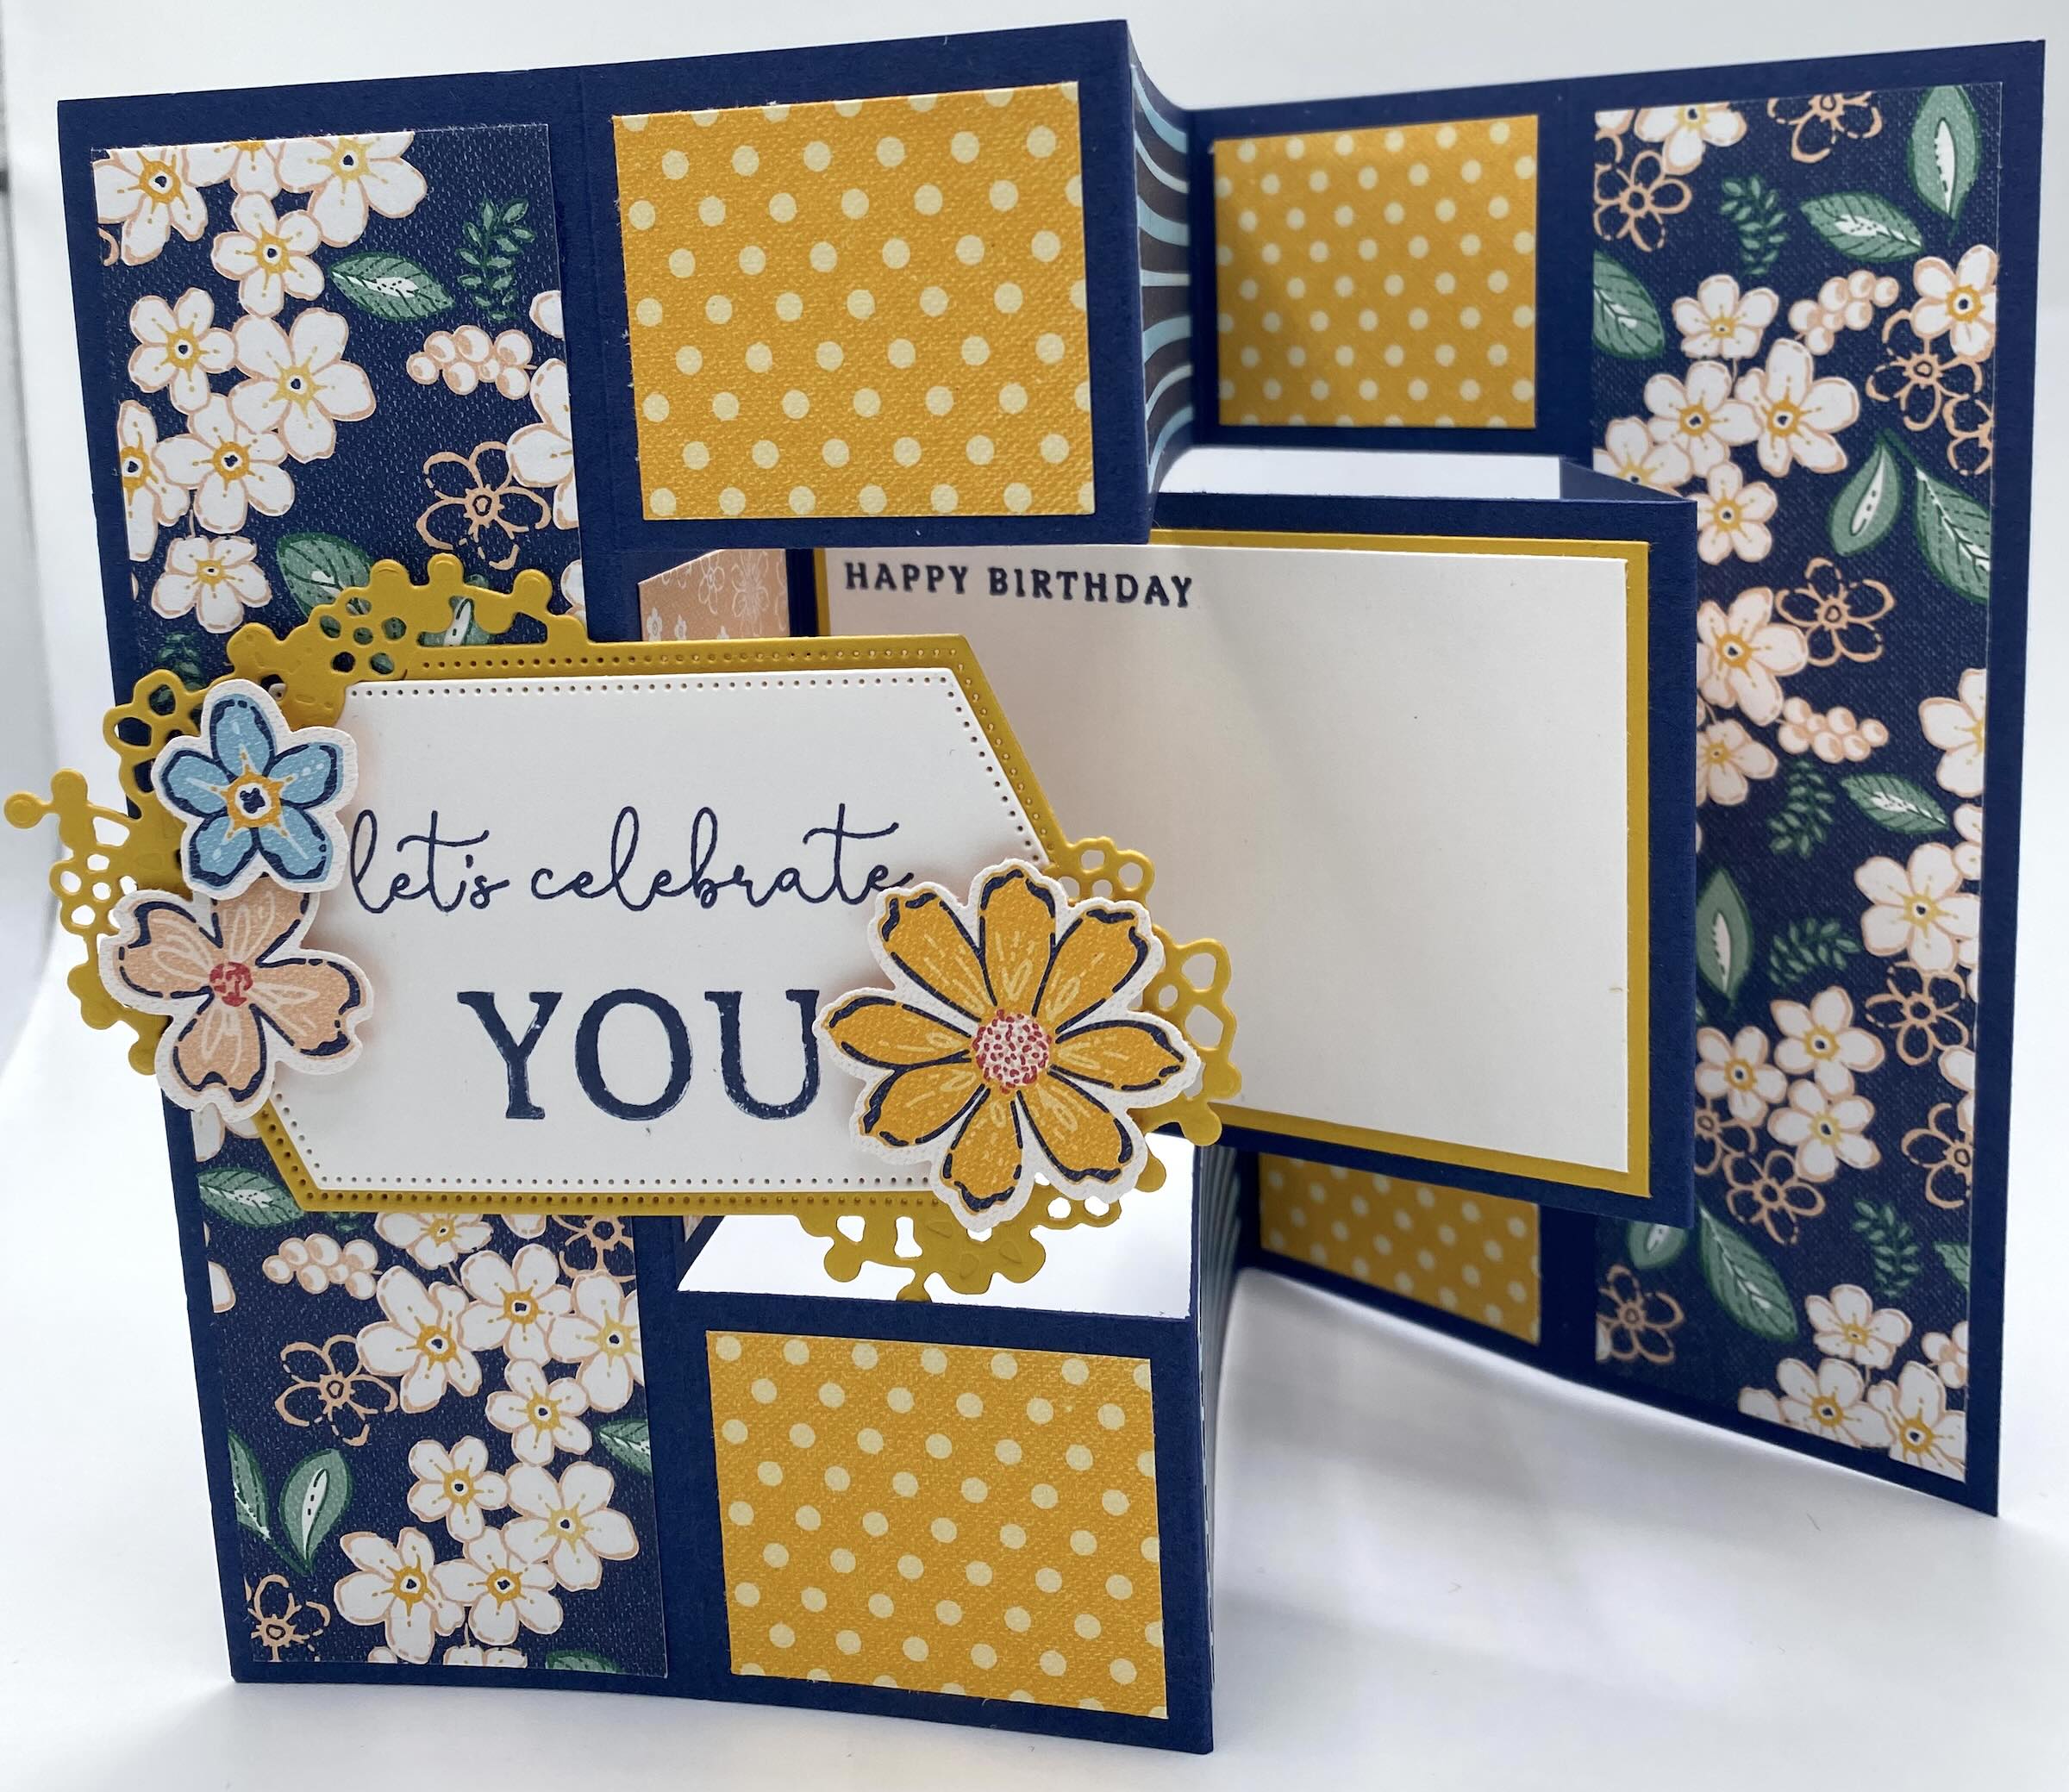
I mean, this Regency Park 6×6 Designer Series Paper….I never tire of it. The card base is Night of Navy. The layer in the middle and the tag on the front is Basic white and Crushed Curry. Stamping is in Night of Navy. You might think I stamped and colored the flowers on the front but nope, those are cut from the DSP using the coordinating Petal Park Builder Punch. Simple!!
Here’s how to make this card!
CUTTING/SCORING
BASE (Night of Navy): 10 1/2″x 5 1/2″, scored at 1 3/4″, 3 1/2″, 7″ and 8 3/4″. Then on the short side, line up your paper at the 1 1/2″ mark and then slice from the first score line (1 3/4″) to the last score line (8 3/4″). Move the paper over to the 4″ mark and do the same thing.
DSP LAYERS: 1 1/2″x 1 1/4″ (x4), 1 1/2″x 5 1/4″ (x2), 1 1/2″x 2 1/4″ (x2), and 3 1/4″x 1 1/4″ (x2)
MIDDLE LAYER/MESSAGE: Basic White 3 1/8″x 2 1/8″, Crushed Curry 3 1/4″x 2 1/4″
EXTRAS: Scrap Basic White and Crushed Curry for the front, DSP scraps for flowers, Petal Park Builder Punch, Embellishments

ASSEMBLY: Cut, score and slice your base. You can fold it now if you want to, or you can wait until all your layers have been added. (I prefer to add the layers before I fold the base.). Cut your DSP pieces. Glue all your DSP pieces to their corresponding spots on the base. Stamp your sentiment from the Sentimental Park stamps onto the Basic White and layer it onto the Crushed Curry. Then add that to the center of your card base.
To fold this card base, start at the top left and fold the 2nd score line out (mountain fold) and the next score line in (valley fold); on the middle section fold the 2nd score line in and then next score line out; on the last section, fold the 2nd score one out and the next score line in. Now you can collapse them all together and everything should fall into place.
After your card is folded, work on the front. (I like to add a large block or a punch on the corner to hold it flat.) For the front, I die cut the two interlocking tags from the Sentimental Park Dies…the outer one from Crushed Curry and the inner one from Basic White. Once I got them put together I stamped them with Night of Navy Ink. The sentiments come from the Sentimental Park stamps. Use the Petal Park Builder Punch to punch out flowers from the Regency Park DSP. That’s it!


Here are two other samples I created. The one on the left uses Wild Wheat as the base. I paired it with some free DSP from Sale-A-Bration. Since the DSP also had some pretty Pool Party in it, I added scraps of Pool Party to the middle and on the front. I stamped the inside sentiment in Wild Wheat. For the front, I cut two circles from the Deckled Circles Dies, one in Pool Party and one in Wild Wheat. I ran the Wild Wheat circle through an embossing folder for added texture. I punched out a scrap of Basic White using the Heartfelt Hexagon Punch. I stamped the birthday cake in Pool Party, the candle in Wild Wheat, and the flame in Crushed Curry. I stamped Make a WISH in Memento Ink.
For the card on the right, I used Petal Pink for the card base. I layered the DSP from the Bee Mine DSP (it’s not just for Valentine’s Day!). The center piece is Basic Black and Basic White and I stamped in Memento Ink. The sentiment comes from Hooray for Surprises. I cut some circles from the Deckled Circles Dies using DSP and Basic Black. Using the Bee Builder Punch, I made a happy little bee. The stamps on the front come from the Filled With Happiness stamp set.
This surprisingly simple card will be a great addition to your card crafting skills. It’s easy, fun and very versatile. I hope you get to try it out soon.
Don’t forget to head over to my online store and check out all the new products out for Spring! Happy Crafting!!