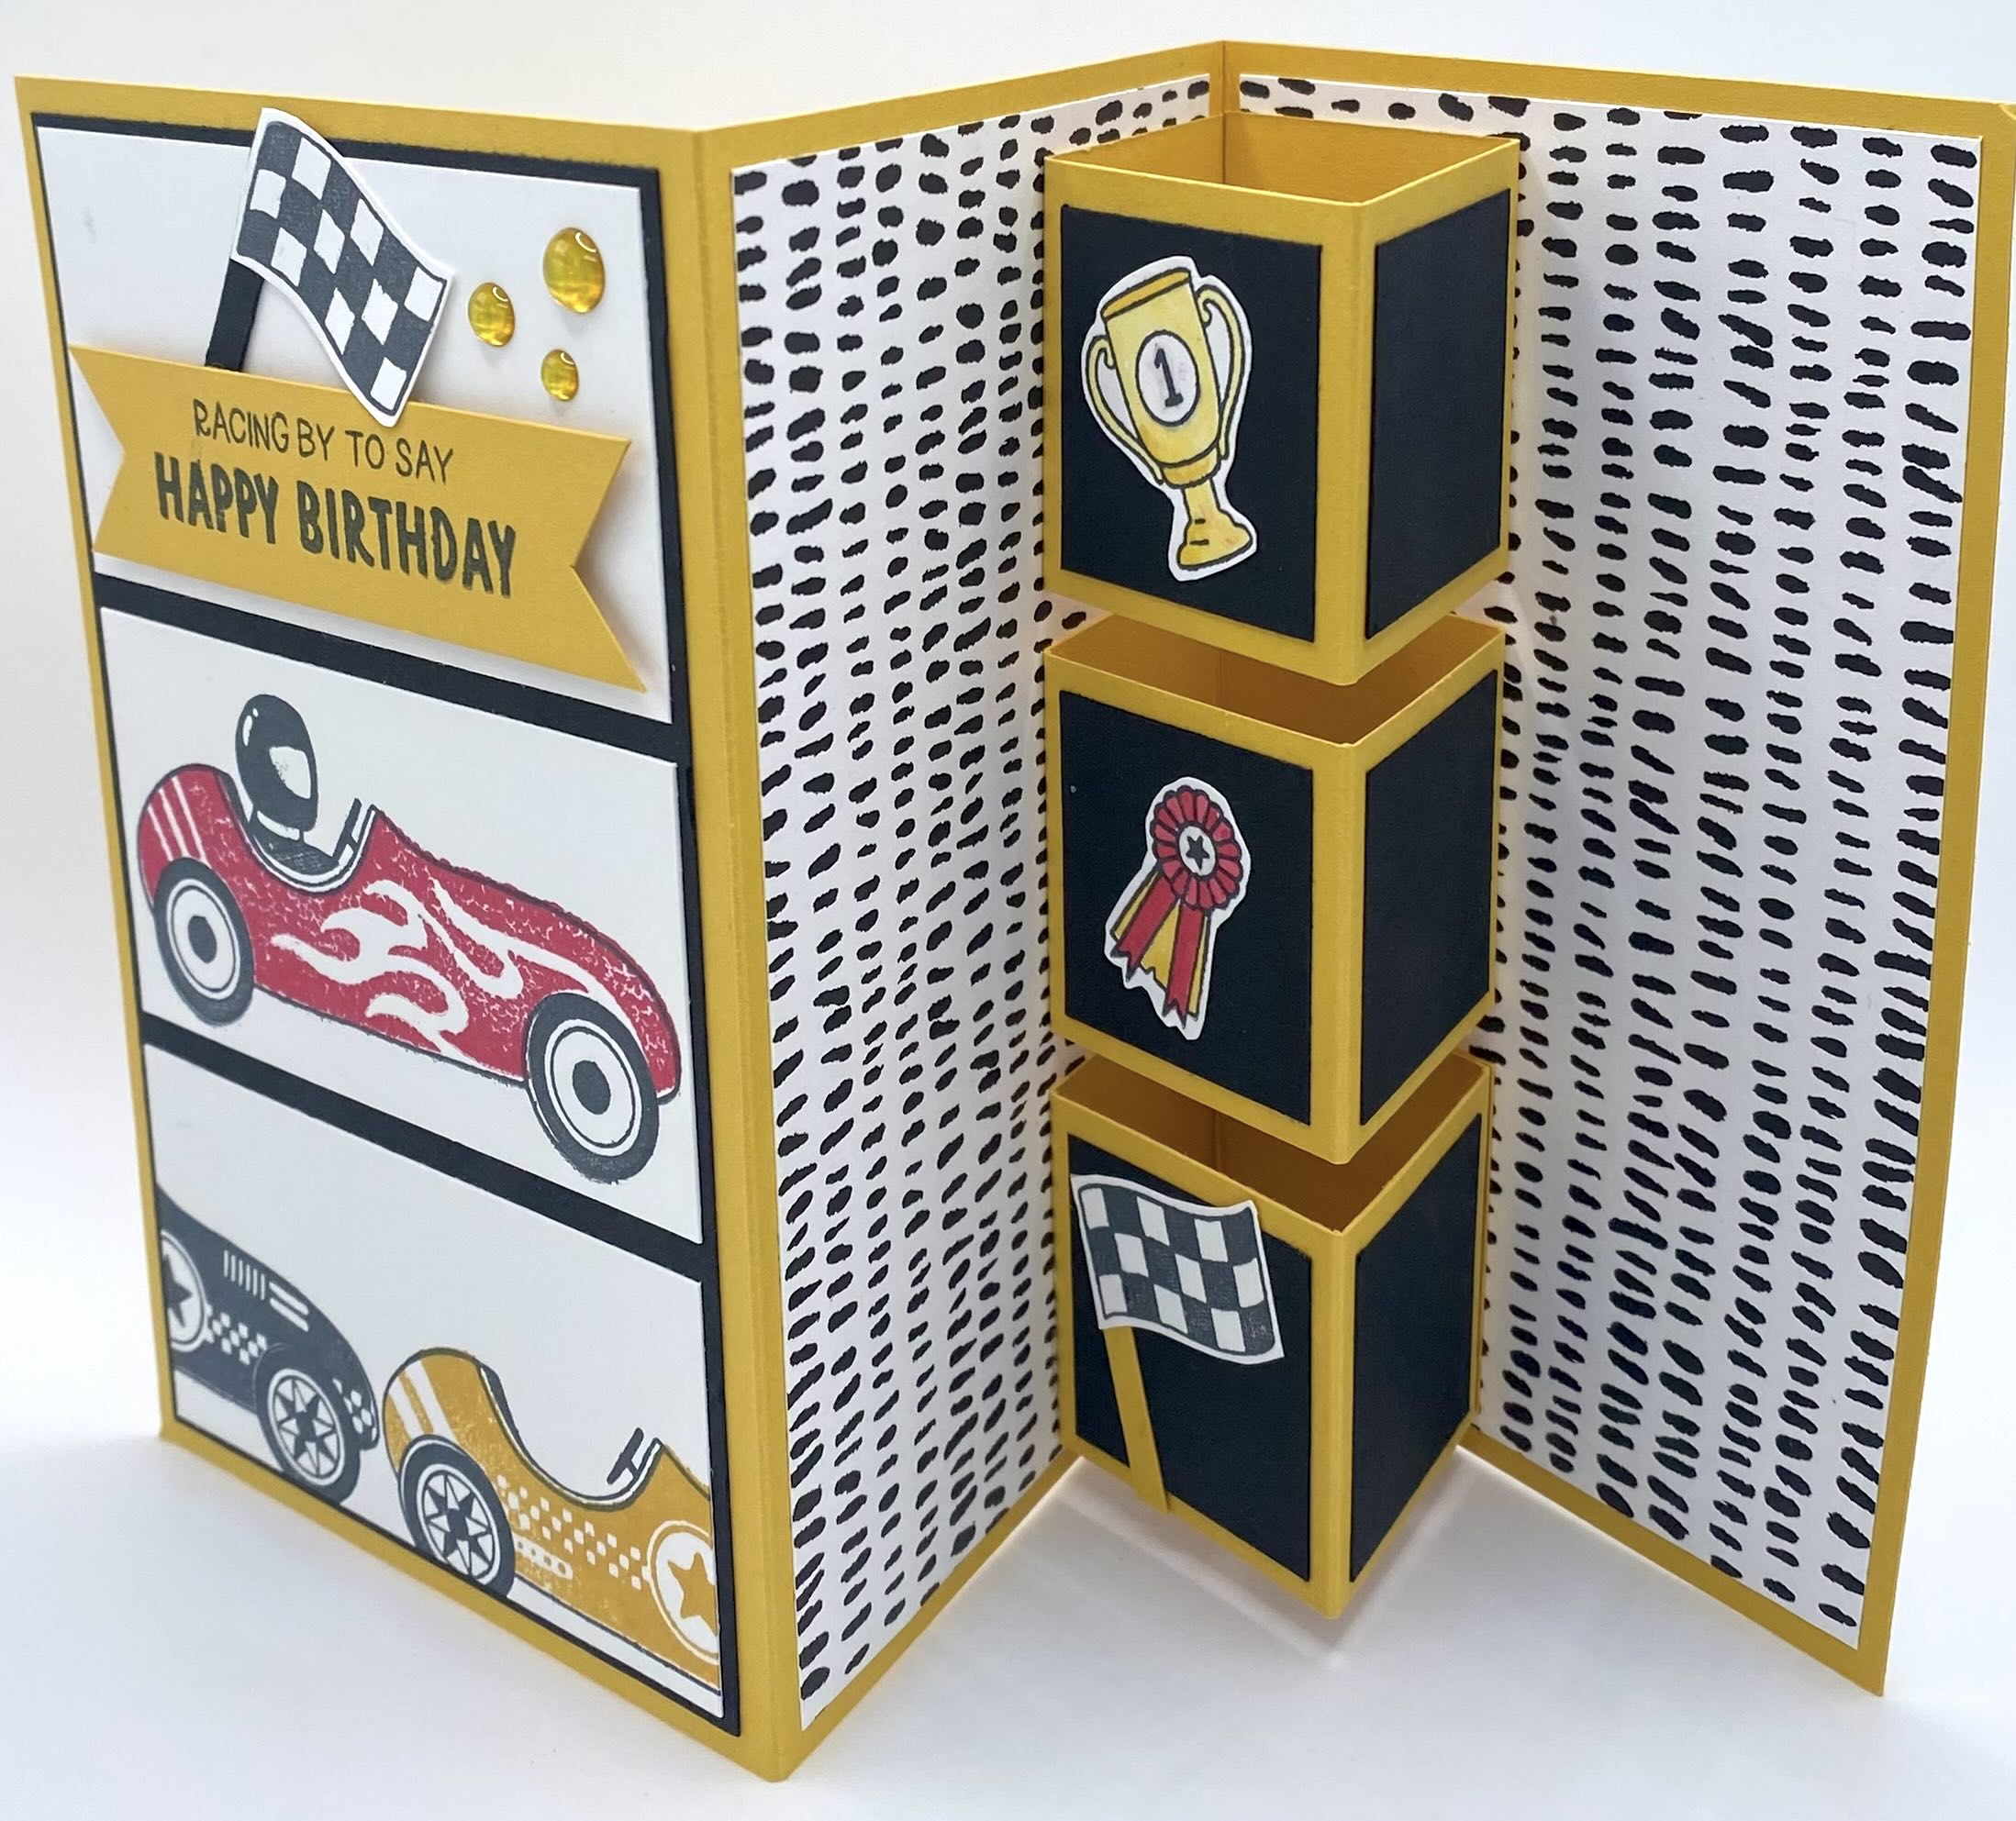
When my son asked me to make a few birthday cards for him to give his friends, I knew it was a great opportunity to use my new Racing By stamps. I love how this card came out and the fold makes it so much fun! Check out this video and learn how to make this Z-Fold Pop Out Card!


I just love how fun this card is. The little race cars in the Racing By Stamp Set are customizable so you can mix and match and be very creative with them. I want to try one that is embossed…wouldn’t that be fun! I created this card using Crushed Curry, Basic Black and Basic White Cardstock. I paired it with Designer Series Paper from Zany Zoo. I also colored the images using Real Red, Crushed Curry, and Tuxedo Black ink pads and Crushed Curry and Real Red Stampin’ Blends.
Here’s everything you need to know to create this fun card!
CUTTING/SCORING:
BASE (Crushed Curry): 5 1/2″ x 10 1/2″, scored at 3 1/2″ and 7″
FRONT LAYERS (Black): 3 1/4″ x 5 1/4″
FRONT LAYERS (White): 3 1/8″ x 1 5/8″ (x3)
DSP (Zany Zoo): 3 1/4″ x 5 1/4″ (x2)
FRONT TAG (Crushed Curry): 3″ x 3/4″
POP OUTS (Crushed Curry): 6″ x 1 1/2″, scored at 1 1/2″, 3″, 4 1/2″ (x3)
LAYER FOR POP OUTS (Basic Black): 1 1/4″ x 1 1/4″ (x6)
LAYER FOR BACK (Basic White ): 3 1/4″ x 5 1/4″
ASSEMBLY: Fold and score your base. Add the front layer (Black) to the front. Next add your DSP to the inside panels. Fold and score your pop outs and adhere them to the inside of your card using strong adhesive such as Stampin’ Seal+ or Tear and Tape. Add your layers to the pop outs (Basic Black). Next it’s time to stamp! Stamp your race cards on your front layers (Basic White) and then adhere the panels to the front of the card. Stamp your flag and cut it out. Cut a “flag pole” with a scrap of basic black. Add dimensionals to the flag. Glue the flag pole down and then pop the flag in place. Next, stamp and color the trophy, ribbon and flag and color them in with Stampin’ Blends or Markers. Cut them out and add them to the pop out cubes. Stamp your sentiment and decorate the layer for the back and adhere it to the back of the card. Add your embellishments and you have raced to the finish line with this cute card!
I love how quickly this card came together. It would be easy to make several at a time in assembly line fashion.
Here is another sample with a completely different look and feel, but with the same simple layout!


For this card, I used the Country Birdhouse Stamps and Dies and the Unbounded Love Stamps. I used the Country Woods 12×12 DSP and Pretty Peacock cardstock. Isn’t it just lovely!


I’ll be making more of this last card, for sure! It’s adorable. I used the Submarine Life stamps and coordinating punch and dies. I paired it with Granny Apple Green, Blueberry Bushel and Basic White Cardstock and used paper from Bright and Beautiful 6×6 paper pack. I used a retired embossing folder to emboss the green DSP to create a “seaweed” look to add some extra pizzazz. You could use the So Swirly or Seaside Wishes Embossing Folders as well! I stamped the images and wording with Granny Apple Green, Blueberry Bushel, Pretty in Pink, Real Red and Daffodil Delight. This card is a great one for kids and kids at heart!
What’s your favorite? I can’t decide which one I love the most so I’ll just have to make several more of each to keep on hand for all my favorite humans.
Thank you so much for stopping by. Don’t forget to check out my online store for all your stamping supplies. I appreciate my customers so much and love to spoil them, so please consider me as your Stampin’ Up Demonstrator. Happy Crafting!

