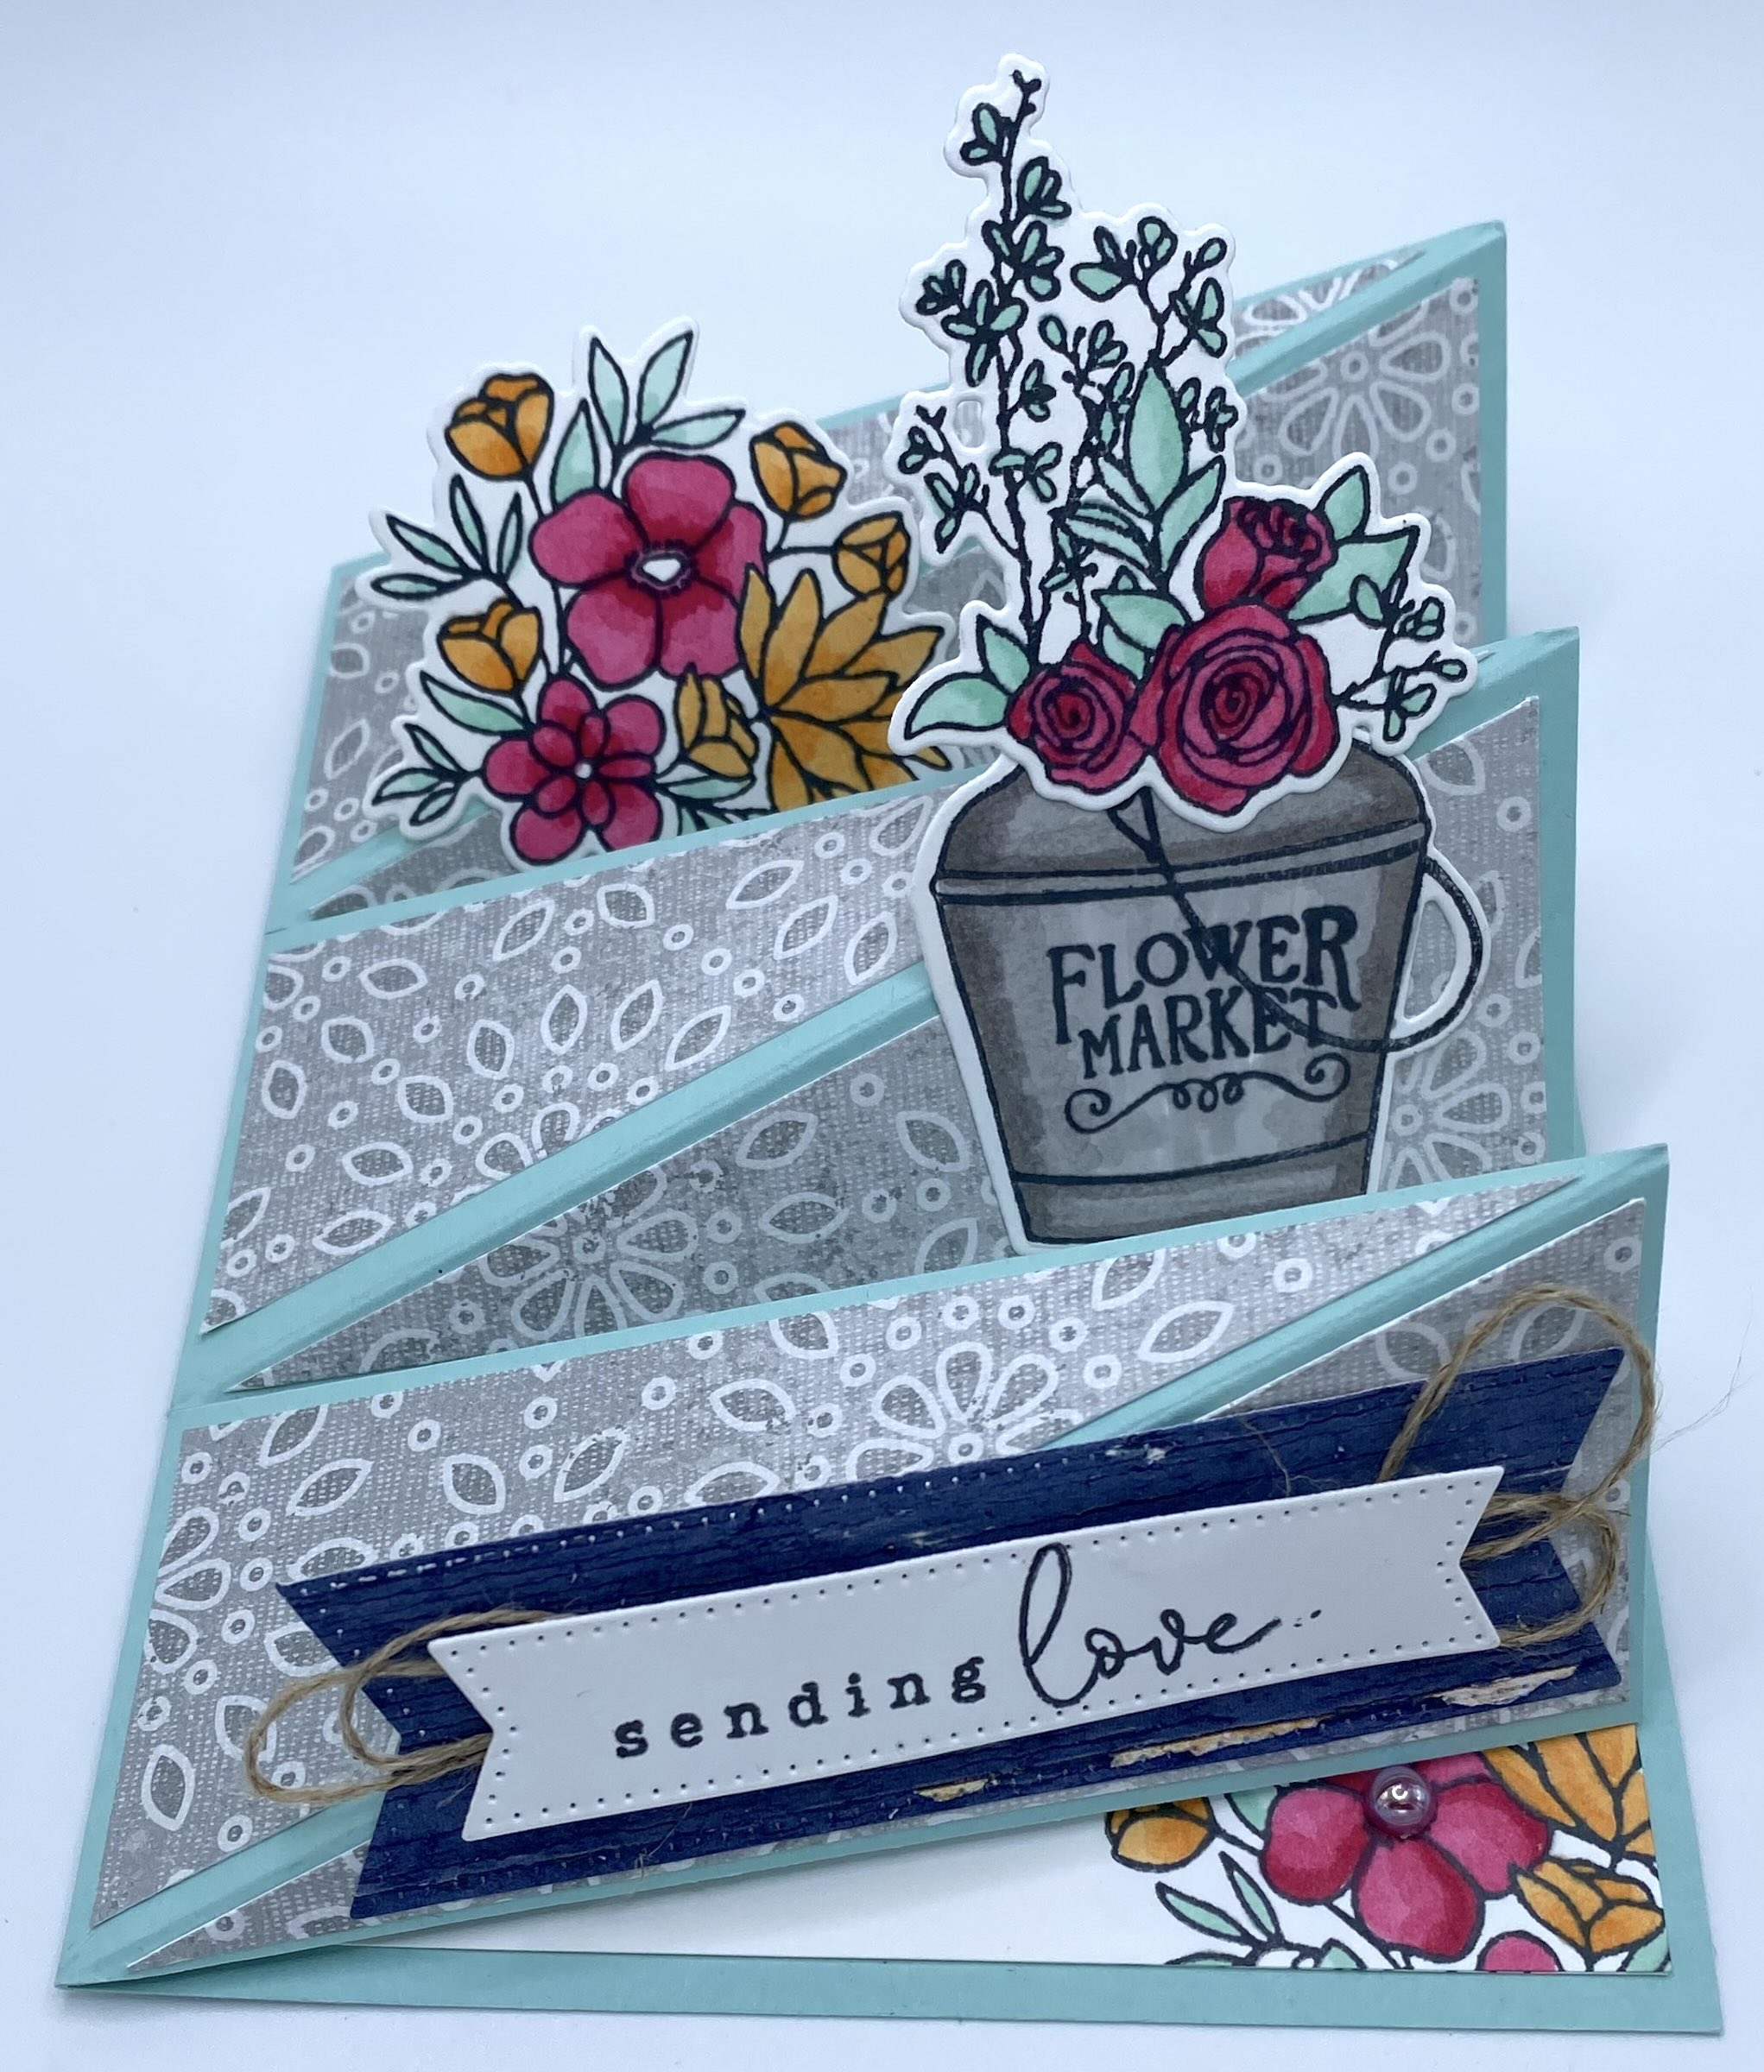
This Pop Up Easel Card looks complicated but it’s super simple. Just a few cuts and scores and some super cute paper and embellishments and you’ll have a masterpiece. To make this card we used the brand new Country Flowers Suite. I am in love with this suite – it’s so pretty! I hope you love it as well.


So pretty! To create this card, I started with a base of Pool Party. The inside is Basic White, of course. I used Country Lace DSP for the Pop Ups and the Country Woods DSP for the tag on the greeting. I stamped and die cut the flowers and colored them with Stampin’ Blends, using Pool Party, Petunia Pop and Peach Pie. I used Smoky Slate for the pail. I also added pearls from the Adhesive Back Pearl Trio pack. There are so many beautiful color combos you could use to create this card!
Here’s how to create this fun fold.
CUTTING/SCORING
BASE (Pool Party): 5 1/4″ x 8 1/2″, score at 4 1/4″ and then refer to template below for cutting and scoring the pop up sections.
DSP (Country Lace): 1 1/2″ x 4 (x3); stack them together and cut them diagonally
INSIDE (BASIC WHITE): 4″ x 5″
GREETING: I used a piece of blue DSP from the Country Woods DSP and Basic White. I die cut them with dies from the Stylish Shapes Die Set.

ASSEMBLY: Cut you base and score it at the 4 1/4″ mark (half the card). Then refer to the template above. You’re going to place the short end of the cardstock at the top of your cutter and then cut at 1 3/4″ down to the 4 1/4″ score line and then again at the 3 1/2″ mark down to the 4 1/4″ score line. Now that you have your 3 flaps, you’re going to score each of them diagonally from the top left corners to the bottom right corners.
Next, glue your triangular pieces onto your 3 flaps. Once those pieces are glue on, you can fold all your score lines.
The next step will be decorating. Stamp, color and die cut the pieces you would like to glue onto your pop up panels. You will only place glue on the bottom portion of each panel so they pop up and down freely when the card is closed and opened. For the greeting, I die cut two pieces from the Stylish Shapes dies…one in a Night of Navy DSP piece from the Country Woods DSP and the top piece from Basic White. I used dimensionals between the two layers.
To finish off your card, add 3 embellishments to serve as stoppers for your pop up panels. I used 3 from the Adhesive Backed Pearl Trio.
Now just sit back a moment and admire your new masterpiece. Isn’t she gorgeous!!
Now that you know how to create this fun fold, here are a few other samples I created. What can you come up with??


To create this cute card, I used the Hearts & Hug Stamps and Dies front. The greeting and inside sentiments are from the Unbounded Love Stamps (such a great set of sentiments!!) I used Shy Shamrock and Pretty In Pink In-Color Cardstock. I used dies from the Unbounded Love Dies for the greeting.


This final sample was easy as pie (or ummm cake!). There was absolutely no stamping on this card. I used pieces from the Ephemera Packs!! The base of the card is Pretty in Pink and I used some paper from last season’s Glorious Gingham 6×6 DSP in Lemon Lime Twist. I chose some embellishments from the In-Color Resin Dots in Summer Splash to match the wording and candle!
I hope you enjoy making this fun fold. I know you’ll come up with some amazing layouts since this is such a versatile fun fold. Happy crafting!!

