


When I saw the Encircled in Beauty Bundle offered up an a new Online Exclusive, I new I needed them right away. We spend a lot of time in nature and these certainly called to me. Once I started to play around with them, I realized they can be used a lot off different ways. So, I wanted to share some of my creations with you…and of course show you how I made them.

When you purchase this bundle, you get some gorgeous stamps that work beautifully on their own. However, when used with the coordinating dies, it brings your artwork to next level status!! And the icing on the cake is that I see myself using some of the dies with other stamp sets…that is always a winner!!

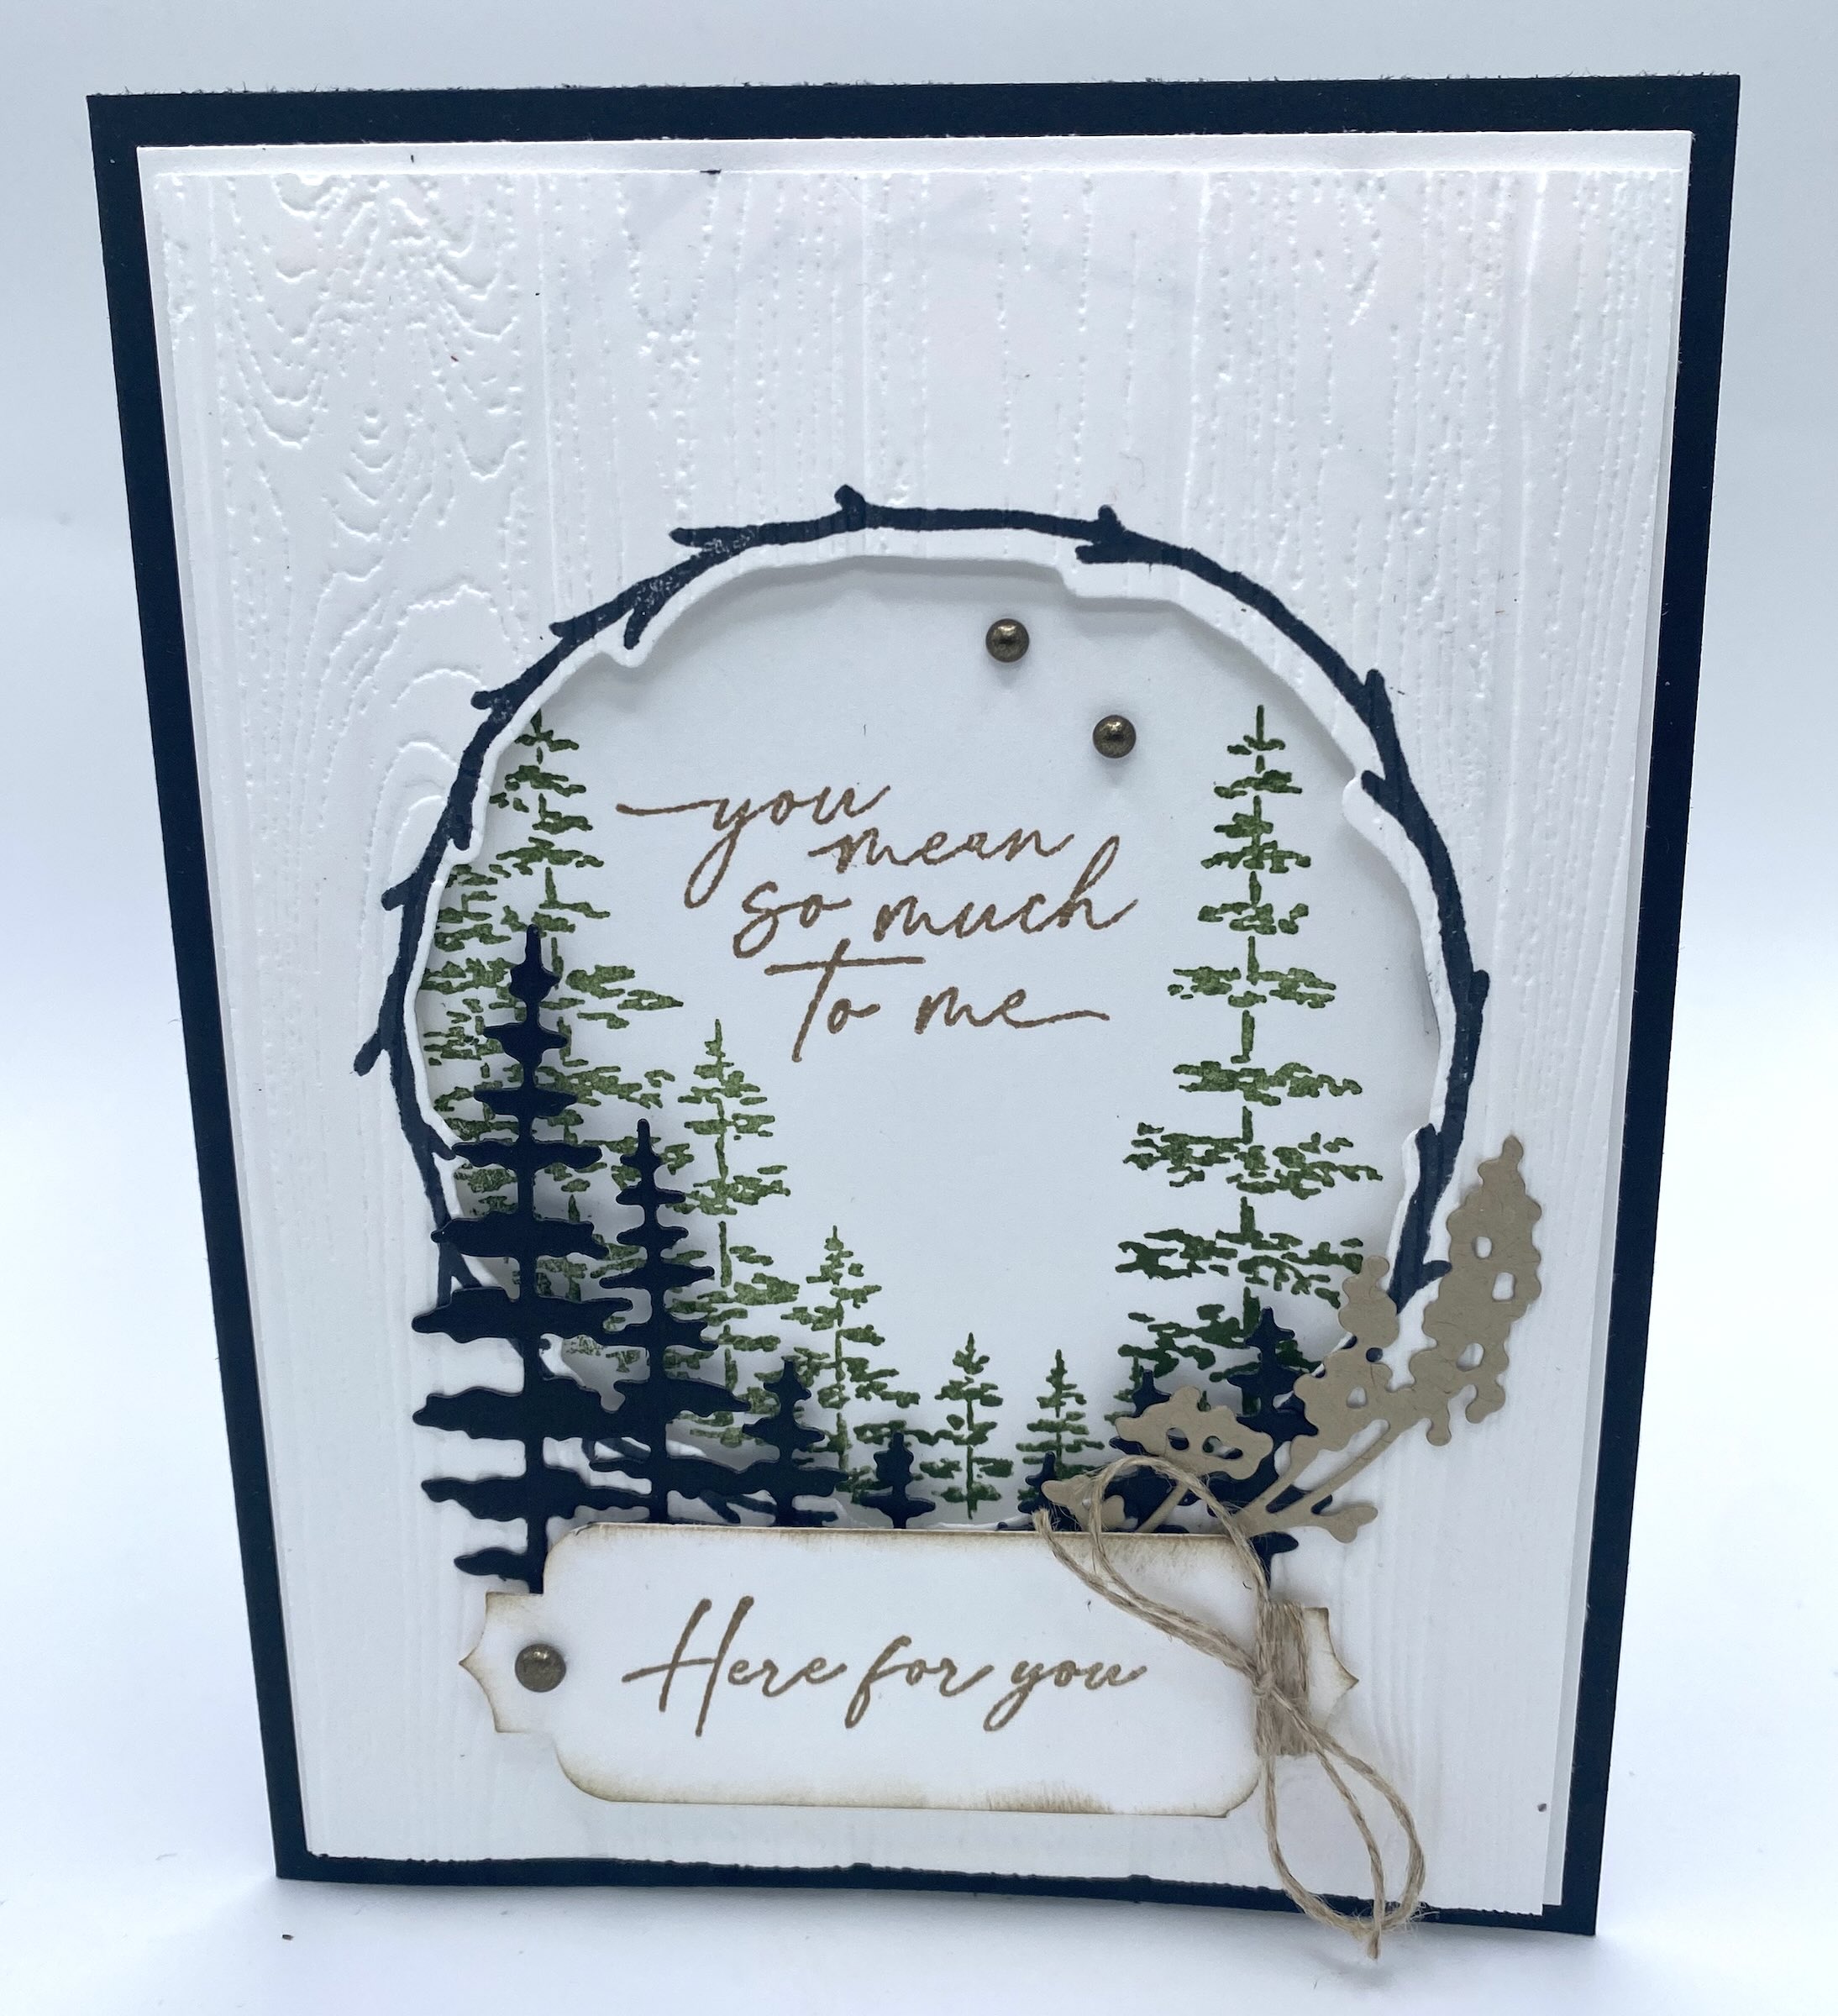
Let’s start with this card layout! I began with a basic base in Black cut 5 1/2″x8 1/2″ and scored it in half at 4 1/4″. I cut piece of Basic White at 4″x5 1/4″ for the background layer and then cut another piece just slightly smaller at 3 7/8″x5 1/8″. For the inside, I cut another piece of Basic White at 4″x5 1/4″. You’ll also need a scrap for the message on the front.
Before I assembled anything, I did my stamping, die cutting and embossing. I first took my 3 7/8″x5 1/8″piece and die stamped with circular branch in Memento Ink. Then it was easy to die cut right where I wanted it. Once the hole is cut out (keep that for something else!) you can run it through an embossing folder. I used a wood designed folder. The Timber 3D Embossing Folder would be awesome for this.
Now that my top layer is ready, I laid it on my background layer and used a pencil to lightly mark where the circle lies….now I know exactly where to stamp on that background layer. I stamped my trees in Mossy Meadow and the sentiment in the middle in Crumb Cake. Once that is done, you can erase your little pencil marks and then adhere the layer onto your Black card base.
Next, grab your embossed layer. Using either dimesionals or Foam strips, adhere that layer evenly over your base. There should only be a tiny margin around the edges.
Now it’s time for the fun part – adding all your layers and building your beautiful scene. I die cut the cluster or trees – both large and small in Basic Black cardstock. You’ll need a very thin line or tiny drops of liquid adhesive to glue these down. I then die cut some flower pieces in Crumb Cake. You can add even more as you like!
For the tag, I cut a piece of scrap paper at about 1″x3″ and used the Very Best Trio punch to create the decorative corners. Add your greeting and then if you’d really like it to pop, brush a little Crumb Cake ink around the edges using a sponge dauber. I also wrapped some thin linen thread around one edge for extra flair. Finally, use dimensionals to attach it to the front of your card.
I wanted to keep the inside pretty blank so I could use it more as a note card so all I did was stamp the tree in Mossy Meadow inside. I adhered that to the inside and then finished off the front of the card with some brushed metallic dots.
I really love how pretty this card came out. It was exactly the vibe I was looking for!

Remember that middle piece we had from our die cutting on the first card? That’s what I used on this card. To create this card, I used a base of Crumb Cake. I added a layer of Blackberry Bliss and then used the gorgeous DSP from the Perennial Lavender DSP. To create the center, I die cut the branch wreath using both branch dies together. Just lay the small and large branch dies together and get them even all the way around. Tape them down and run them through your die cutter. Now you can glue that right onto your circle. To create the purple flower buds, I die cut that die on Highlander Heather paper and snipped off the buds. All I had to do was glue them onto the ends of the Shaded Spruce branches. I also cut a flower die with some patterned Gorgeous Grape DSP from that same Perennial Lavender DSP pack and layered that on as well. Add your sentiment (I stamped in Gorgeous Grape) and use dimensionals to add it to the front of the card. I finished it off with a bow made from Pecan Pie Center Stripe Ribbon and some gems from the Purple Fine Shimmer Gems.

This final card was created using the layout from last week’s video…the Pop Out Bridge Card. I used some retired DSP, die cut several different elements from paper that coordinated with it, added my sentiment and layered it all together.
As you can see, the cards all have a different feel but we used the same stamps and dies. This is what I love about Stampin’ Up products. A zillion ways to use them, coordinate them, decorate them, and color them. Endless possibilities.
Thank you so much for joining me today. Don’t forget to set some time for yourself tap into your artistic side.
Happy Crafting!