
Don’t you hate when you see something you like, but don’t buy it because you have such a list of things you want! That’s what happened with the Biggest Wish stamps. I really liked what people were creating with it, but didn’t jump on getting it right away…and then I felt some major FOMO, lol. Finally, I just had to have it…and I’m so glad. This stamp set is so fun to work with. You can use it so many ways and the greetings “interact” with each other so well.

This simple fold really shows off the boldness of the Biggest Wish stamps…which really is what makes it so special. All you need is some pretty Designer Series Paper, matching cardstock and fun embellishments. Here’s how I created this card.
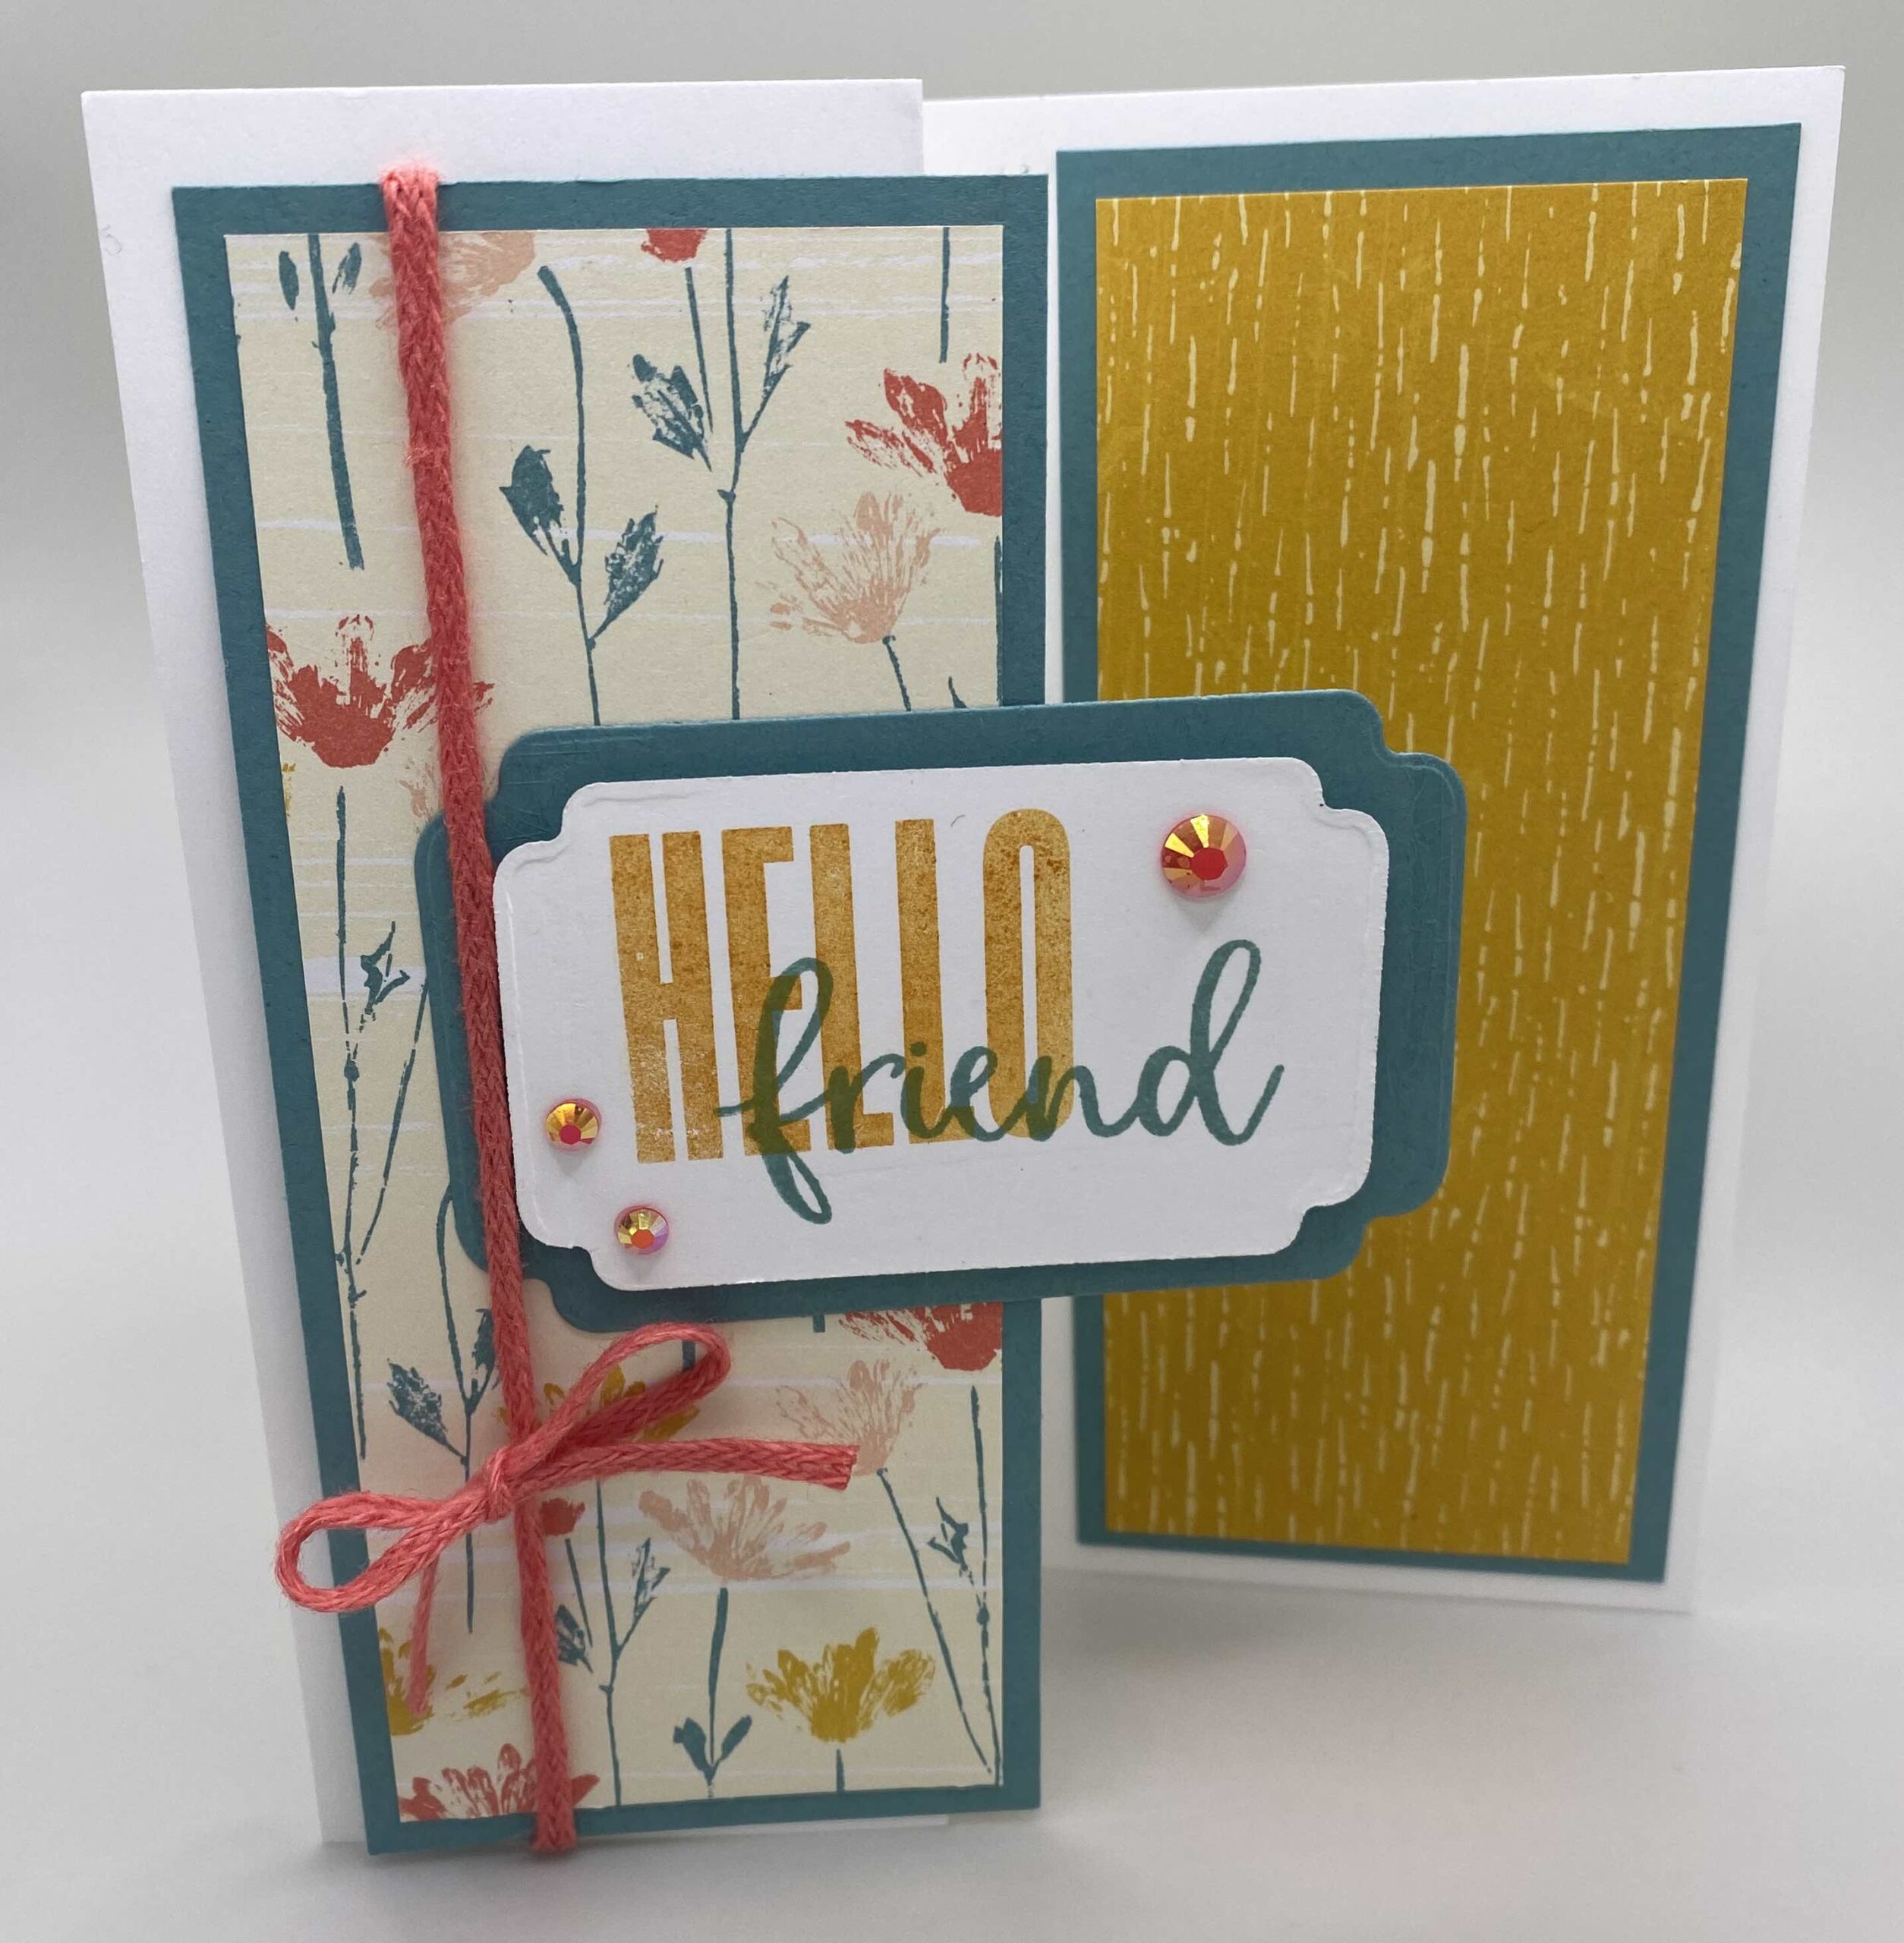
INSTRUCTIONS:
Base: (Basic White cardstock) cut 5 1/2″ x 8 1/2″; score at 2 1/8″ and 4 1/4″
Layer for Base (Lost Lagoon) cut 2 1/4″ x 5 1/4″ (x2)
Designer Series Paper (Inked Botanicals DSP) 2″x5″ (x2)
Cut and score your base and use your bone folder to give it all a good crisp fold. Fold your 2 1/8″ section as a mountain fold and the 4 1/4″ fold as a valley fold. Layer your Lost Lagoon and DSP together using liquid glue or Stampin’ Seal. If using a piece of ribbon on your front panel, tie it on now so you can have it adhere to the back of the panel when you add the panel to the card base. Adhere the panels to the base. The panel for the front will hang off the right edge so make sure you don’t put adhesive on the portion that will hang over. Align the back panel to the right with a small margin of base showing.
Create your die cut pieces for your sentiment on the front. I used the dies in the Something Fancy Dies set that coordinates with the Something Fancy Cling set to create my pieces. Stamp your images…HELLO friend and stamped in coordinating ink colors (Crushed Curry and Lost Lagoon). Adhere the die cut pieces to the front of the card….be careful not to get adhesive on the side that hangs off the card! Add your embellishments to finish off your card. I used the Iridescent Pastel Gems…they match perfectly!

This card shows off the Bright & Beautiful Designer Series Paper…the name says it all. I layered Azure Afternoon cardstock underneath the DSP and stamped the HAPPY birthday in Azure Afternoon Classic Ink onto a die cut piece from the Radiating Stitches Dies. I added a second die cut piece to match and layered it directly onto the back panel so it hides under the front die when the card is closed. I finished the card off by using liquid glue to add some Loose Frosted Dots. This really says Happy Birthday in a big way!

This final card was created using some retired DSP that I love…layered on Basic White and Night of Navy cardstock. It’s super metallic and has lots of pretty sheen to it. No embellishments needed. This card design is a great way to use up those pretty little scraps you haven’t been able to part with!!
If you’d like to stamp along with me and make these cards, just watch my YouTube video and have some fun! If you would like to know when I post my next video, don’t forget to subscribe to my channel. I’d love to have you join me.
Don’t forget to stop by my online store and grab everything you need to create your own masterpieces. All of my customers get a nice little surprise in the mail from me when they order. I’m just so grateful.
Thank you so much for your time! I hope you enjoy a great Crafternoon soon!!