
I am in love with the Trucking Along Bundle. The little truck is so much fun to create cards with. The size of the truck is perfect for so many layouts. This fun fold really shows off this stamp set. However, this is a great fold to know how to make because it’s so very versatile. You can create a cute card using any stamps, designer paper and cardstock.


I told you these cards are cute! This card folds completely closed and then can display by sliding it open a bit. Then, when you slide it open all the way you get the surprise inside….plenty of room for a sweet message! I love to carry the trucks all the way across and in the inside! Here’s how to create this card!
CUTTING/SCORING:
BASE (Wild Wheat): 5 1/4″ x 11″, score at 1 3/4″ and 3 1/2″, flip and repeat on the opposite end.
TRIPLE PANELS (Cherry Cobbler): 1 3/4″ x 4″ (x3)
BACK PANEL (Cherry Cobbler): 4 1/4″ x 5 1/2″
INSIDE PANEL (Basic White): 3 3/4″ x 5″
DSP (Country Lace): 3 3/4″ x 1 5/8″ (x3)
OPTIONAL FONT PANEL: Cardstock 3″ x 3″ or 2″ x 3″; DSP 2 3/4″ x 2 3/4″ or 1 3/4″ x 2 3/4″
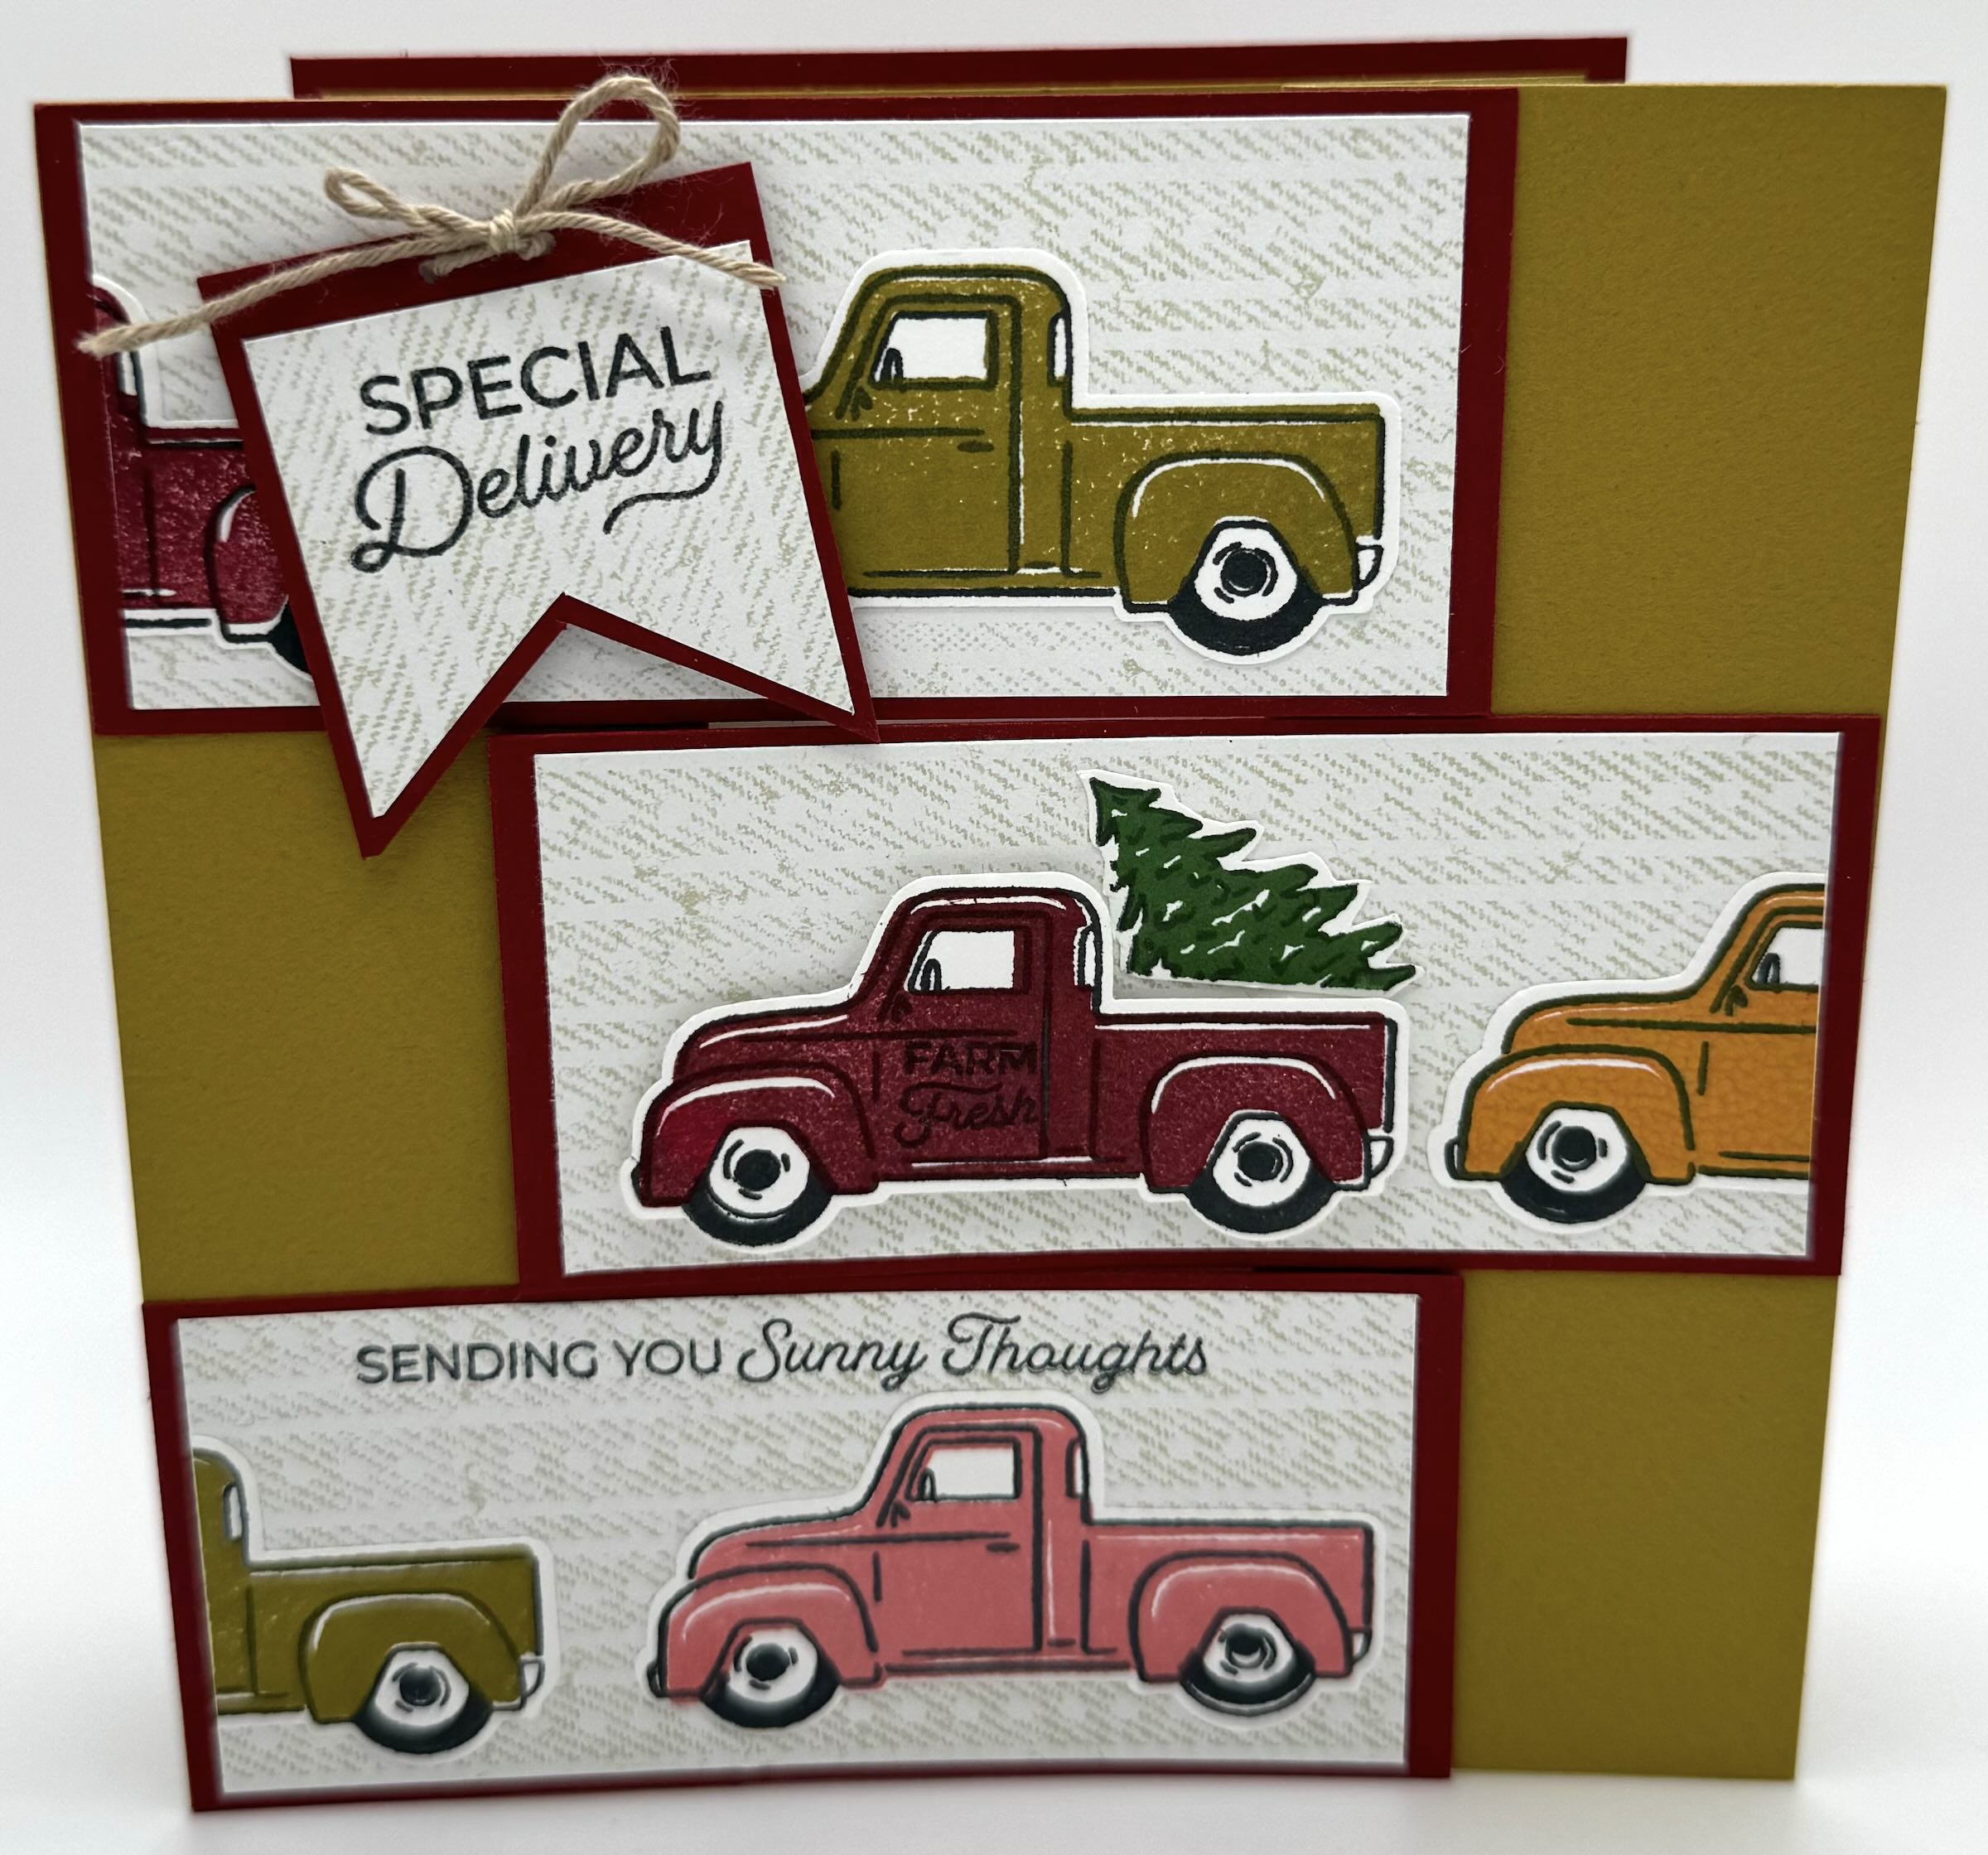
ASSEMBLY: Cut and score your base; burnish with bone folder and set aside. Add your DSP layers to your triple panels. With your card base folded, glue the top and bottom panels to the left side of the card front; glue the middle panel to the right side of the card front. Next, stamp your inside panel and add the inside panel to the card. Glue the back panel onto the back of the card. Finally, decorate your card front. I stamped several trucks in Cherry Cobbler, Wild Wheat, Flirty Flamingo and Crushed Curry. I used the coordinating punch to punch them out. I raised one truck up on dimensionals on the center panel and then glued down the rest of the trucks, cutting some to fit. Don’t forget to choose a stamp to create the “filling” in the truck bed. I used the tree! To finish off this card, create a tag for the front and add additional greetings such as what I added to the bottom panel.


I’m in love with this card. For this card, I added the optional 3×3 panel so I had a nice base for the adorable bee from the Bee Mine Bundle and the sweet little Zinnias from the Flowering Zinnia Suite. The papers is also from that same suite of products. I decided to make this a birthday card so I added happy birthday from the Sweetly Scripted Stamp Set…this is a very useful set of stamps!


This one was fun to make! Instead of using a 3×3 or 2×3 panel, I created a pocket from the Pocket Thoughts Bundle. The Full of Life DSP really makes this a bright and cheery card! As you can see, there’s lots of room for creativity on this card front!


This final sample was a super simple design but it is still super pretty! I took advantage of the Unbounded Beauty DSP and how it coordinates with the new In-Color shades…like Petunia Pop and Summer Splash! The sentiments are stamped using the Happy Little Things stamps. I used my Stampin’ Blends to color in the words, but you can also just use the solid stamp to fill it in. I added a matching Petunia Pop bow to finish it off.
This is a great way to send a card with lots of character without spending lots of time creating it. It’s also a great way to use up scraps of DSP since you only need 3 panels. I hope you get as much enjoyment from this fun fold as I do!
Happy Crafting!